Welcome to the new Bear Mountain Builders Forum - an interactive internet service we provide to encourage communication between canoe and kayak builders
from the photo below you can see how my inside stem aligns with its adjacent form. The mould and stem outlines were traced right off of the bearmountain plans.
I'm wondering what happens with the strips as the get nearer the center of the hull, and how they flow into the stem. In particular, I'm wondering how the inner stem would be shaped along the top. Somehow I now get the feeling that maybe the stem is supposed to be in-line with the adjacent form and that I somehow screwed up. Maybe I was supposed to subtract the strip thickness from the stem shape when tracing, although I don't have the plans in front of me right now to check.
So either I'm doing okay and need a bit of guidance, or I'm going to have to shave off a bunch of wood from the inside stem so that it's even with the adjacent form. If it's the latter, maybe I won't be able to use my outside stems.
I'm interested in what the more experienced fellows say.
Since I'm a rookie, I'm no expert, but it doesn't look bad to me. The stem is almost flush with the top of the mold. There is not much spokeshaving to do there. When the outer stem goes on, you have to cut a grove so that the outer stem fits snug. I think that's called a mortice. When that is epoxied, it will be strong.
For me the the angle of the bow or stern stem from the last mold may be the more important factor. ie, you want the boat to cut the water/waves as it was designed to.
I don't have my plans near by nor access to my freedom 15 but your stem looks a bit high to me but I do recall taking some of the stem off (beyond just a taper in both directions leaving a full thickness in place). You will need to shave off the inner stem to make it match the first station mold's shape and height. Ideally, the top (highest surface in your photo) of the inner stem will align with the peak of the first station mold. Then only the corners of the stem would be shaved off. That way the strips will flow smoothly from the station to the inner stem. You have plenty of wood left on the inner stem to be ok but as you observe, the outer stem will not fit properly on the inner stem without a bit of extra bending. As you take wood off of the inner stem, ensure that you evenly taper that back to zero (in the center of the stem's width) out toward the end of the canoe. Then you should be able to easily press the outer stem into place when you put it on (after cutting the mortise). This shape should naturally occur as you continue your rolling bevel. I don't see any disasters here.
One small piece of advice. Put a small screw or pin through the first station mold into the end of the stem. As you add strips, those clamps holding the stem to the stem mold will get in the way. The pin or screw will hold it in place as you continue stripping. Remember to remove it when you take the hull off the forms later.
It's the strangest thing... Both of my end moulds are about 1/8" short. The next moulds in are just about okay, maybe a little short. I have no idea why this is the case, I can see that I've sanded right to the line which I traced on the mould.
I think I will add a bit of wood or veneer to the outer edge of the end moulds to bring them just about level with the stems. I can then easily fair this added wood. Maybe I'll do one dimensional check at the bilge on the end moulds just to make sure that I don't screw up the fairness elsewhere. I can also take off a little bit from the stems, maybe no more than 1/32".
Does the above sound like an okay path forward? Any other suggestions are welcome and appreciated.
Randy, thanks for the tip. I was hoping to avoid the screw but now that you mention it, I probably won't be able to. The stems still need some support and I'm getting close to the point at which I need to shape the stem all the way to the end while I still have room to work the spokeshave.
a really really nice tool for doing the inner and outer stems.
We call it a bowers edge, if you look it up under that name you'll see it.
or In Popular woodworking magazine, you can find an article on "make a spokeshave".
The difference is the blade is turned around adn the blade angle is much steeper. in the bowyers edge, (straight down) and it has a back plate on it to help stabalize the blade.
You sharpen the blade as usual (though up till now I could never get it really really sharp), and you end up rolling a burnishing a bur over to the face of the blade.
Insert the blade bevel away from your nomal direction of pull (can be used both ways without tearout), and go to town.
The body being wood can be adjusted to keep from digging into the soft wood nearby. The angle of the blade acts more like a super scraper taking off curls almost as big as the spokeshaves do but little to almost no risk of tear out.
The spokeshave did do a great job where the stems were flat, ie the top (bottom of hull) side, but with the sharp curve towards the gunnels, the spokeshave was hard to control and get into that tight of an area. I believe this home made spokeshave is also made to cut like the bowyers edge is and it's MUCH cheaper ;)
Man, I think I definitely need some more advice on this matter. :confused I took some more measurements and I think it's actually the stem that is riding high. The measurements are a bit hard to do because I can't run a measuring tape all the way down the length of the stem because of the blocking/support wood that is holding the stem form in place.
With the stem being too high I have a more complex problem. I can't just shave down the inner stem because then the outer stem won't fit. Or, I could maybe shave down the inner stem and then when I put on the outer stem I won't mortise all the way to the inner stem along the keel line. I dunno
I can't go stemless on the outside because I've already cut back the strips close to the edge of the inner stem. I can still build up the end mould, but then I will be losing some of the rocker and/or fairness I think?
If the inner stem is only about 1/16" to 1/8" too high, I think I would study the practicality of cutting that much wood off the bottom edge of the stem form to bring the top of the inner stem flush with the adjacent form. I have done this once without causing any problems.
First, make sure the stem form and adjacent form are made exactly according to the plans and setup in the proper manner with waterlines matching.
If your inner stem is 3 layers of 1/4" stock (maybe a hair thicker) then you laminate them with thickened epoxy, you will end up with inner stems that are actually slightly thicker than 3/4" and this will throw you off.
I assume that lowering the stem mold a bit isn't possible given you have already stripped much of the canoe. But I really think that simply continuing on with the rolling bevel and the stripping such that the strips flow from the first station to the trimmed down inner stem will be OK. I can't tell exactly how high your stem is (it's apprently less than 1/4" but probably more than 1/8"). If you watch how you taper your inner stem from the station mold outward, your outer stem will have enough flex to pull down to the inner stem. Try to put some tension on your outer stem to see if you can convince yourself that it has enough play. I'd be amazed if it doesn't.
Oops, I didn't realize he had started the stripping. :embarassed
Perhaps a combination of taking a bit off the inner stems and adding a bit to the adjacent forms would do the trick. Whichever gives you fair lines flowing from the hull into the stems.
I know you have probably already glued up the outer stem and the problem you have is that they wont fit as things are right now.
What I propose you do is to laminate the outer stems right onto the boat after you get it stripped. That way you can get the edge of your stem face squared up you can laminate 2 to 3 1/8" strips at a time.
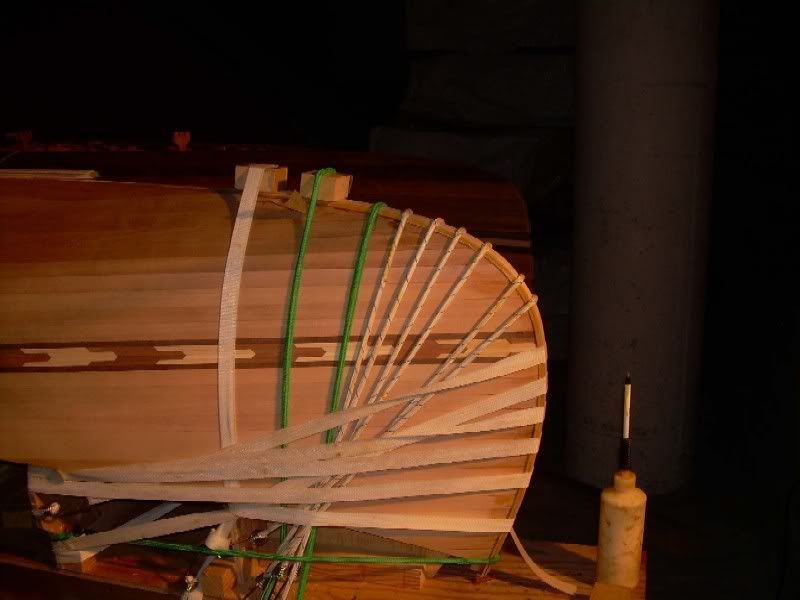
I had a similar problem. Here is a photo of how I clamped (bungee'd) them on
No need to panic there is still hope.
Just a side note my boat is one of five boats, that some Boy Scout dads and their sons and I are making. My boat was the first and it worked so well we did them all this way. It takes a bit of time because you only glue a few strips at a time but the end result is the same.
I tried to make the outer stem on mine after the fact. I made a glue up station from the pattern. That was a mistake. It twisted on glue up and the pattern was somewhat off and the stem would not sit correct no matter what amount of shaping I was going to do. The bend was just too far off. So, take Tom;s advice and glue it up by strips on the canoe itself and you'll have better success. I'm going to do that next.
I think it's too cold for me to seal the canoe now. I've run out of time for warm weather. so I'll tack down the strips at the stations and refill and sand next spring and carry on.
I'm dissappointed I didn't do this right the first time.
Cheers, Robbie.
Thanks for all the tips.
I think my plan of action is as follows. Check the height of the waterline on the moulds and stem to get a better handle on which is actually out. Next, shape the stem as I would if it was okay. Then lay down some strips and access whether I will shave down the stem for fairness or maybe add a bit of wood to the end mould. If I shave down the stem then I probably have two or three options forward. First, I may be able to bend the outside stem into place depending on how much things are out. Secondly, if there is a gap between the outside and inside stem I can check and see if I can add a shim or filler strip on the outside stem, that might not be too hard. Lastly, I can always form a new outside stem in place.
It's kind of funny. When I put the moulds and stem in place on the strongback I didn't give too much thought about how they were supposed to align vertically. For any number of reasons (slightly mishaped, slightly raised stem, etc.. which easily can add up to 1/8") the stem was a bit higher than the mould and it looked to be the thickness of my 3/16" strips, so I just assumed that was the way it was supposed to be. I was imagining that the strip runs off of the last mould and runs in-line with the top of the stem. Now when I look back at it from what I've learned here and from what I saw in canoecraft, it's clear to me what is supposed to happed.