Welcome to the new Bear Mountain Builders Forum - an interactive internet service we provide to encourage communication between canoe and kayak builders
For the benefit of all the forum users, I have solicited some additional assistance from Glen Smith and I am posting the information here. I believe that most of the info is out there in various spots, but it is good to have the details of my scenario here for all to use - see below:
Glen's Guidance:
The dimensions seem correct. When using plastic cane it is advised to varnish the seat frames before caning. You should also use Vaseline dabbed in the holes to reduce friction and heat build-up which can break the can as you pull it through the holes. Of course you will have clean off the Vaseline once the job is done.
Glen.
Original Question:
Another question if you don't mind. I have not caned seats before and I don't want to screw up my frames.
From the literature that I can find, I believe that the following combination should work:
3.0 mm plastic cane (which I have already purchased)
1/4" holes spaced at 3/4", placed 3/8" back from the edge
Plse confirm if this combination will work well or if I should alter something???
I will be preping the seats this week after work each night. I have a few steps to do yet (holes + CS touch, stain, epoxy, varnish). I probably could come close to caning this upcoming weekend, but I have travel on the weekend. I may have some questions when I start pulling cane - like tensions, etc. I will see what works...
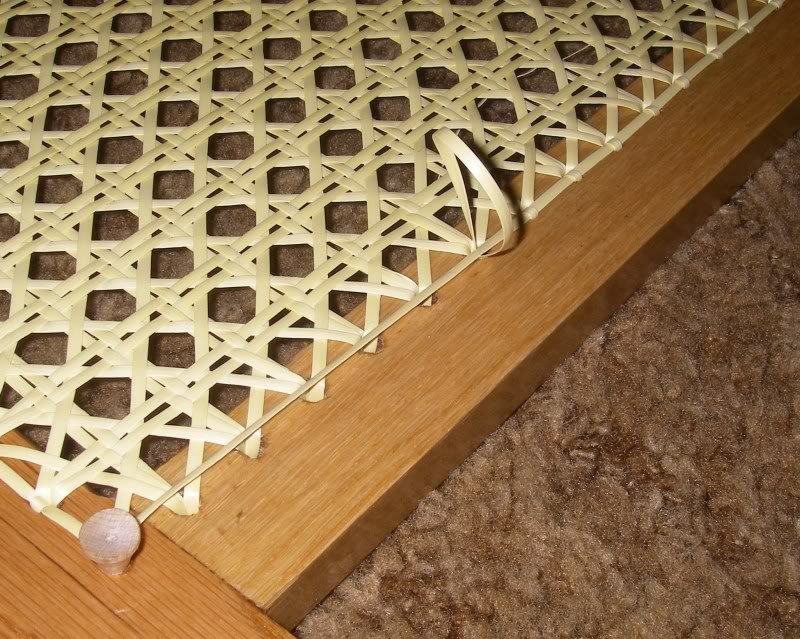
One trick I picked up from a caning web site is a technique called couching. Instead of leaving the holes in the corner of the seat visible, cut a peice of golf tee to the same thickness as the seat itself. The golf tee is placed into the corner hole and the binder cane is pulled over the top of the tee from both sides of the seat. A small dab of glue helps hold the peice of golf tee in its place. The binder cane is then pulled back under the tee underneath the seat and tied off. I don't have a picture available, the tee just acts to fill the hole, and the binder cane, if it is wide enough, completely covers the tee and makes it invisible, and provides a nice finished loolk
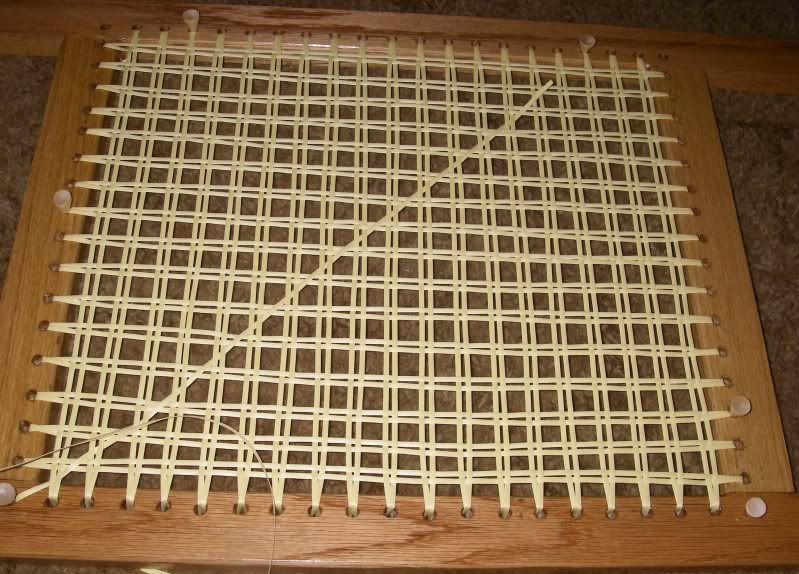
One of the main things I learned when doing the first one was how tight to get the
"first" course of cane, it was hard to pull tight with just the golf tee and nothing to tie to yet....the first runs just need to be "held" in place. When the weaving continues with the diagonals the cane gets tighter and tigher with each weave.....I was suprised how well
every thing thightened up as progress went along...
Did any of you out there apply a touch of counter sink to the holes to take the edge off? I thought it would be easy to do. I used the bottom side of the frame to set up the depth stop to get it right and found that it was hard to get a nice cut in the hole. The CS bits that I have have a shaft size <1/4" making it hard to get it centered. As the bit tries to self-center, it leaves a bad cut. I think if there are no problems with using a "sharp edge" I will just leave the holes alone. The binder cane will cover the holes nicely leaving the holes with a 1/4" straight bore.
I used a countersink on the seat holes. I had tried one from the local hardware store but it didn't do a good job so I bought a good quality countersink from Lee Valley and it did a great job. I just had a look at their website and couldn't find the one I bought so maybe they don't carry that particular model anymore.
Edited: Mine has 7 flutes, a 3/8" shaft and a cutting angle of 82 degrees.
I use a 1/8" round over bit in a router table. The bit is the one with the brass pilot, not a bearing. I simply drop the hole over the spinning bit and give it a circular "shake".


 [/img]