
I built my first Wee Lasse by lofting plans from the Adirondack Museum.
It too was a lapstrake canoe. I left the forms flat edged, and so it resembled a stich and glue canoe. With 4" flats.
It was a fun project.
It's a good thing you went with thin strips, as there is a lot of twist between forms 1 and 2.
Will you bead and cove your strips ?
Great start already !
How does the Paulonia compare to Western Red Cedar ?
Jim
Non-Bear Mountain Designs
Re: Non-Bear Mountain Designs
Keep your paddle wet and your seat dry!
-
Rehd Brown
- Posts: 148
- Joined: Sat Sep 08, 2007 8:23 pm
- Location: Fresno, California
Re: Non-Bear Mountain Designs
Hi Jim
That's another reason why I went with narrower strips. That twist comes in a very short distance, and I want to do a couple stripes in there above the waterline.
I will be doing B & C on some of the strips, however, the thin acceent strips may have to be left flat. That's my next and last step before starting the actual build. I was thinking of gluing my accent strips to one of the wider ones next to it, then doing the B & C on that combo.
Good western red cedar is hard to come by here so I'm using some redwood strips I have set aside for a bigger canoe. I've worked with all 3 and though the Paulownia is lighter than the wrc, it tends to fuzz a little if not cut with 'sharp' tools. It is easy to sand out, but, it's added work. The redwood is a tad splintery if you aren't careful. But, none are really difficult to work, with a little care.
I'm using the Paulownia, Redwood stripes, Sitka outer stems and some Poplar ( green and white ) for a little football detail. Haven't figured that out yet.. was going to do that on the driveway tomorrow, but, I need to get to the ranch and work on equipment.
Rehd
-
Rehd Brown
- Posts: 148
- Joined: Sat Sep 08, 2007 8:23 pm
- Location: Fresno, California
Re: Non-Bear Mountain Designs
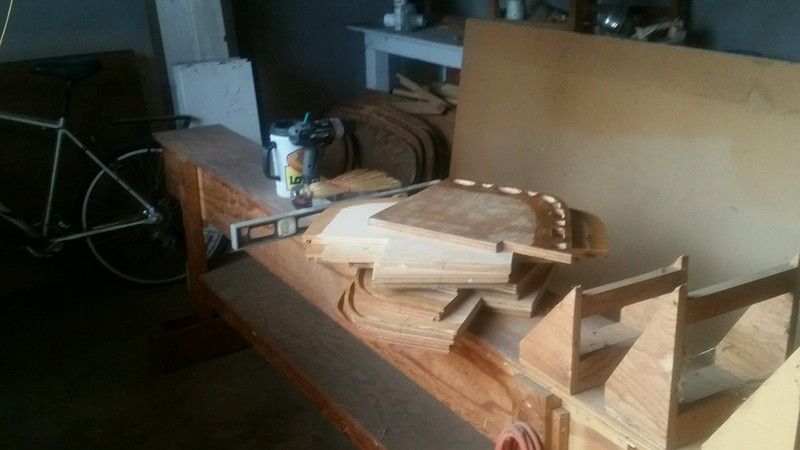
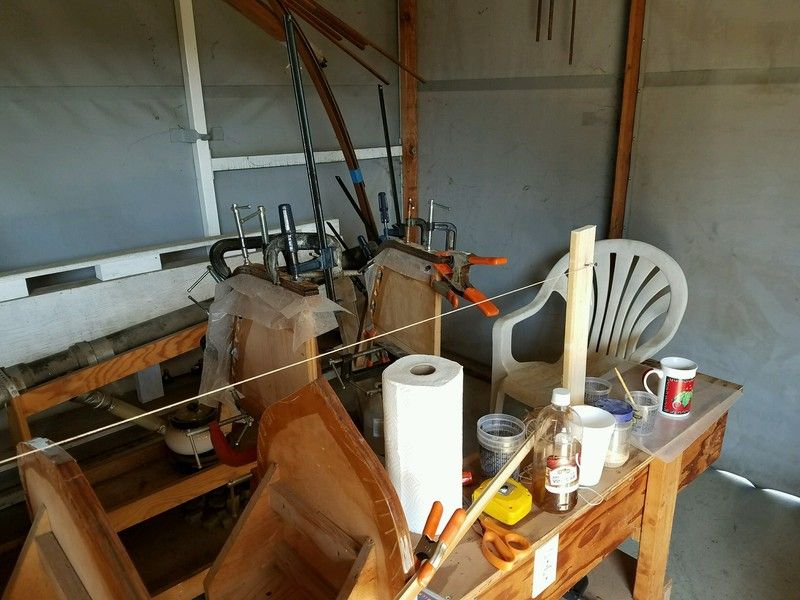
Started gathering everything out in the shed. I built those little stands for a previous boat and they will work out perfect for this one as well.
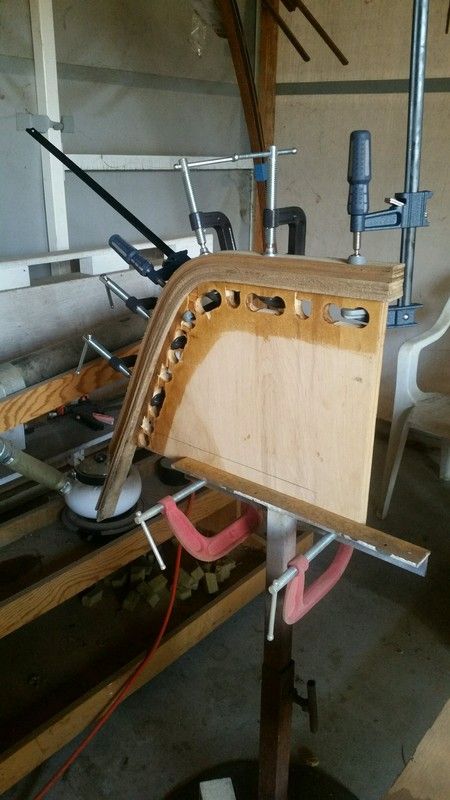
Now It’s time to start setting up the stems. I broke out my little cannon of a steamer. Two problems: 1) my duct tape seams were pretty bad.. had to replace most of them. 2) I neglected to clean out the pot and it evidently had some black residue left from water I left in it 8 years ago. I’m just guessing, because all my white wood I steamed turned gray once they were really soaked. Not happy with that. The Paulownia for the inner stems is VERY white and the Sitka Spruce for the outers was very light as well. Now they are all shades of gray(only 9). It is what it is, and we’ll see if shaving them down takes the discoloration out.
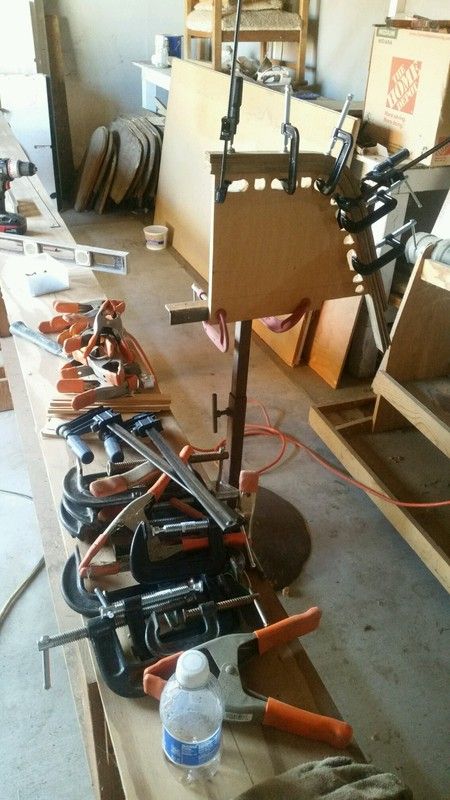
By the way, when preparing your stem molds, just because it’s a small boat, you can’t necessarily get away with small clamping holes. Be sure your clamps will fit in them before getting too far into the process.
Rehd

Now It’s time to start setting up the stems. I broke out my little cannon of a steamer. Two problems: 1) my duct tape seams were pretty bad.. had to replace most of them. 2) I neglected to clean out the pot and it evidently had some black residue left from water I left in it 8 years ago. I’m just guessing, because all my white wood I steamed turned gray once they were really soaked. Not happy with that. The Paulownia for the inner stems is VERY white and the Sitka Spruce for the outers was very light as well. Now they are all shades of gray(only 9). It is what it is, and we’ll see if shaving them down takes the discoloration out.

By the way, when preparing your stem molds, just because it’s a small boat, you can’t necessarily get away with small clamping holes. Be sure your clamps will fit in them before getting too far into the process.

Rehd
-
Rehd Brown
- Posts: 148
- Joined: Sat Sep 08, 2007 8:23 pm
- Location: Fresno, California
Re: Non-Bear Mountain Designs
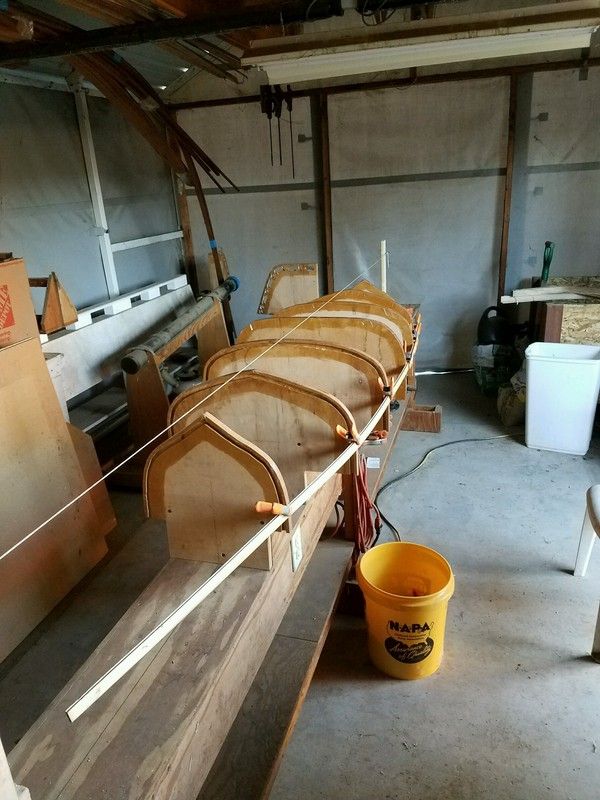
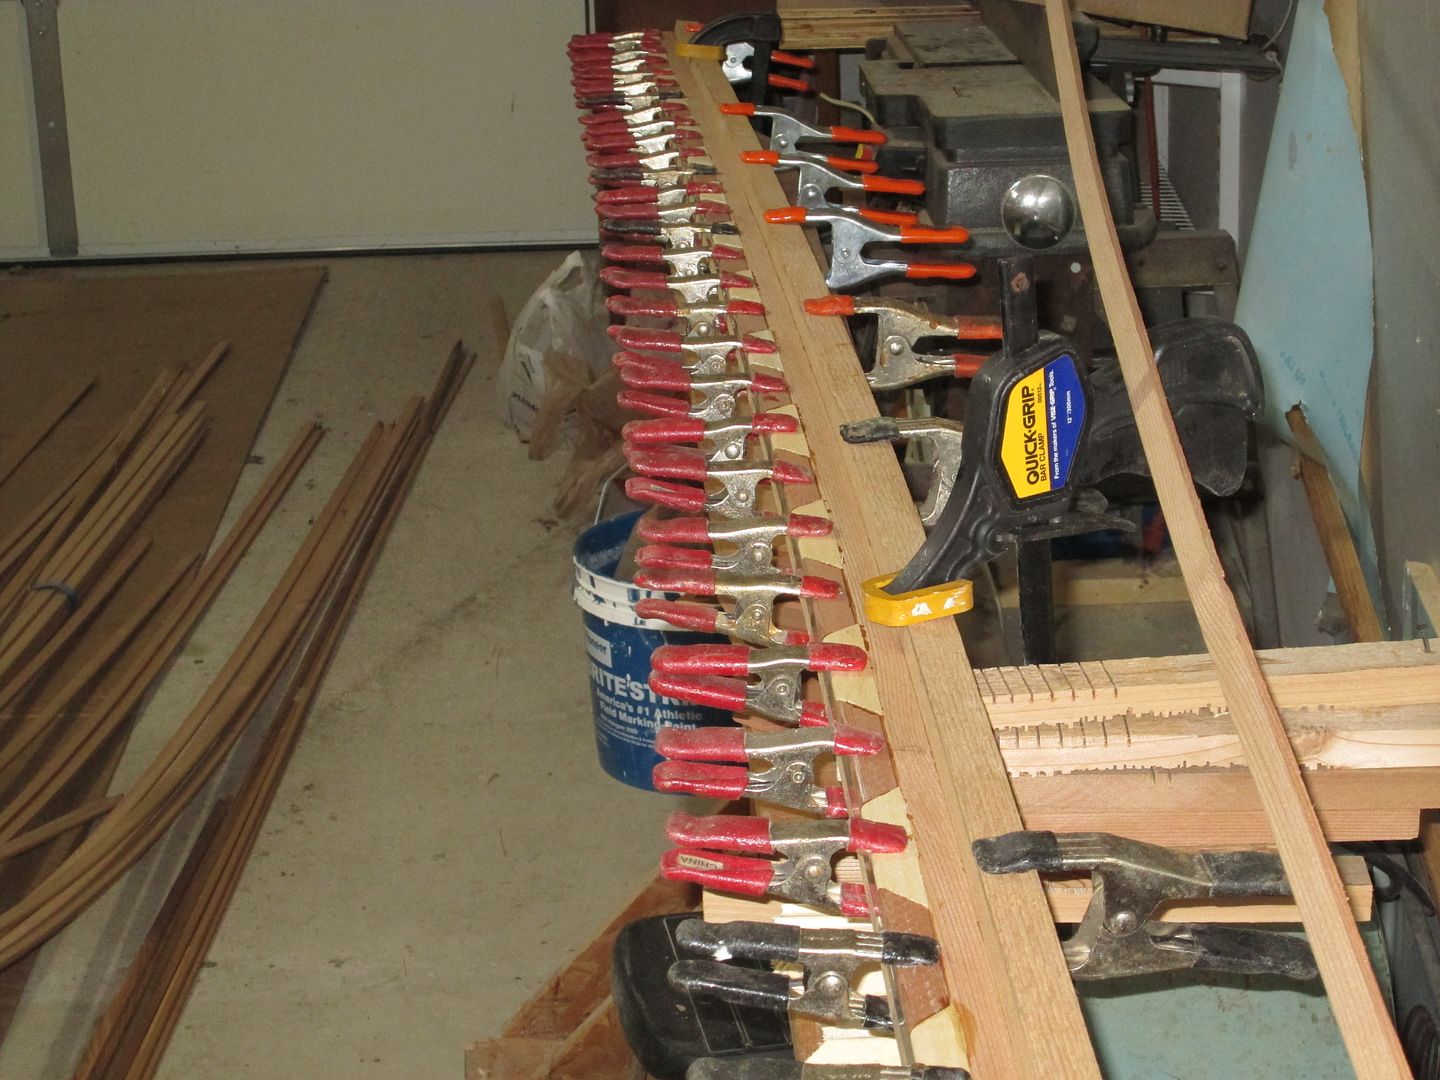
Back to the Strong-Bench and sta. mold set up and alignment. Even though I put a centerline down the top of the bench, I still needed to put a stringline above the molds to double check.
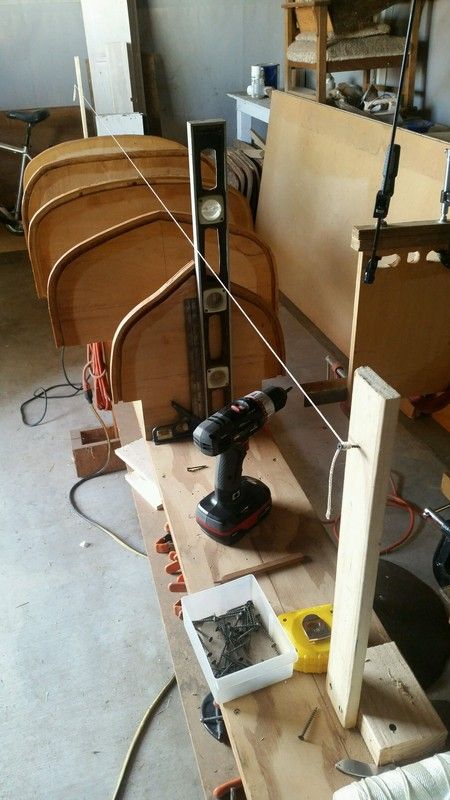
Here, all the stands are screwed down and the molds are being attached to them, lining up the centerlines of each mold.
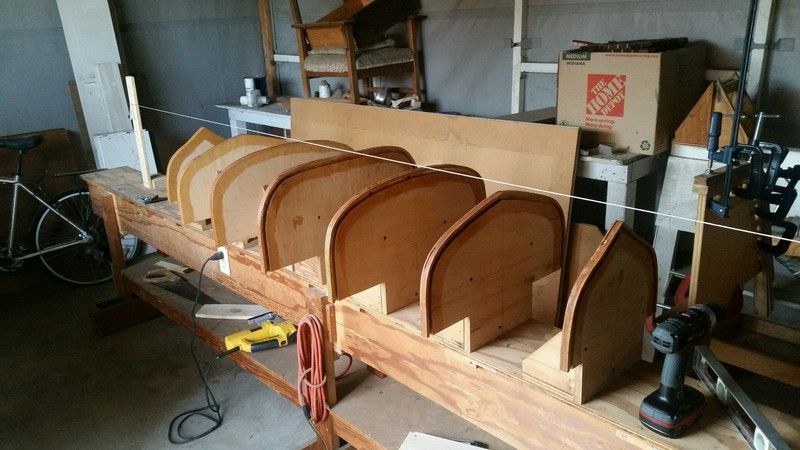
All done, aligned and ready for the stem molds.
Rehd

Here, all the stands are screwed down and the molds are being attached to them, lining up the centerlines of each mold.

All done, aligned and ready for the stem molds.

Rehd
-
Rehd Brown
- Posts: 148
- Joined: Sat Sep 08, 2007 8:23 pm
- Location: Fresno, California
Re: Non-Bear Mountain Designs
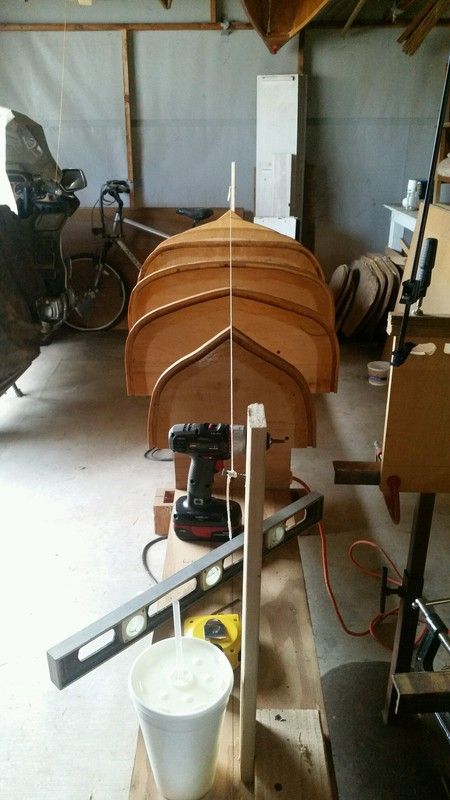
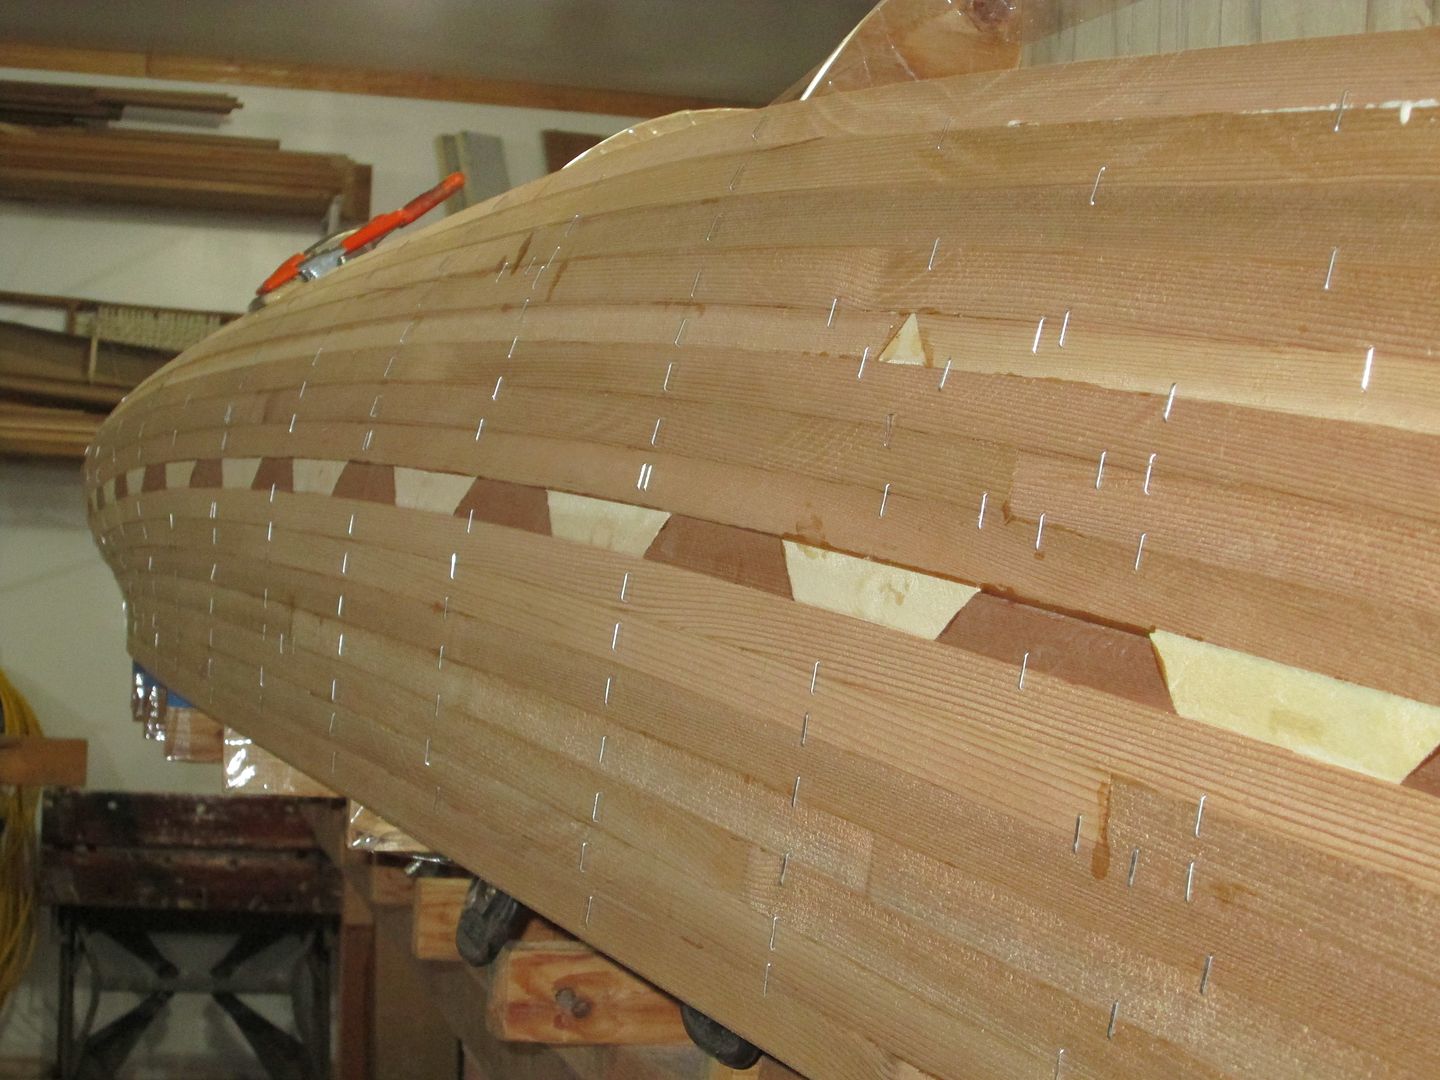
I got a wild hair and decided to put on a fairing strip and see what it looks like so far, less the stems, of course.

Now, I need to go check on my trees and get some needed work done at the ranch.. Back in a few days..!
Rehd


Now, I need to go check on my trees and get some needed work done at the ranch.. Back in a few days..!
Rehd
Re: Non-Bear Mountain Designs
In looking for accent wood, I found Aspen stays white, under glass. Just a thought, if you had any available.
Jim
Jim
Keep your paddle wet and your seat dry!
-
Rehd Brown
- Posts: 148
- Joined: Sat Sep 08, 2007 8:23 pm
- Location: Fresno, California
Re: Non-Bear Mountain Designs
My actual intent for this boat is as a sample of our Paulownia wood, so since it's white, my accents are the redwood and poplar. I want very little other wood in it, to demonstrate how light our Paulownia is.
I think I have more wood/strips than I'll actually need for the build. The inner stems are Paulownia as it's a softer wood, and the outer stems are Sitka Spruce because it is light colored and reasonably light weight but strong.
Before I even put the green Poplar in, I'll have to put some under glass and see how it looks.
Rehd
-
Rehd Brown
- Posts: 148
- Joined: Sat Sep 08, 2007 8:23 pm
- Location: Fresno, California
Re: Non-Bear Mountain Designs
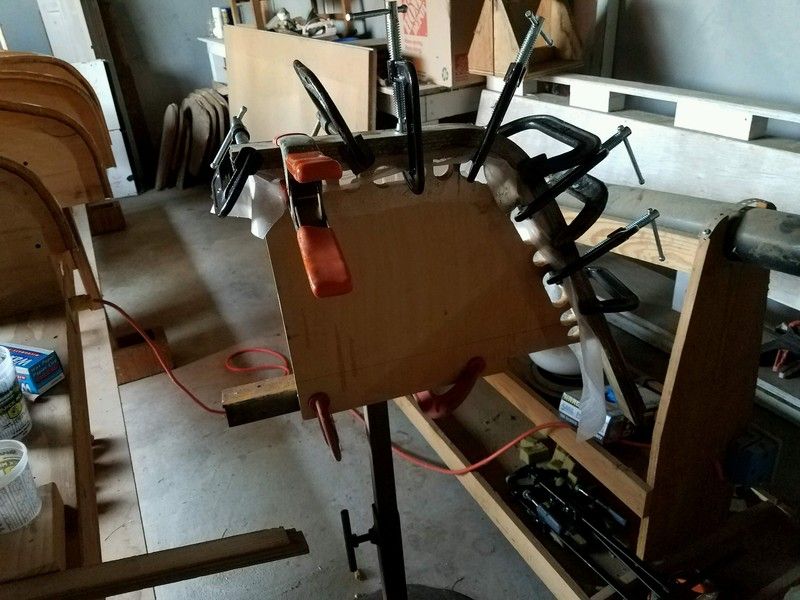
Starting to assemble the stems and I decided to try epoxy resin. Don’t think I’ll do it this way again. Way too time consuming and messy.!
I usually use Titebond II, rub in a thing coat and let it soak in and start drying. Then add a second coat and put the pieces together. Tighten them down, make sure there’s a little squeeze out and done. This was a really messy process and, of course, you need gloves and respirator. You CAN use gloves with Titebond, but, it usually rubs off or washes off with soap and water. Sooo much easier..!!
Now to go out and play with the strip selection and see what simple pattern I can put together, then start the B & C process.
Rehd
I usually use Titebond II, rub in a thing coat and let it soak in and start drying. Then add a second coat and put the pieces together. Tighten them down, make sure there’s a little squeeze out and done. This was a really messy process and, of course, you need gloves and respirator. You CAN use gloves with Titebond, but, it usually rubs off or washes off with soap and water. Sooo much easier..!!


Now to go out and play with the strip selection and see what simple pattern I can put together, then start the B & C process.
Rehd
-
Rehd Brown
- Posts: 148
- Joined: Sat Sep 08, 2007 8:23 pm
- Location: Fresno, California
Re: Non-Bear Mountain Designs
After gluing up the stems this morning, I went out and set out my strips and figured out where I wanted them, then I started gluing up the accent strips.
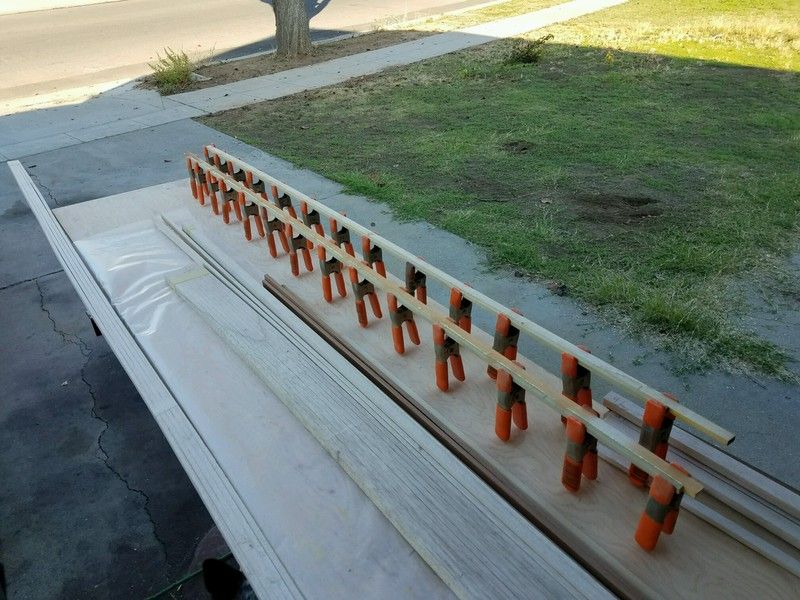
Just a passing thought, but, since I’m gluing two different color strips together, will they be more difficult to bend. These are going in the football area of the boat. The two strips are about ¼” and not big enough to do B & C without breaking them or other problems. So, gluing them up will make it easier to do the B&C.
I’m thinking also that if I B&C the accent strips, as I sand to fair the hull, the accent strips could change shape depending on how much I sand in any one spot. Not good..!
Anyone done it this way, or does everyone just bevel the accent strips.?
Rehd
Re: Non-Bear Mountain Designs
I bead and cove my accent strips, just like the rest.
There are so many ways to make accent strips, it's really a Builders Preference.
Jim
There are so many ways to make accent strips, it's really a Builders Preference.
Jim
Keep your paddle wet and your seat dry!
-
Rehd Brown
- Posts: 148
- Joined: Sat Sep 08, 2007 8:23 pm
- Location: Fresno, California
Re: Non-Bear Mountain Designs
I'd be a tad leary of putting 1/4" strips through the router. That's why I'm gluing them to the next strip, then routing them. As you say, each to their own.
Sitting down to draw out the stations for the 16' Prospector.
So far my grandsons haven't had time to come by and help, or learn. But, I'm going to make a couple of boats to keep around and see if they come around.
Rehd
Sitting down to draw out the stations for the 16' Prospector.
So far my grandsons haven't had time to come by and help, or learn. But, I'm going to make a couple of boats to keep around and see if they come around.
Rehd

Re: Non-Bear Mountain Designs
I would post some pics, but PB is down ATM, I will when it is up.
Gluing the strips together works fine. I made pinstripe strips by gluing up 2 strips of NWC (5/16") with a WRC (1/4") core. Granted I did that with 3.5" width pieces and cut the strips from the glue up.
They B&C'd, installed and sanded like the rest of the strips, I didn't have any issues with flexibility ... in short they were pretty unremarkable from a problems view.
Brian
Re: Non-Bear Mountain Designs
Not sure if you intended to just add the 1/4" strips to a regular strip and make an extra wide strip, or glue wider thin pieces together to make a plank blank suitable to cut strips from. That's what I did to get the pinstripes for my last boat.
You can see the accent strips sitting on top of the molds.

And added to the boat

Brian
You can see the accent strips sitting on top of the molds.

And added to the boat

Brian
-
Rehd Brown
- Posts: 148
- Joined: Sat Sep 08, 2007 8:23 pm
- Location: Fresno, California
Re: Non-Bear Mountain Designs
Thanks Brian
My idea was to put the 1/4" accent onto a narrow regular strip and do the B&C. My concern is, sanding the hull to fair it, if you sand more in some areas, it will remove more of the thin cove piece, making the accent strip vary in width.
However, I see what you are saying about adding the accent to a wider piece, or sandwiching it, THEN cutting out your strip with the accent in the middle. Much better idea and eliminates the possibility of getting a variation in the accent piece.
Perfect timing by the way.. I was just heading out to put those last long accent strips together this morning.
On a side note: Is that a Craftsman Radial Arm saw.? If so, have you ever had a problem with it stopping. Mine quit on me and just hums and the blade kinda vibrates. I'm considering taking the motor off and checking it out for dust or other problems inside. It's old, but it's been a great saw, and it's built into my bench so the bench top IS the saw table. Don't want to tear my bench up to get a new saw.
Rehd
Re: Non-Bear Mountain Designs
I've always glued my accent pieces to a strip, before installing. I'll even prebent the strip a little, so it will match the curve of the previous strip, already on the hull..
I wouldn't worry about sanding the cove edge too much, You can always come back and sand the thick spots to match. Besides it might make a good gage telling you how thin you've sanded in that area !
You got a good start ! Keep the pics a coming !
Jim
I wouldn't worry about sanding the cove edge too much, You can always come back and sand the thick spots to match. Besides it might make a good gage telling you how thin you've sanded in that area !
You got a good start ! Keep the pics a coming !
Jim
Keep your paddle wet and your seat dry!