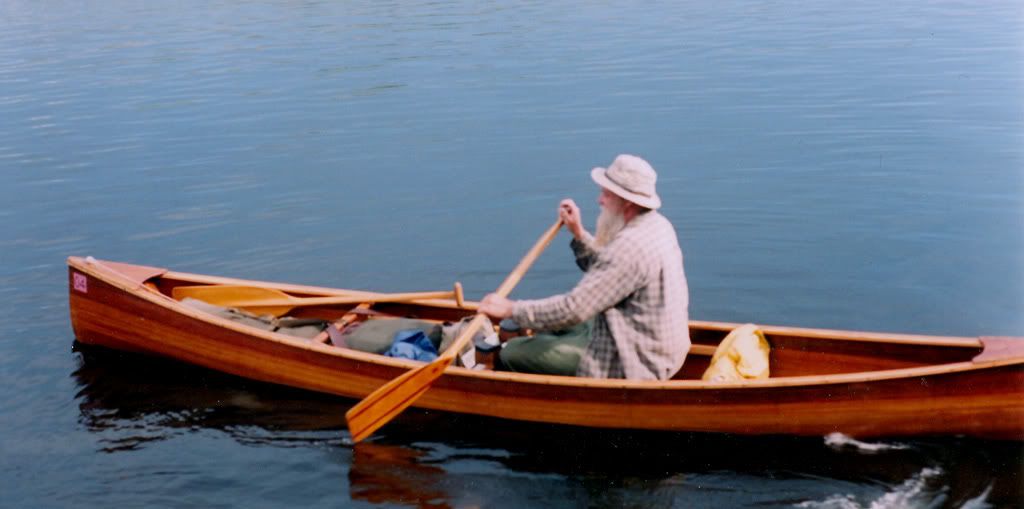
Interesting to see this hull being built. I built a similar hull from the plans in the book about Rushton, the Canadian Ugo or Vayu model. 15'x30". I built it as a solo tripping canoe and like it a lot. It has the same "deadrise" v-bottom as the Arkansas Traveler.
You will find the initial stability real shaky at first, but the secondary stability is awesome when the flat portion of the bottom becomes parallel with the water surface. I have had the boat out in big waves hitting me broadside and felt confident enough to keep traveling.
If you are serious about your scaled down traveler being a children's boat I would set it up for tandem as well as the solo seat so your child can paddle with a friend. It is a great boat for two kids. The v- bottom makes it go straight without a lot of skill or effort.
sedges wrote:Interesting to see this hull being built. I built a similar hull from the plans in the book about Rushton, the Canadian Ugo or Vayu model. 15'x30". I built it as a solo tripping canoe and like it a lot. It has the same "deadrise" v-bottom as the Arkansas Traveler.
You will find the initial stability real shaky at first, but the secondary stability is awesome when the flat portion of the bottom becomes parallel with the water surface. I have had the boat out in big waves hitting me broadside and felt confident enough to keep traveling.
If you are serious about your scaled down traveler being a children's boat I would set it up for tandem as well as the solo seat so your child can paddle with a friend. It is a great boat for two kids. The v- bottom makes it go straight without a lot of skill or effort.
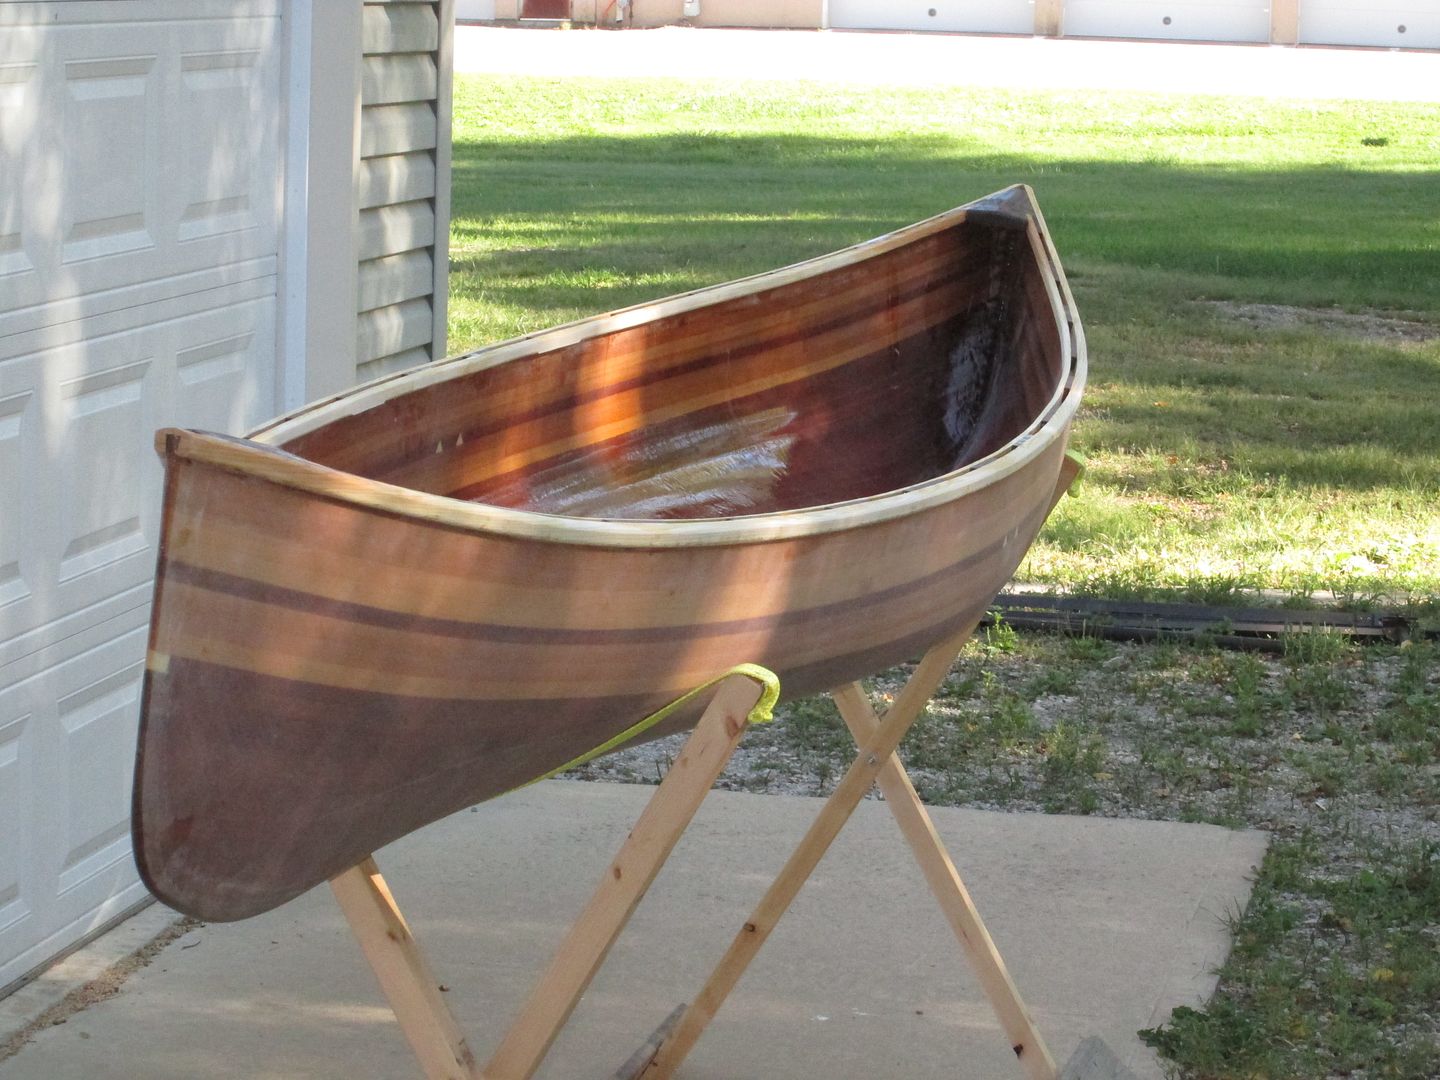
I would have to dig the molds out of storage to measure the seat height off the bottom. I no longer have access to the canoe. As you can see from the photo the seat is just a few inches below the gunnel. The hull was 14 inches if I recall correctly, but with that v-bottom the depth number is deceiving and probably would be more equivalent to 12.5 or 13 in a shallow-arch hull.
I would not have the seat lower than that for my comfort for long days on the water. Others may find a lower seat more comfortable. The shaky initial stability never really bothered me, but I spend a lot of time in canoes.
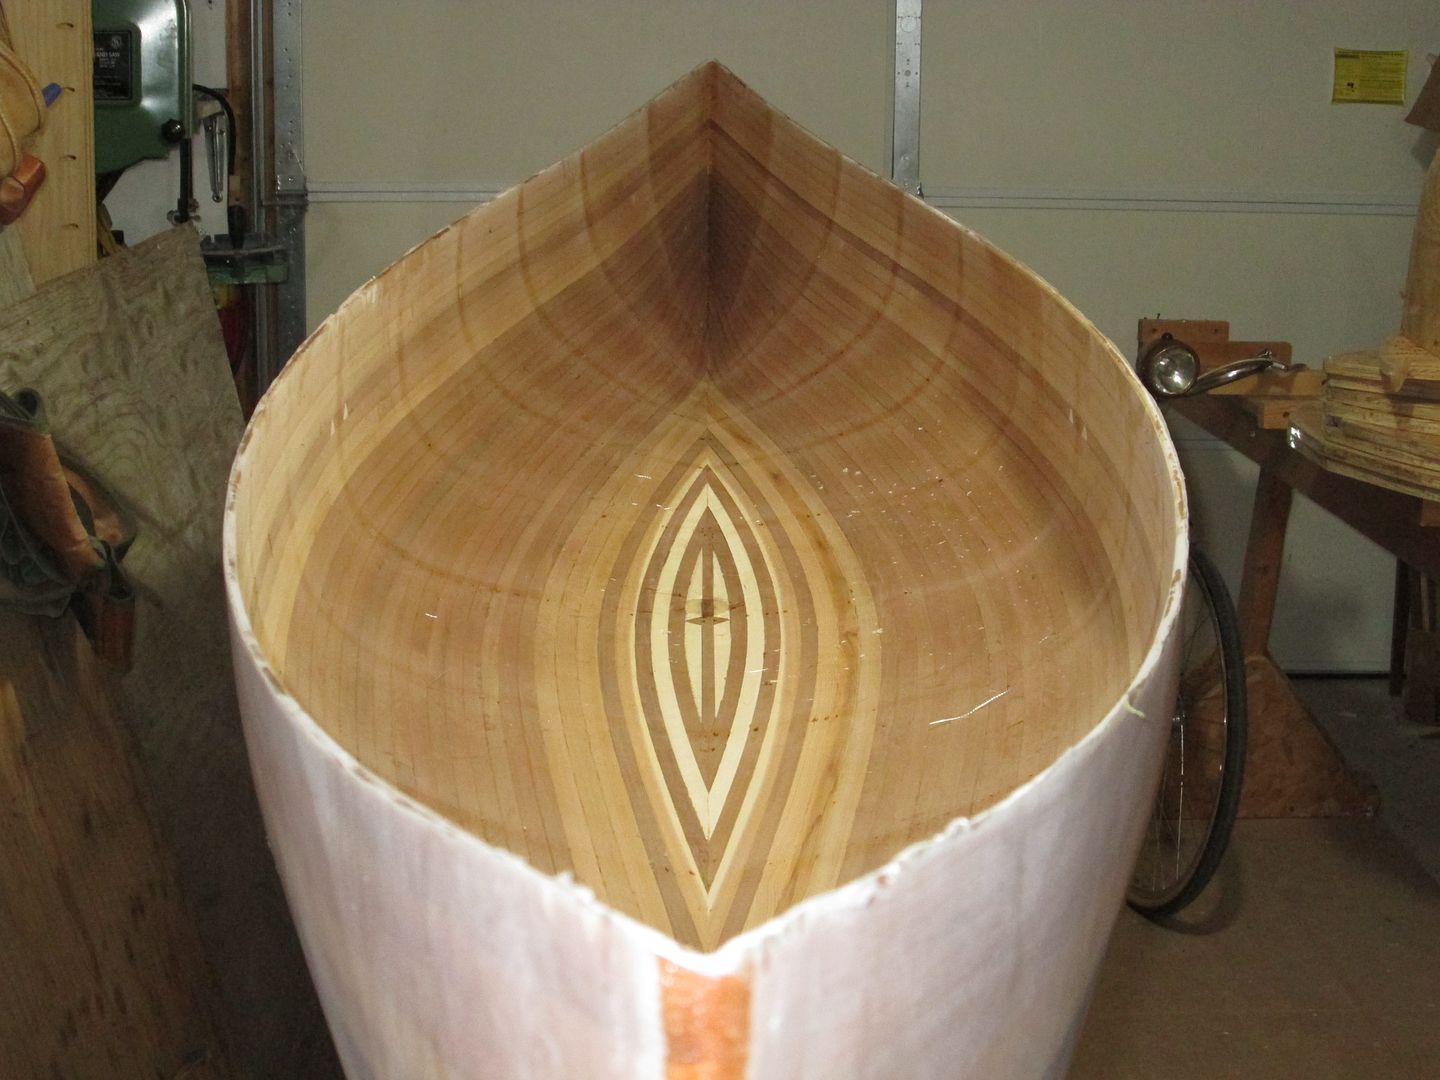
The v-bottom with the flat bottom panels gave me another paddle technique for those long days when I need to use a number of styles to use different muscles and avoid boredom. I lean into the paddle side for the power phase and than cock my wrist down to turn the blade vertical, leaving it trailing at the end of the stroke and lean away from the paddle side. The little push that the blade gives as I rotate away is enough to correct direction without j-stroke or pitch-stroke. The paddle is out of the water by the end of the lean. The lean ends when the off-side bottom panel firms up and pushes me back toward the paddle-side during the recovery phase of the stroke. Its a slow, graceful style that I can get into at the end of a long day with a few more miles to go. Almost sleepy.
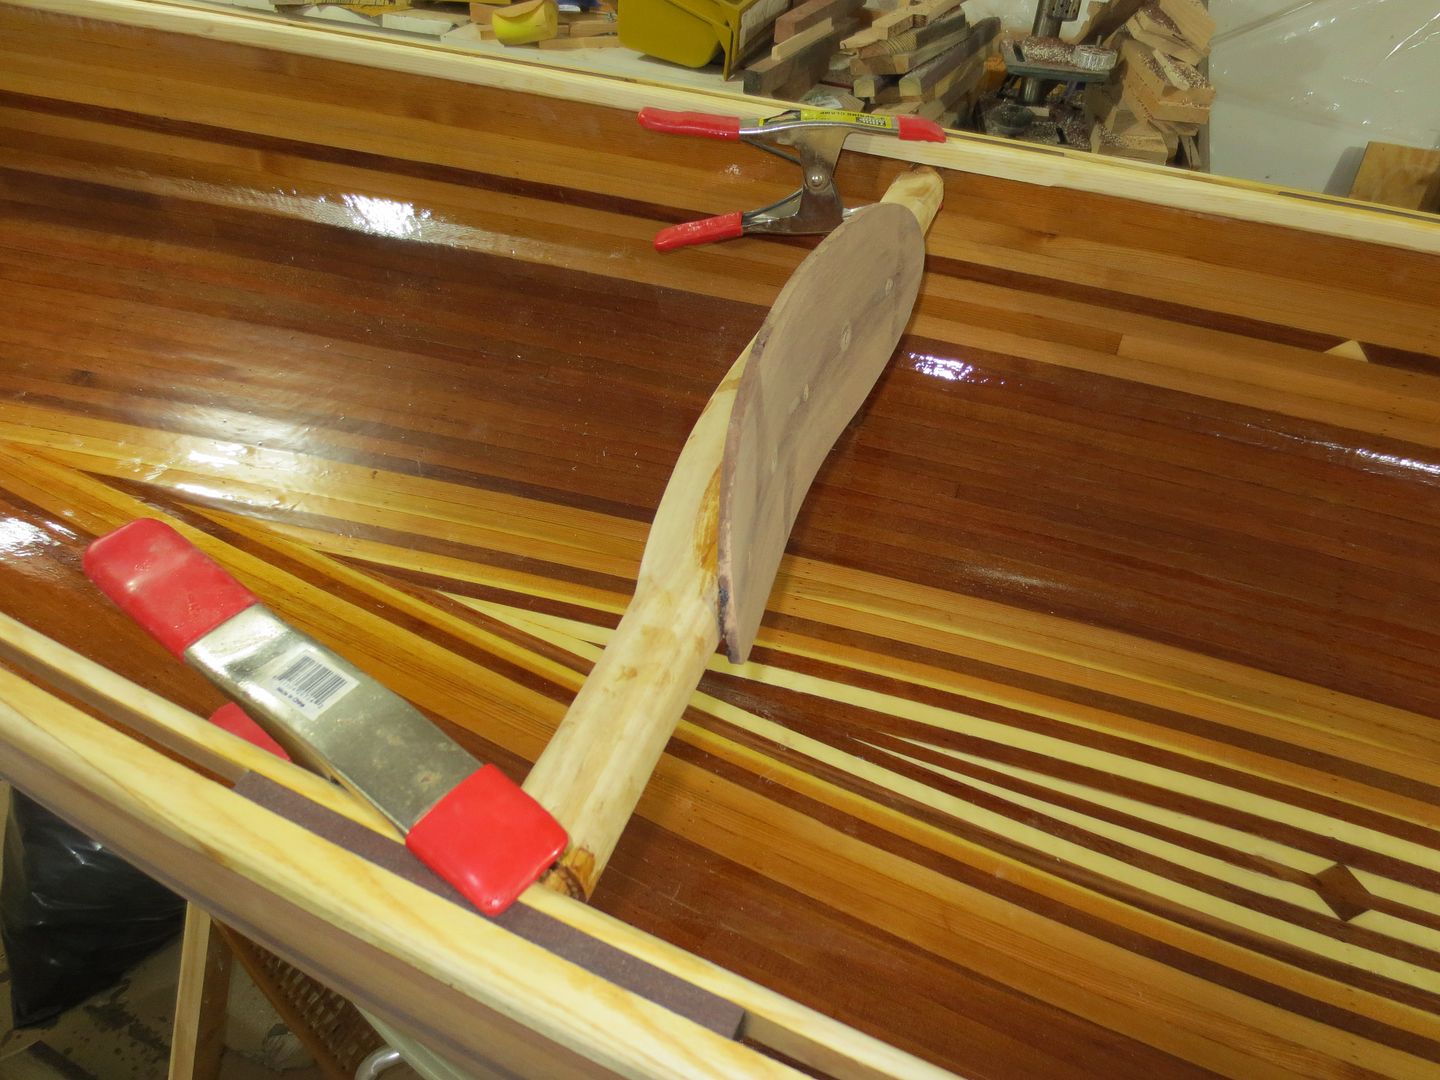
After finishing my Nokomis, I was back helping Ben with his Traveler.
Right now we are working in a pivoting backrest. Our first attempt at steam bending. The 1/4" Walnut was a breeze.
The backrest will be mounted in walnut blocks, attached to the inwhales. So far we are planning on friction to keep the backrest in the desired position.
Any better ideas out there ?
Here's some pics.
Cruiser wrote:Just to be clear, you want a 1) normal position to start, and then 2) have the backrest swivel to the users position as they lean into it?
Love the finishing BTW, looks so good.
Brian
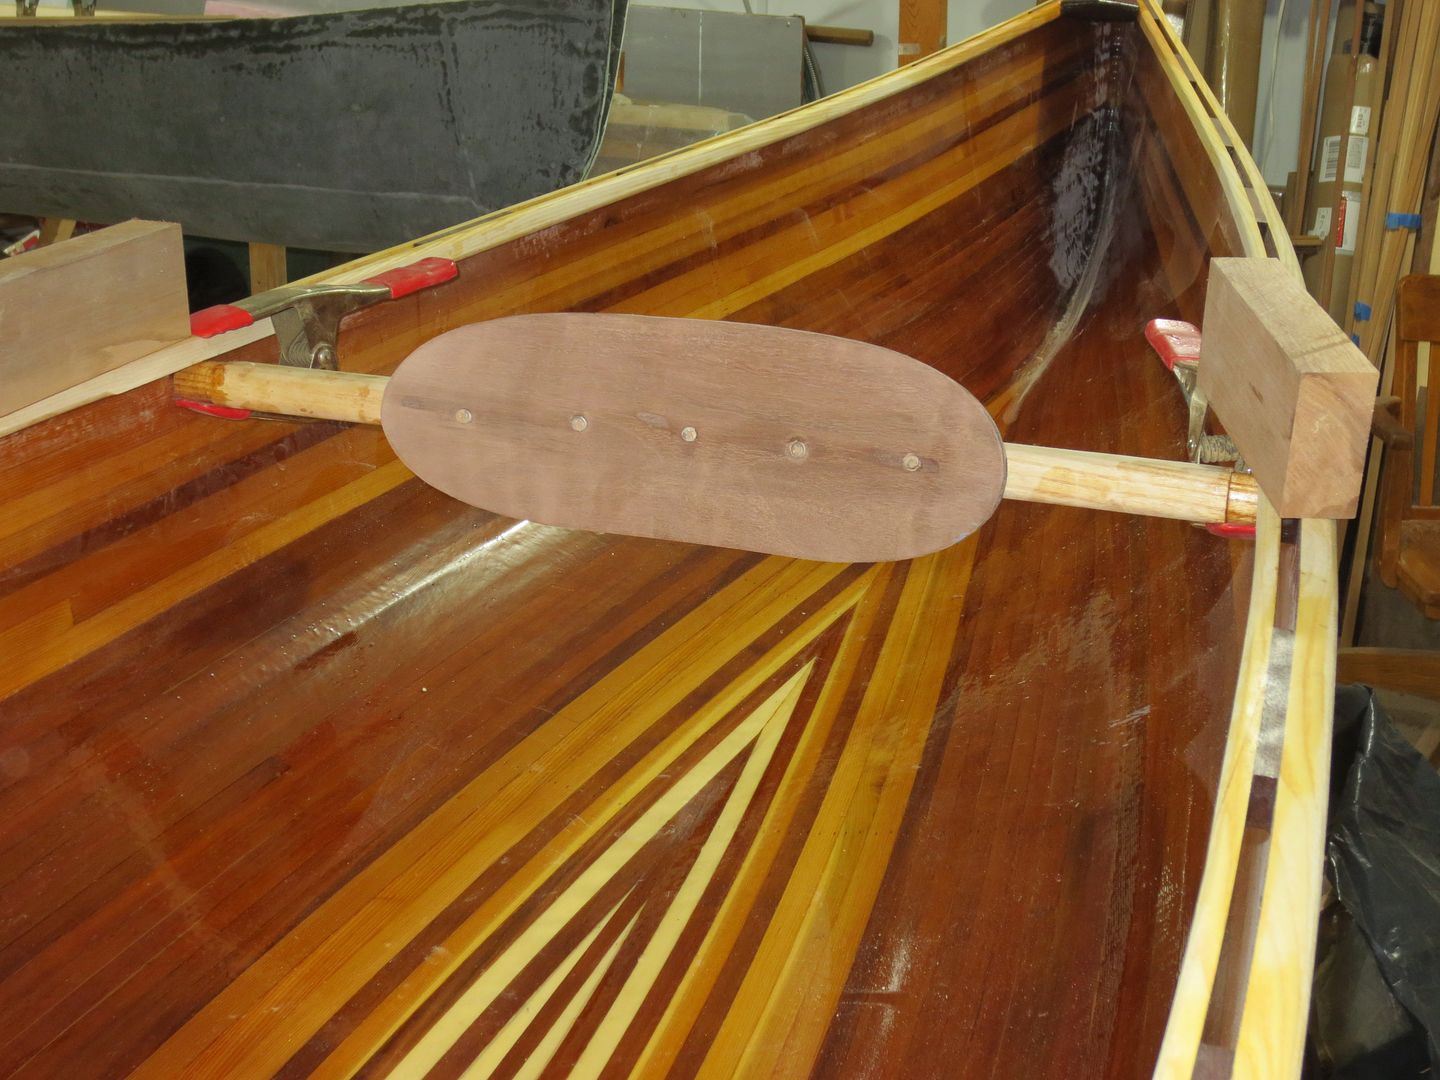
Yes, in the last pic you can see the two blocks resting on the gunnels. These will be cut horizontally lengthwise. Clamped and then drilled, slightly oversize to accept the ends of the brace. Then bolted to the inwhale.
Friction (hopefully) will keep the brace from rotating, and stay in the right place. I may fashion a plastic sleeve as a sort of bushing. Haven't gotten there yet.
This design will allow the backrest to rotate completely out of position and the tendency will be for that rest to rotate to one of the extreme positions. Friction would solve that issue, but friction tends to need to be adjusted and can be fiddly to get right and over the long term always seems to "wear loose". In use, if the rest moves to the extreme position, it would be a pita to reach back to correct.
You have lots of "meat" on those blocks to add some additional pieces for control. First the amount of movement required for the backrest is actually pretty small. Maybe consider building in some hard stops on the shaft/blocks, so that movement is limited to an arc something a little larger than required (guessing at +/- ~15 degrees). That would keep the rest more or less in the right position, so that when the occupant leans back, it just swivels to the right position.
You could also think about wrapping a little shock cord around the shaft (or some other tensioner), attach to the block, to always return the rest to one of the max positions (limited max position), so when you sit, it always will require the same "lean" to get it to swivel to the right position.
I like your idea about limiting the travel !
If I made the pivoting shaft say half moon shaped, a simple pin through the block would limit it.
Hmm, I'll try and mock something up !
Thanks Brian !
The shock cord has merit also !! It might be a little unsightly, but worth a look !
Thanks again !
O.K. I hope this is posted in the right spot.
I’m getting back into building after 7 or 8 years. My project is two-fold in that I’m need to make something to demo the wood I’m growing ( Paulownia ) and I want a practice project to start with after all this time.
I’m building the Sairy Gamp, as per the Title, which many of you know, is a J.H. Rushton design and was built for Writer/Adventurer, George Washington Sears (Nessmuk – pen name ) in the late 1800’s. There are a few good reads out there by and about Nessmuk and I would encourage you to check them out.
The Sairy Gamp was a lap-strake built boat and I’ve changed the numbers so I could use the strip-built method. I used the numbers taken off the original in 1967 by O.E. Markkula. Glen Smith had a copy and offered a copy of that, adding that some of the numbers were incorrect. I drew it up and had to make two corrections, but, that went fairly easily. The link below, if it works, if a picture of the original, which at that time, was on load to The Adirondack Museum, from the Smithsonian Institution.
I chose to go stapless and use all my clamps as I have in the past. So, I’m routing dado’s all around the form edges, 3/8”x 3/8” and 3/8” from the edge. I couldn’t find a guide pin for the router, so I had to do it all freehand. It ain’t pretty, but, it should work. I painted the dado and lip with epoxy resin to help keep the edges from breaking off, then put the usual packing tape on the edges to keep glue from sticking.
I’ve got a bunch to put on here, but I’d best try it out and make sure I’m doing it right. Plus I’m gluing up my stem laminations now, so I need to get back at that.
Well, that first post went well, aside from the terrible spelling. Whew..!!
Pictures of the forms as I was coating them with epoxy along the edges and into the dado’s. Then hanging them out to cure.
After dealing with the station molds, I broke out the material for the strips. Cut them, planed them and bundled those that will be opposed. I cut the strips to 5/8” wide by 3/16” because of the size of the boat and I want to get 1 or 2 accent lines before it rolls down to the water line. This boat is very shallow. It was built for the sole purpose of being able to pack it with him on his adventures, so the sides are minimalized. It was built for 105 – 120 lb max load, if I read correctly. I intend to build a second at a future date, so I added 1 ½” height to the forms at the sheer. This boat will be built to the original sheer, which is marked on all the forms.
Now to give the Strong-Bench a little love after 8 years of neglect. Got out the sander and plugged it in… from there, the bench sanded itself.
When I build a Strong-Bench, I don’t fool around..!!
Then I got out the squares, rulers and put my centerline back on in pencil. After that, I got out the levels and drill and went to work on leveling it end to end and across. It was built with adjustability length-wise and side to side. Once it was dialed in, I put the screws in it and I’m good..
Once the station molds were cured I temporarily set them on the Strong-Bench to get a first look at my little canoe..


