
Sorry for the little side track, but Brian ? How did the jig that you have on the first, and last stations work ? Did it hold the strips tight against the forms ?
Thanks
Jim
Non-Bear Mountain Designs
Re: Non-Bear Mountain Designs
Keep your paddle wet and your seat dry!
-
Rehd Brown
- Posts: 148
- Joined: Sat Sep 08, 2007 8:23 pm
- Location: Fresno, California
Re: Non-Bear Mountain Designs
I was wondering that myself.
Rehd
Rehd

Re: Non-Bear Mountain Designs
Jim,
The end jigs are mostly for after the turn at the bilge, those strips have quite a twist usually and since I build stapleless, it can be a challenge to get everything to stay tight to the forms in this area. With the jig, I just slip a wedge in the gap and it provides that firm hold required to keep the strips aligned at this high tension area.
To make those I just take that station mold "leftover" plywood, take off an additional ~3/4" all round, and presto, a jig to fit around the mold.
And yes, it works very well for that purpose, it took a little getting used to, but it solves the issue of getting support in this area, which can be difficult. I remove them once the strips get past this area, since obviously they aren't of any use when closing the bottom.
RedH,
The saw is also quite old, but it is just a great tool ... I have done so much with it, they aren't popular currently, but I believe it has a lot of advantages for the work I am doing ... only place I would rather have a table saw is cutting up plywood sheets, and I have a good skillsaw and guide for that.
The only time it just dies, is when I push it too hard ... then the thermal overload kicks and it can take up to 15 minutes for it to be resetable (red button on top of motor unit, take a solid push to reset).
Brian
Re: Non-Bear Mountain Designs
Good trick Brian !
Stapleless does provide challenges, and your jig should help overcome keeping strips tight to the hull.
Often times I've had trouble keeping the keel tight to the forms. Caused mostly by too tight of a fit at the keel seam. Randy suggested gluing a block to the hull on the underside, pull the hull tight to the form, and fasten the block to the form. It's worked twice for me.
Thanks !
Jim
Keep your paddle wet and your seat dry!
-
Rehd Brown
- Posts: 148
- Joined: Sat Sep 08, 2007 8:23 pm
- Location: Fresno, California
Re: Non-Bear Mountain Designs
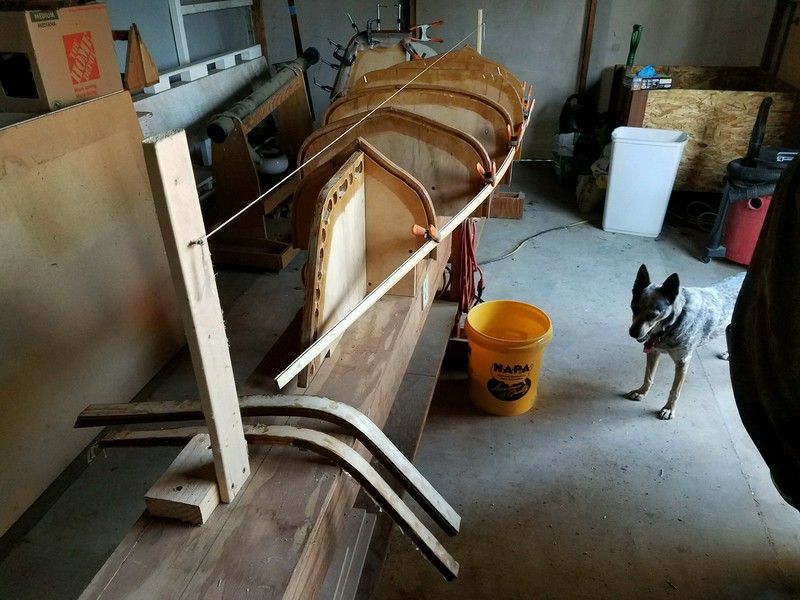
Pulled the stems off the molds and separated them. Stood the stem molds in place and got a better look at the canoe.
Started putting together some of the accent strips. These go in the football area.
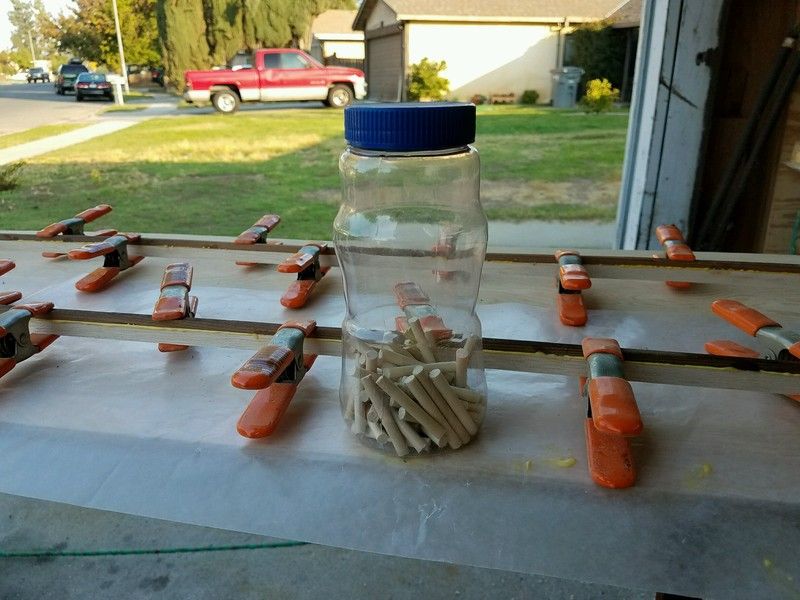
While waiting for glue to dry I cut up a couple lengths of ¼” dowel, to use to protect the cove edges while clamping.
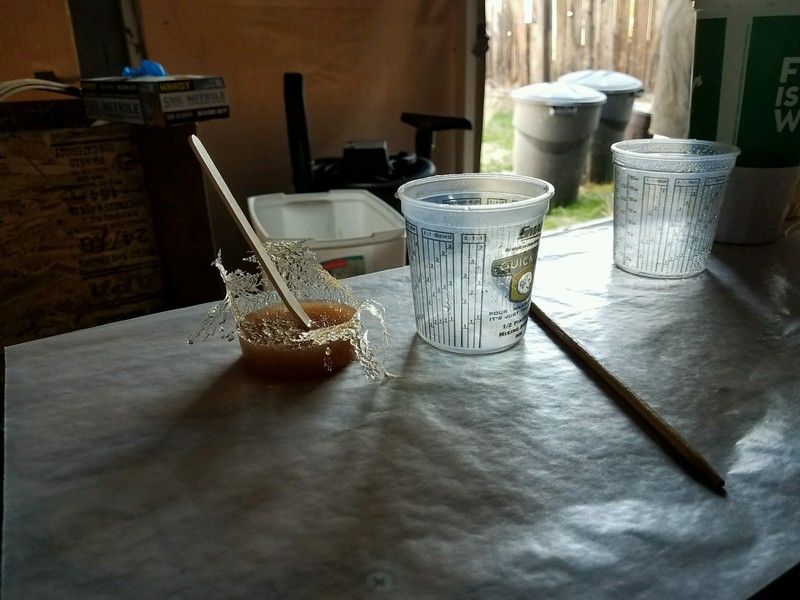
It’s kinda nice having mixing cups that are reusable. Let excess build up, poke a stick in it and let it cure, then pop it out and it’s ready to go for another batch.
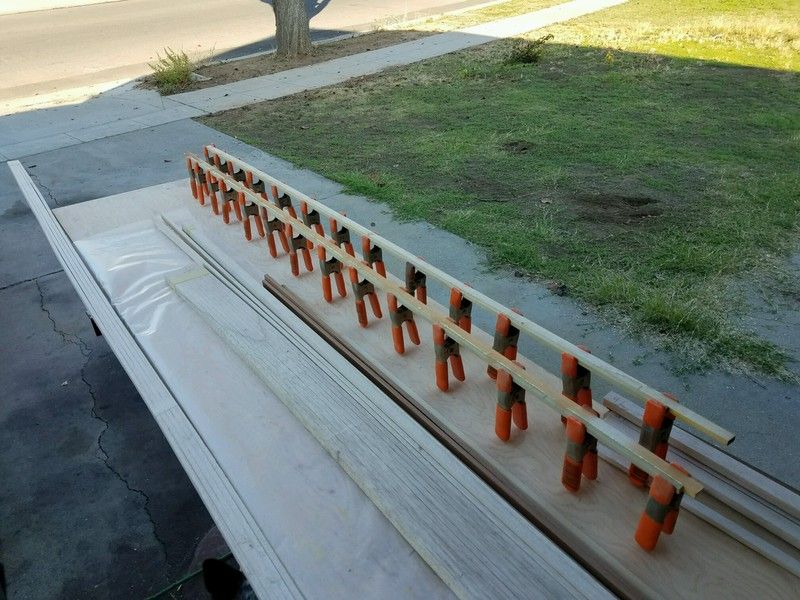
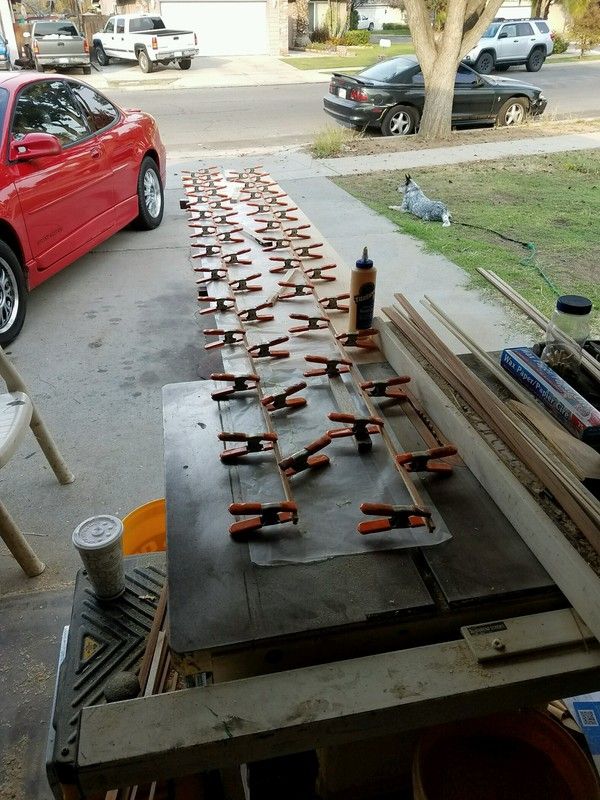
Next come the longer accent strips. Takes a lot of clamps, but I can put them up in just a few minutes, wait an hour and take them off and do the next couple.
I’ll try to finish those up tomorrow so I can start actually building a boat this week.
Rehd

Started putting together some of the accent strips. These go in the football area.

While waiting for glue to dry I cut up a couple lengths of ¼” dowel, to use to protect the cove edges while clamping.

It’s kinda nice having mixing cups that are reusable. Let excess build up, poke a stick in it and let it cure, then pop it out and it’s ready to go for another batch.

Next come the longer accent strips. Takes a lot of clamps, but I can put them up in just a few minutes, wait an hour and take them off and do the next couple.
I’ll try to finish those up tomorrow so I can start actually building a boat this week.

Rehd
Re: Non-Bear Mountain Designs
Stem alignment trick.
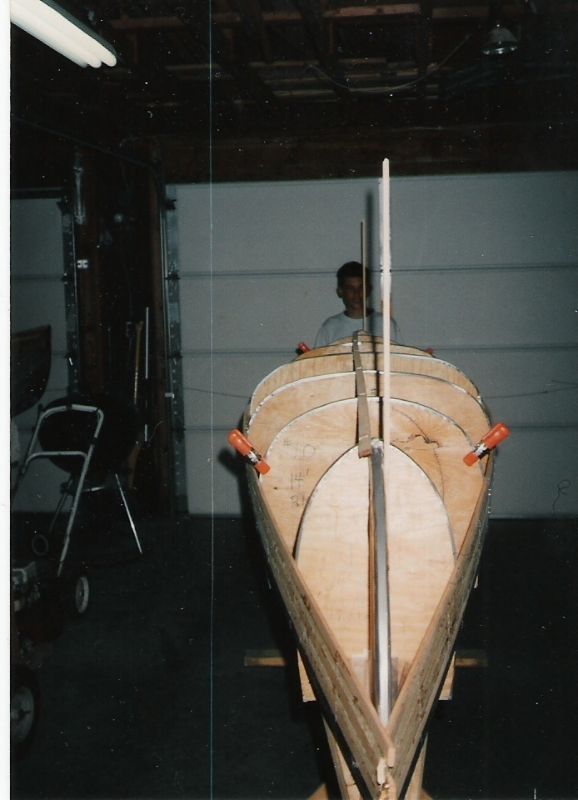
Old pic, but it should give you an idea. Take a couple of scrap strips, and staple both on the Starboard or the portside. I leave these stapled to the stem forms, until I have enough strips on that I know the stems won't shift.
Jim
Old pic, but it should give you an idea. Take a couple of scrap strips, and staple both on the Starboard or the portside. I leave these stapled to the stem forms, until I have enough strips on that I know the stems won't shift.
Jim
Keep your paddle wet and your seat dry!
Re: Non-Bear Mountain Designs
I used to use cut up dowels, but on my last build I had bought some new dowel lengths (which are dirt cheap) and was ready to cut them up .... but when I thought about it, I just couldn't see why I was doing that.
Long story short, it was easier to just use the 4' lengths directly on the strips, and it would definitely give better spread of the clamping pressure. It also simplifies how you apply clamping pressure because it can go anywhere on the strip, it's all covered. I use 3/16" bungee cord to clamp strips, so having it all covered definitely simplifies that operation.
Made dowel handling a lot easier as well, instead of handing many small pieces, I had a couple of longer dowels. I sacrifice the last dowel length (pair of side cutters) as the strip length starts to shrink.
Just a thought.
Brian
Re: Non-Bear Mountain Designs
How about just ripping a strip in half, and using the beaded edge ?Cruiser wrote:I used to use cut up dowels, but on my last build I had bought some new dowel lengths (which are dirt cheap) and was ready to cut them up .... but when I thought about it, I just couldn't see why I was doing that.
Long story short, it was easier to just use the 4' lengths directly on the strips, and it would definitely give better spread of the clamping pressure. It also simplifies how you apply clamping pressure because it can go anywhere on the strip, it's all covered. I use 3/16" bungee cord to clamp strips, so having it all covered definitely simplifies that operation.
Made dowel handling a lot easier as well, instead of handing many small pieces, I had a couple of longer dowels. I sacrifice the last dowel length (pair of side cutters) as the strip length starts to shrink.
Just a thought.
Brian
Jim
Keep your paddle wet and your seat dry!
Re: Non-Bear Mountain Designs
That's a thought Jim, but the dowel fits right into the cove and is quite secure, the minute you add wood above the cove, it wants to twist out. I only build stapleless, so whatever is used to clamp the strip will need something that is not going to easily move around or out of the cove. Dowels fill the bill.
Brian
Brian
-
Rehd Brown
- Posts: 148
- Joined: Sat Sep 08, 2007 8:23 pm
- Location: Fresno, California
Re: Non-Bear Mountain Designs
Now ya tell me..! :-p
Well, I'm already this far with the dowels, but next time, using a long length or a partial strip both sound like excellent options. I'm using my stack of pony clamps to hold strips in place and there's about 300 of them. I can work continuously around the boat, clamping one side, then working on the other, and when done with the second, clamps come off the first side and I start again. Should move reasonably quickly.
But, I've been wrong before..!!
Rehd
Re: Non-Bear Mountain Designs
lol, famous last words.
Re: Non-Bear Mountain Designs
I guess when I think about it, the full length dowels make sense for the way I do my strips, you can see (the bungee cords) that in the second pic I posted for the accent strip comment, I basically use lengths of 3/16" bungee cord wrapped around the strips to clamp each new strip. So it is easier for me to just use a continuous dowel and not worry about were I wrap .... if you are doing the clamping at each station, something else may work better.
I like to have a couple of compression points between each station, so the wrap gives me the flexibility to apply as much pressure where ever I feel it's needed, just by using another length of bungee cord (I have a bunch of 15' pieces I use).
Brian
I like to have a couple of compression points between each station, so the wrap gives me the flexibility to apply as much pressure where ever I feel it's needed, just by using another length of bungee cord (I have a bunch of 15' pieces I use).
Brian
Re: Non-Bear Mountain Designs
OK ANOTHER suggestion. 
I don't go stapleless, but a friend uses old bicycle inner tubes, he gets for free at his bike shop. I think the bungees would be better, as the inner tubes might leave black rubber on the strips.
I used to buy bungee cord at our local hardware store. Not any more. Do you have a good source Brian ?
Thanks !
Jim
Keep your paddle wet and your seat dry!
Re: Non-Bear Mountain Designs
I just go to the local hardware chain, in Canada that is Canadian Tire, if I was buying again, I would get 3/16" latex/surgical tubing.
I bought the bungee, then figured out that the other would be better, but I am too cheap to throw out what I have and buy new ... it still works.
I suspect that 3/16" rubber tubing will be very easy to find.
Brian
I bought the bungee, then figured out that the other would be better, but I am too cheap to throw out what I have and buy new ... it still works.
I suspect that 3/16" rubber tubing will be very easy to find.
Brian
Re: Non-Bear Mountain Designs
Surgical tubing. That should be even better !
And just incase I need a transfusion, I'd be set !
Thanks again Brian !
Jim
And just incase I need a transfusion, I'd be set !
Thanks again Brian !
Jim
Keep your paddle wet and your seat dry!