15' 0" Freedom
-
Patricks Dad

- Posts: 1476
- Joined: Wed Oct 13, 2004 1:11 pm
- Location: Warrenville, Illinois
-
Glen Smith

- Posts: 3719
- Joined: Sat May 08, 2004 9:08 am
- Location: Baie-St-Paul, Quebec, Canada
-
Patricks Dad
- Posts: 1476
- Joined: Wed Oct 13, 2004 1:11 pm
- Location: Warrenville, Illinois
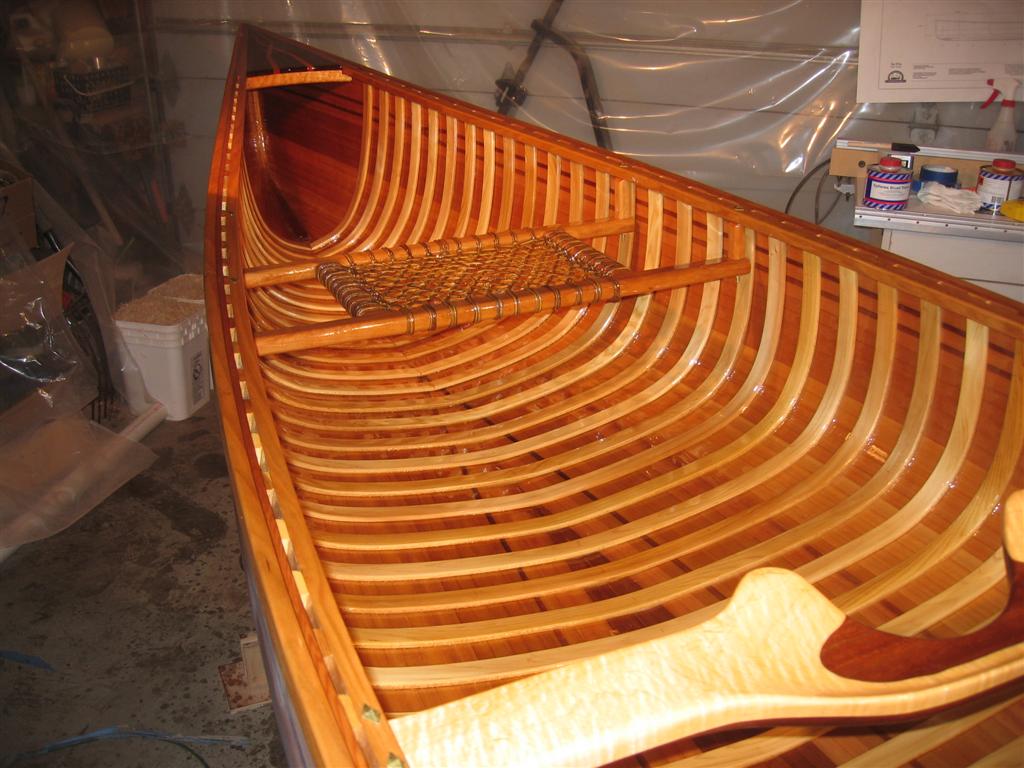
Good question....
Several answers:
1. I got tired of putting the darn things in.
2. I ran out of rib material.
3. I plan on putting in bulkhead covers (or whatever-you-call'em) some day so the ribs would just be in the way and I would have to seal between them at the deck anyway. More trouble than it was worth and they wouldn't be visible anyway.
That's my story and I'm sticking to it.
-
Glen Smith
- Posts: 3719
- Joined: Sat May 08, 2004 9:08 am
- Location: Baie-St-Paul, Quebec, Canada
Here's my latest update. I haven't worked on the canoe for a while, and won't be working on it for maybe a couple of months. Two weeks I ago participated in The Battle of Sluggo And The Scooter vs. The Van. The Van won, so I'm licking my wounds (ie recovering).
I managed to glass the outside with 2 layers of 3oz cloth Style 1678 from Thayercraft. The wetout was a bit challenging but not too bed with some help. I bought a fiberglass roller which I thought really helped for wetting the tight weave cloth. I did somehow get a bit of float, even though everything looked good after the squeegee. Here are a couple shots of the wetout and fill.


s.
I managed to glass the outside with 2 layers of 3oz cloth Style 1678 from Thayercraft. The wetout was a bit challenging but not too bed with some help. I bought a fiberglass roller which I thought really helped for wetting the tight weave cloth. I did somehow get a bit of float, even though everything looked good after the squeegee. Here are a couple shots of the wetout and fill.
s.
-
jfranck
Freedom 15 - a great design for a stable, versatile canoe
:smile
I have built a Freedom 15 (my first canoe) and have just finished a written summary and with a few pictures. I hope it will be helpful to those thinking about building a woodstrip canoe. I enjoyed building it as much as using it. It took me about a year to build (just a few hours a week).
The web site is http://mysite.verizon.net/jimfranck/id10.html
Designing the web site was almost as much work as building the canoe - and I used to teach computers.

-
Glen Smith
- Posts: 3719
- Joined: Sat May 08, 2004 9:08 am
- Location: Baie-St-Paul, Quebec, Canada
I have the outside pretty much sanded now. One quadrant of the boat had decent epoxy runs. Getting rid of the runs wasn't a big deal, but there wasn't much epoxy coverage as a result. That's ok, prior to varnishing I will be putting on one or two very thin coats of epoxy and sanding with 180grit. I got this from Rob Mack's building plans, I think it works better for my style. The big thing I'm going to concentrate on is post-application care of the epoxy. In other words, check on the epoxy every 20min to make sure there are no runs and other issues. I wasn't able to do this up to this point, as I was stuck with late-night epoxy applications (due to family) and didn't want to check on my work at 3am!


-
Glen Smith
- Posts: 3719
- Joined: Sat May 08, 2004 9:08 am
- Location: Baie-St-Paul, Quebec, Canada

The gunwales are scarfed and shaped, I have borrowed a drill press to cut a few slots for the inwales (will finish later today), the seat frames are glued and will be drilled with the drill press, the cane is in my house and ready for action. Things are moving along! My blog has updated bits and pieces of info.
