when i was looking through the website of the manufacturer of my epoxy, i noticed that they had a range of water based polyurethane top coats designed specifically for marine use. aside from the colours, they also had a clear top coat. after getting a sample pack to try out i decided this was the way to go.
i remembered that someone else had posted in the build section using a water based product, but wasn't sure if it could be sprayed. although from a different manufacturer, it sounded like a similar product in so much as rather than using a large volume catalyst it used a small volume cross linker. i figured since i was spraying i'd post something here about my experiences.
ok, the product itself. i've had experiences spraying and airbrushing with water based automotive base coat, so it didn't catch me by as much surprise as it might some, but, in liquid form it's milky.
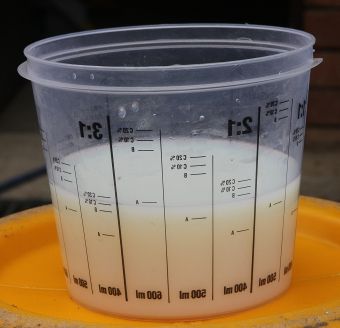
don't freak out, in thin film it's clear, a bit like pva glue.
for this particular product, aquacote, you use 1.5% cross linker. the cross linker remains active for 4 to 6 hours, after which time it breaks down. this means that any product left over can be strained and re-used, you just have to add more cross linker. thinning is with water. they say up to 10% and unlike the organic solvent based clear which can be over reduced happily, if you go much over 10%, it breaks and won't form a smooth film. you end up with frogs eyes, not good.
for gun setup, they recommend a 1.4mm tip standard gun (not hvlp) @50psi. i used my gravity feed 1.4mm for the hull, but a 1mm gravity fed touch up gun for the gunwales, decks, thwart and seat frames. to be honest i think a 1.2mm tip for the big gun would have been easier. i got a better finish with the stuff i used the touch up gun for.
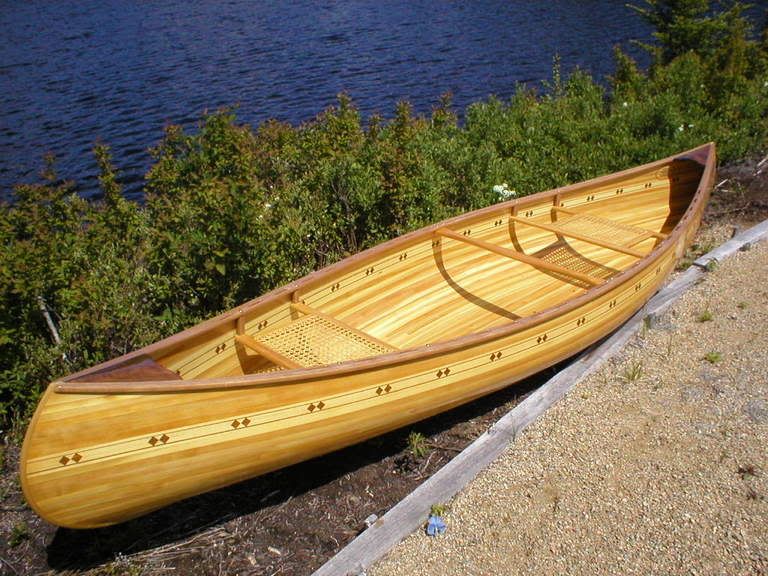
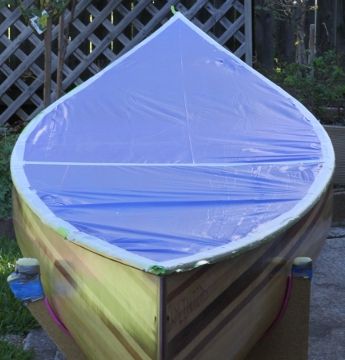
all the surfaces coated had first been coated with epoxy and allowed a week or so to cure. the inner hull, gunwales and other trim was prepared by dry sanding with grey automotive scuff pad. the outer hull was dry sanded with 240 grit paper, then the scuff pad. the end result looks something like this:
at an angle there is a slight sheen, but that's ok. if when you wipe it with a wet cloth it forms a film rather than bead up, that's about right. if you decide the lump of timber in front of you isn't a boat but is in fact a hot rod you were planing on prepping it for concourse then you could grab a can of cheap black spray paint and mist on a coat. work your way through wet sanding starting with 800 grit and keep going till all specks of black is gone. sorry, but i'm spraying a canoe, so the scuffed surface is good enough.
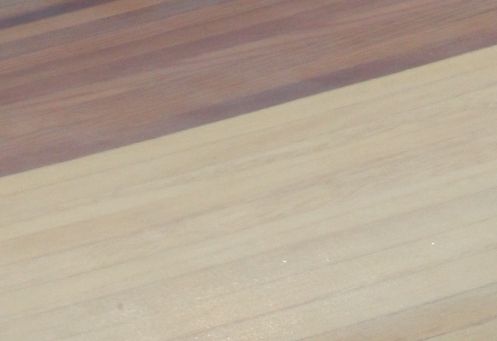
you can get a reasonable gloss with this stuff, but don't expect polished glass. for the inside hull i wanted more of a matt finish. to achieve this i left the pressure the same, but opened the fan pattern right out and sprayed much further back than usual. 7 coats later and i'd laid down the same amount of material as 3 normal coats. the end result was a fairly flat finish with a silky feel.
here you can see the contrast in the sheen:
the outer hull was a different story. i started by masking the top and gunwales.
this stuff dries fast, so over spray can be an issue. the recommendation of the manufacturer is to mask half the hull and spray it in two sessions. i decided to do this, but to get a nice "seamless" seam i used an old trick i've used several times before with no problem, didn't work this time.
the first coat is pretty important, since it sets up the foundation for the rest. it needs to be misted on to get the best adhesion. a bit like a tack coat. manufacturer says follow this with 3 - 4 full coats. they specify how much coverage each coat should be, but since i had no idea what the surface area of the hull is and couldn't find it published anywhere (wetted surface area helps me not!), i just sprayed the way i normally would. well, i ended up with it getting under the curl of the tape giving me a worse seam than if i laid the tape flat, and runs all the way along the hull. i must have been fairly close because the runs were clear. if you get carried away runs with this product can stay milky, even after curing.
dealing with the runs and centre line. unlike the automotive products i'm used to, you can't deal with these in the same way. whilst the water based stuff touch dries very quickly, it takes days to dry out and finish shrinking. the end result is that after 24 hours it's still rubbery. normally you scrape high spots like runs and tape lines with a razor blade or scalpel. i found it was chattering much like using a plane against the grain, or worse, tearing the coat. for similar reasons you can't remove masking tape when you finish spraying if you have built up a fairly thick coat. for the "keel line" i bend a scalpel blade into an arc, placed the apex of the arc flat against the hull and cut the raised tape line. as for the runs i waited a few days then tried to scrape the runs. it mostly worked. normally with runs if you try sanding them out you usually end up sanding through the coat down to the substrate. in this case i found that dry sanding with 240 grit paper actually worked really well. i also sanded the centre line smooth.
ok, so, take two! i masked the half i'd already sprayed with a flat taped centre line and this time sprayed the same amount of clear to the other half. this time i applied it the same way i apply water based base coat. the idea is fine atomisation similar to the inside of the hull, only laying down slightly wetter coats and building them up slowly for full coverage. they started out dull but gloss slowly built up with successive coats. 7 coats later and i'd applied the same amount of material as the other half and the gloss level was the same and no hint of any runs. about 5 - 10 mins between coats. there doesn't seem to be a tacky phase, it goes from being wet to dry, so when it's touch dry, it's ready for the next coat. i wait for the whole coat to be dry before applying the next one.
since i'm not sure if this product can be wet sanded and buffed, i sanded the whole hull again using grey scuff pads, masked the underside of the gunwales again and sprayed what product i had left.
this time i did not mask half. the speed of application from the previous spraying lead me to the conclusion that i'd be able to spray the whole outer hull even with the fast drying time. there are several spray patterns that could be used to approach this. i chose to spray a single stroke about a meter long down the centre, then followed the arc of the strips. i sprayed each stroke on one side of the hull, then leant over to spray it's mirror on the other side and worked along the football alternating sides with 50% overlap. once the football area was coved i continued by following the pattern by walking the gun down the length of the hull, around the stem and up the other side to the opposite stem, giving a little flick to give that stroke coverage at that stem, then walking back down the same side with 50% overlap, around the stem and back to my starting place, and repeat till you get the gunwale. this pattern worked and kept the over spray headed down and away from the surface that had already been sprayed.
unfortunately i only had enough material for a tack coat and 3 thin coats. this was the result:
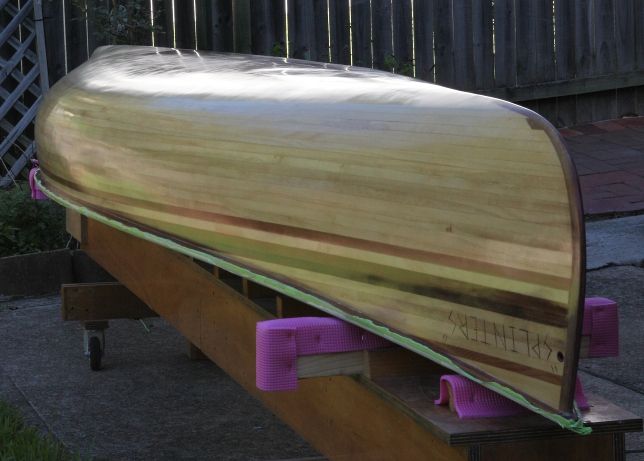
another 2 coats and it would have been smoother and glossier, but i'm happy enough with where it's at.