19' 9" Chaa Creek Expedition
Re: 19' 9" Chaa Creek Expedition
Jim,
Usually when the molds are setup, the order is
- bow/stern assemblies first
- setup the alignment string
- then start at each end and work to the center station, aligning to the string for each station
Each station will likely require some horizontal "adjustments" to make them all line up with each other ... the bottom is aligned to your strongback center mark, then the station is tilted (keeping the bottom on the mark) to make sure it also aligns at the center mark at the top.
I just did that in this thread:
viewtopic.php?f=3&t=2006&start=60
Now if you were just putting a few stations on to see what it would like , then ignore the comment ... otherwise, the initial alignment is a pretty big deal.
Brian
- jimlgordon
- Posts: 109
- Joined: Mon Nov 20, 2017 6:57 pm
- Location: Bainbridge Island, Washington
Re: 19' 9" Chaa Creek Expedition
Yeah, I set up a few so the others in the woodshop can get an idea of the space requirements. They aren't tightened down yet. Another kayak building class (Joe from Redfish Kayaks in Port Townsend) will be starting up next month so we are figuring out the space requirements. The strongback however is now all tightened up now and ready to go. I have a slot in the block where the molds attach so I can wiggle them around to adjust as needed. I got in on the kayak building class with Joe in that same woodshop. I imagine this canoe will be easier in some ways than a kayak and harder in others... bigger, more strips, and fancier, hand built seats. This will be our first time with two boats underway like this so it will be a good test.
Re: 19' 9" Chaa Creek Expedition
Always good to do two at a time ! Let the kayak get ahead of you, and you can benefit from the mistakes !
I can't believe I said that !
Keep the pics coming !
Jim
I can't believe I said that !
Keep the pics coming !
Jim
Keep your paddle wet and your seat dry!
- jimlgordon
- Posts: 109
- Joined: Mon Nov 20, 2017 6:57 pm
- Location: Bainbridge Island, Washington
Re: 19' 9" Chaa Creek Expedition
Kayak class cancelled... I got the green light to proceed with the build. Started attaching and adjusting the forms. Lasers are cool.
Re: 19' 9" Chaa Creek Expedition
Just a little jealous .... you have better toys than I do, lol
Brian
Brian
- Patricks Dad
- Posts: 1477
- Joined: Wed Oct 13, 2004 1:11 pm
- Location: Warrenville, Illinois
Re: 19' 9" Chaa Creek Expedition
I found the blur of the laser to be too much and the effort to align it too time-consuming. I went back to the fine string. It's easy to set up and stays put...
But yes lasers are cool...
But yes lasers are cool...
- jimlgordon
- Posts: 109
- Joined: Mon Nov 20, 2017 6:57 pm
- Location: Bainbridge Island, Washington
Re: 19' 9" Chaa Creek Expedition
Should I pre-glue short strips into longer ones before planking or do that while planking? Skarf joint or butt joint?
- Patricks Dad
- Posts: 1477
- Joined: Wed Oct 13, 2004 1:11 pm
- Location: Warrenville, Illinois
Re: 19' 9" Chaa Creek Expedition
Butt joints on the fly. Some builders build up their strips on the bench using scarf joints. Others don't. Do what feels right to you.
Re: 19' 9" Chaa Creek Expedition
Either way works ... pick what will work best for you .... I would check the forums here for tips/tricks on doing what you pick. I suspect butt joints on the boat will be easiest, in which case you will want a few small strips pieces covered in tape to act as a splint (spring clamp in place) when you make them.
If I know I am going to have short lumber and a lot of joints to do ... my preference is to skarf the source lumber into suitable lengths. This allows me to control/stagger where the joints occur and I am only doing a few joints instead of many individual ones.
Brian
If I know I am going to have short lumber and a lot of joints to do ... my preference is to skarf the source lumber into suitable lengths. This allows me to control/stagger where the joints occur and I am only doing a few joints instead of many individual ones.
Brian
Re: 19' 9" Chaa Creek Expedition
I glue up splices right on the canoe. Preferably between the forms, and at places that doesn't stress the strip.
The bead and cove is a great aid in holding strips in place !
A pic of how I do it.
I like to use the bigger 2" spring clamp, that way I can continue with my next course of strips.
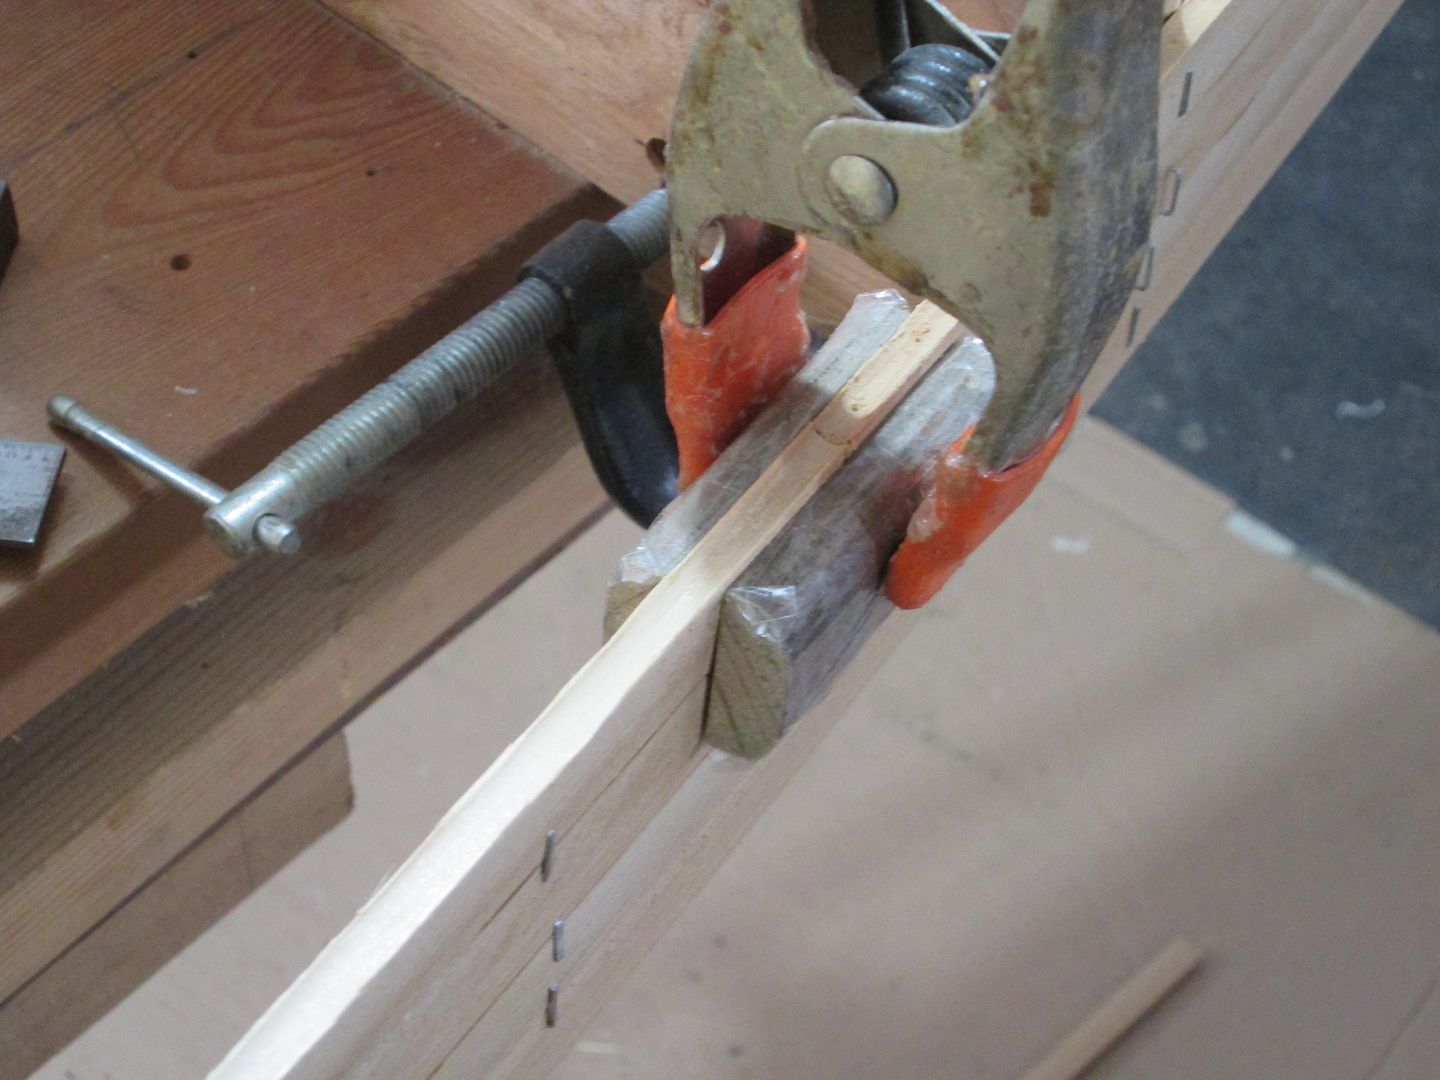
Be sure to cover the little clamping blocks with tape !
Jim
PS ! I prefer Fish line for setting my forms. To me it's more precise, but a lazer is fine !
The bead and cove is a great aid in holding strips in place !
A pic of how I do it.
I like to use the bigger 2" spring clamp, that way I can continue with my next course of strips.

Be sure to cover the little clamping blocks with tape !
Jim
PS ! I prefer Fish line for setting my forms. To me it's more precise, but a lazer is fine !
Last edited by Jim Dodd on Sat Dec 30, 2017 5:24 pm, edited 1 time in total.
Keep your paddle wet and your seat dry!
Re: 19' 9" Chaa Creek Expedition
While you are prepping to strip, I'll pass on some pics, that might help as you go .
If you plan to use staples. adding several layers of tape to the bottom of your stapler, will prevent bruising of the wood, by sinking the staples too far in. Also makes it a lot easier to remove the staples !
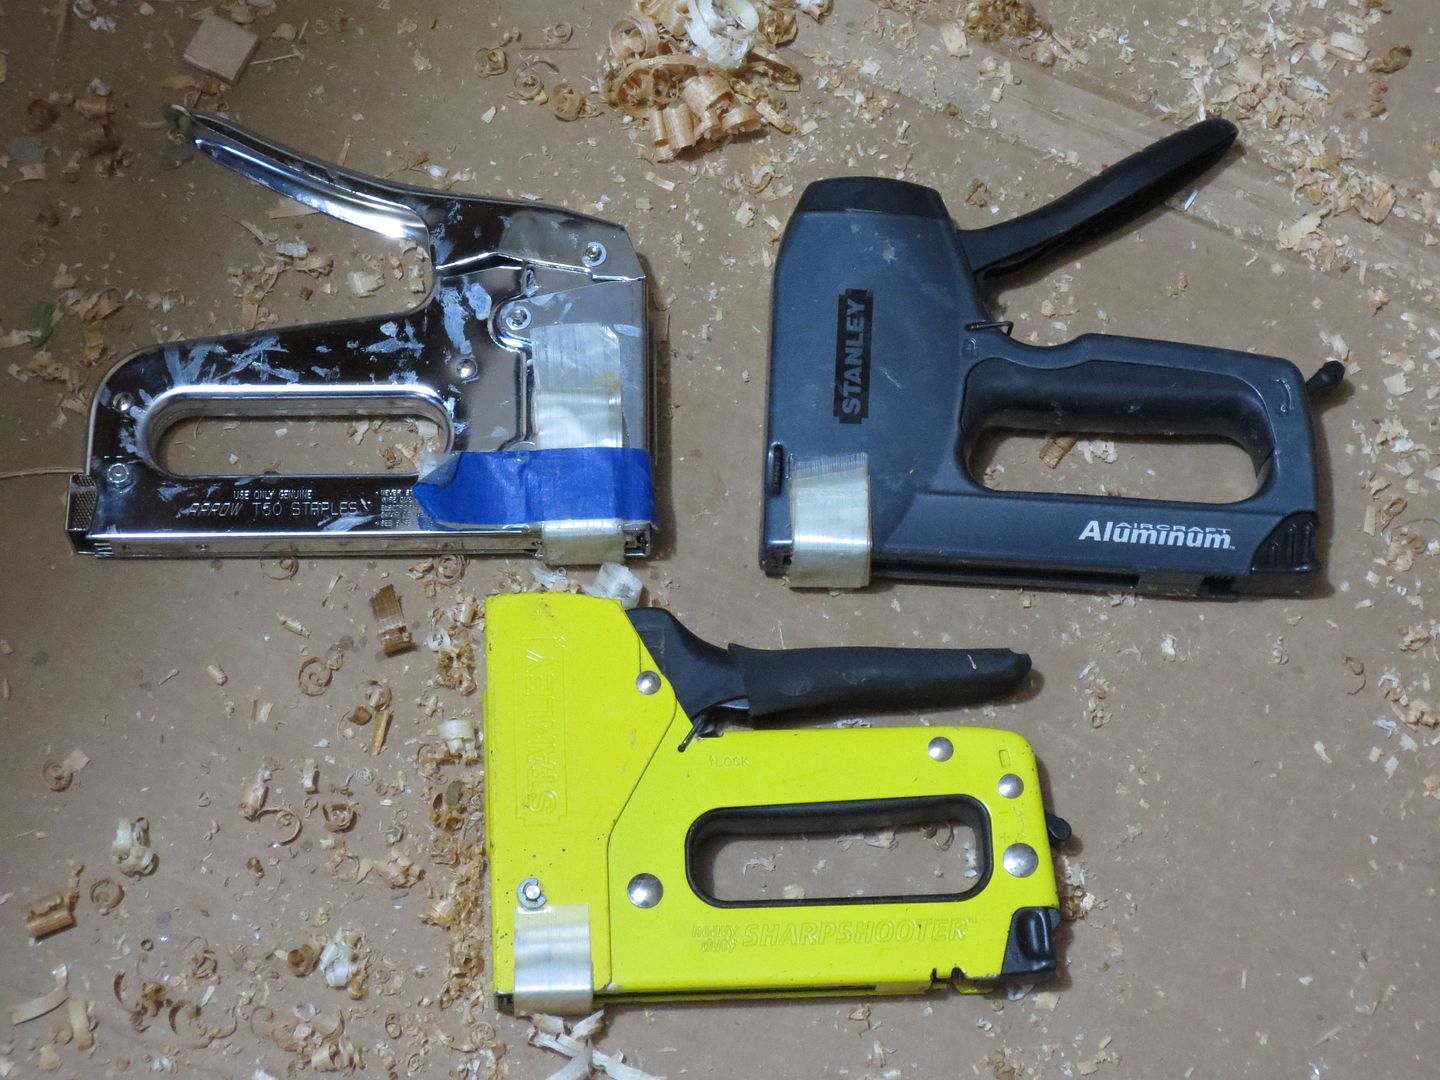
When fitting strips, a light on the strongback helps to see where the strips need trimming.

I like to tape my center form a different color, as I always start stripping from the center out. Also I make a mitre box, that sits between the forms, for squaring up splice joints, right on the forms.
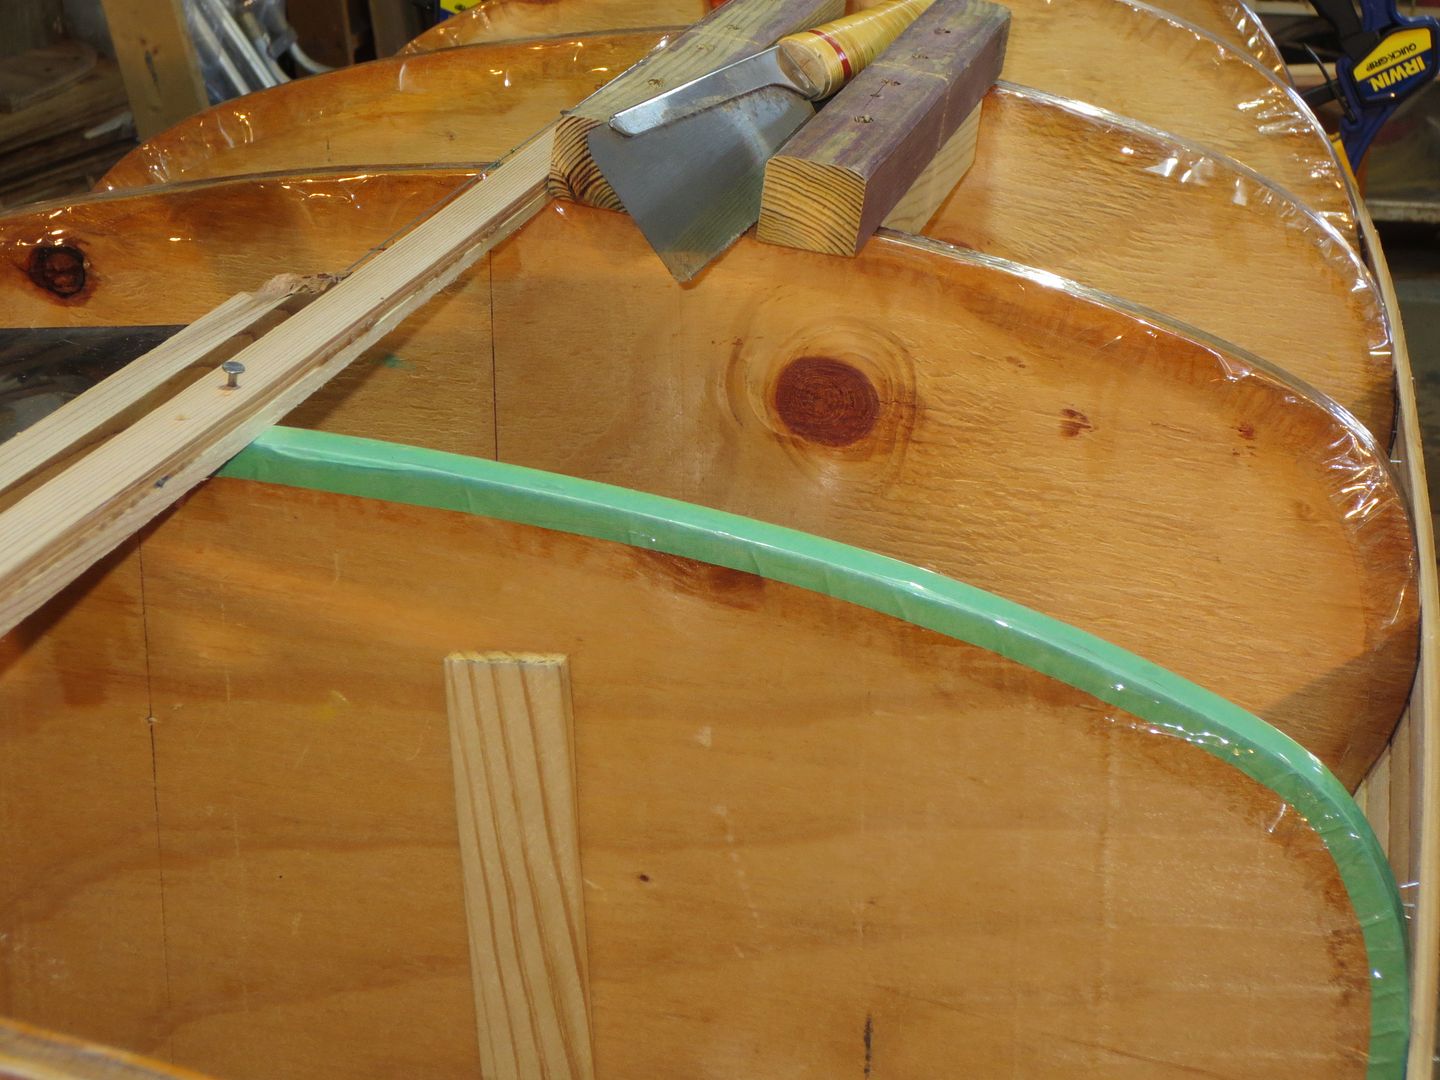
I like to fasten my forms to the cleats on the strongback with C-clamps. This makes it super easy to adjust the forms, during set up. They provide a clamping surface to persuade strips that don't want to stay tight to the forms. Also a handing holding place for my glue bottle. I love a small pencil shaped tip on the glue bottle.
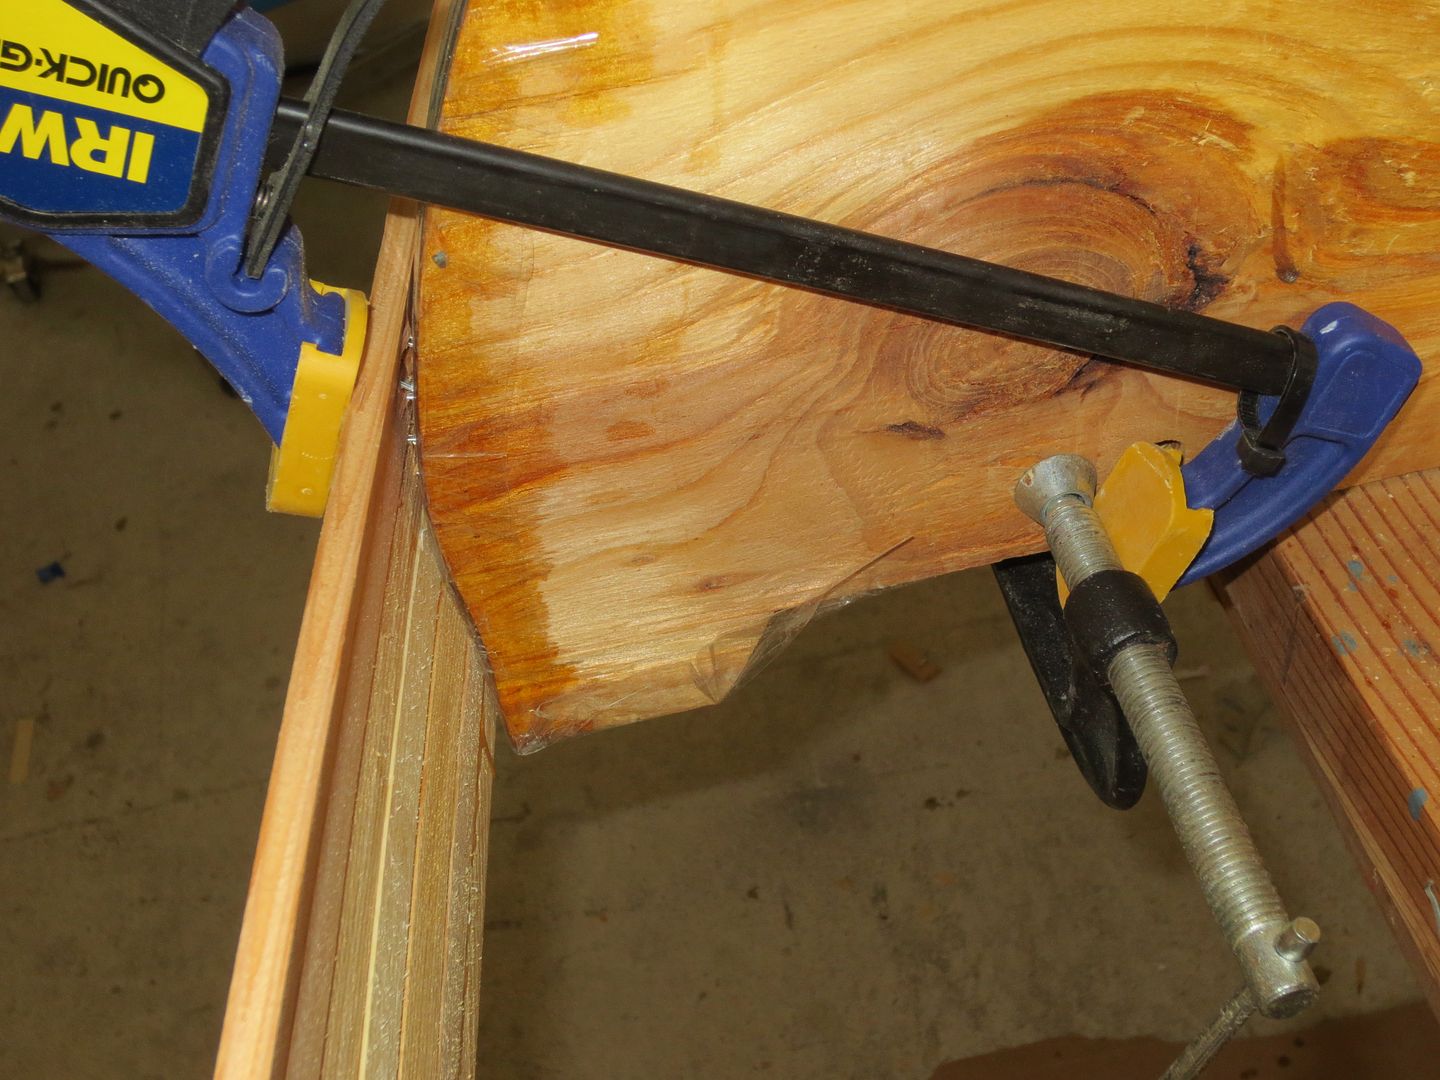
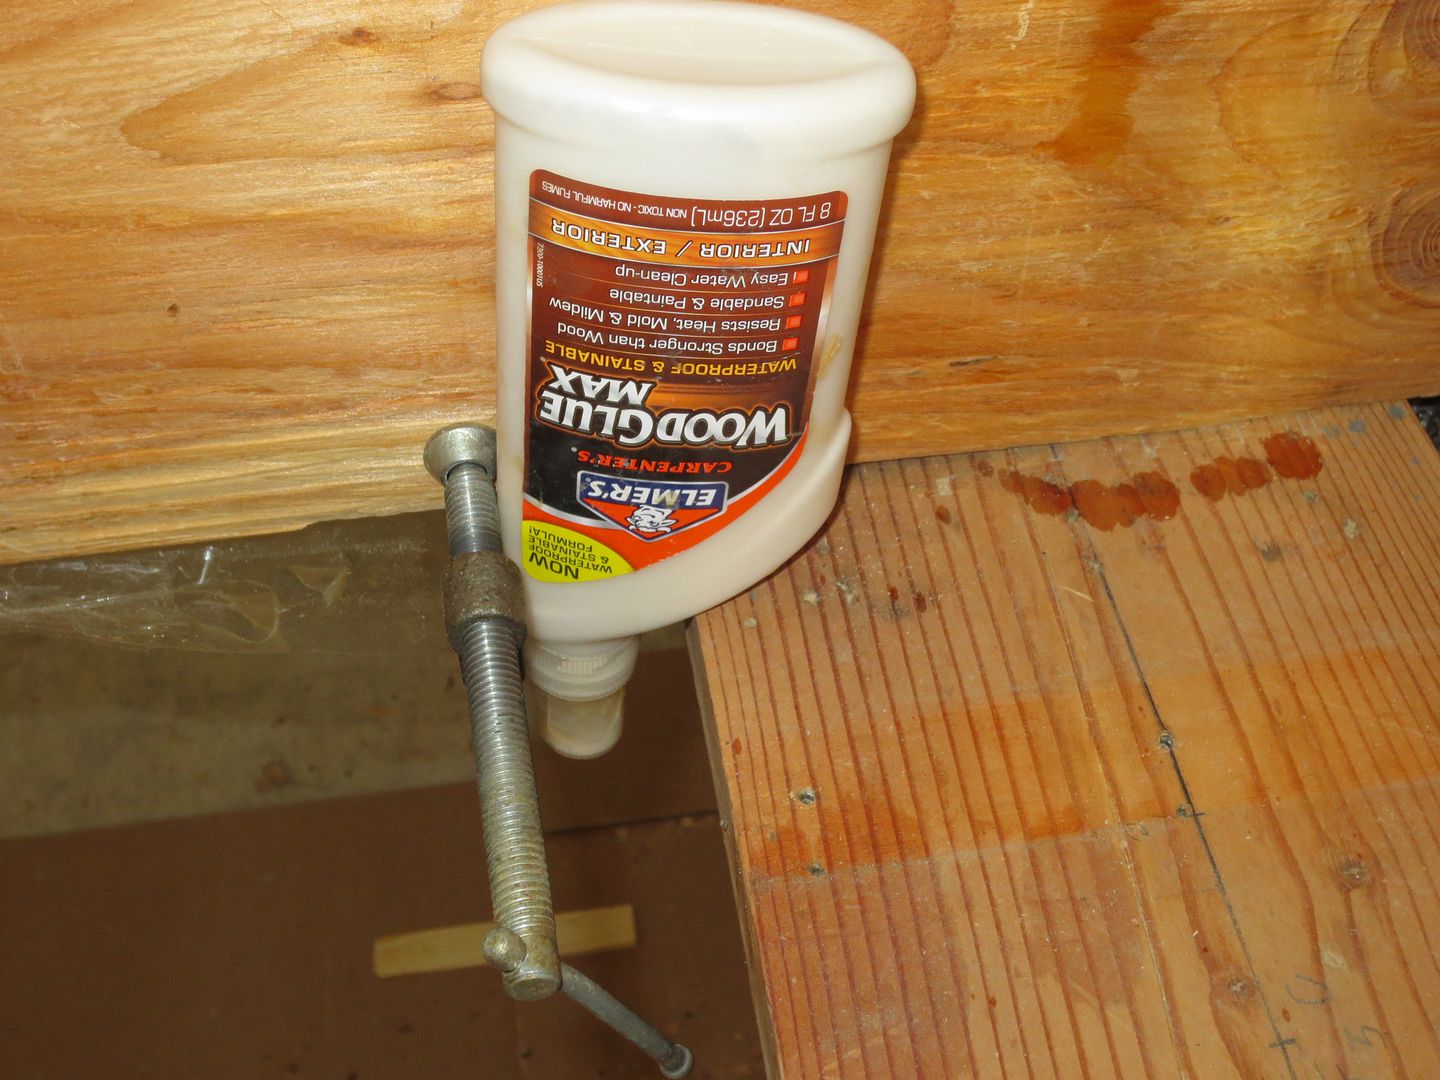
For squeezing glue out of the bottle, I enlist the help of a 2" spring clamp ! It saves these Old hands a lot of suffering !

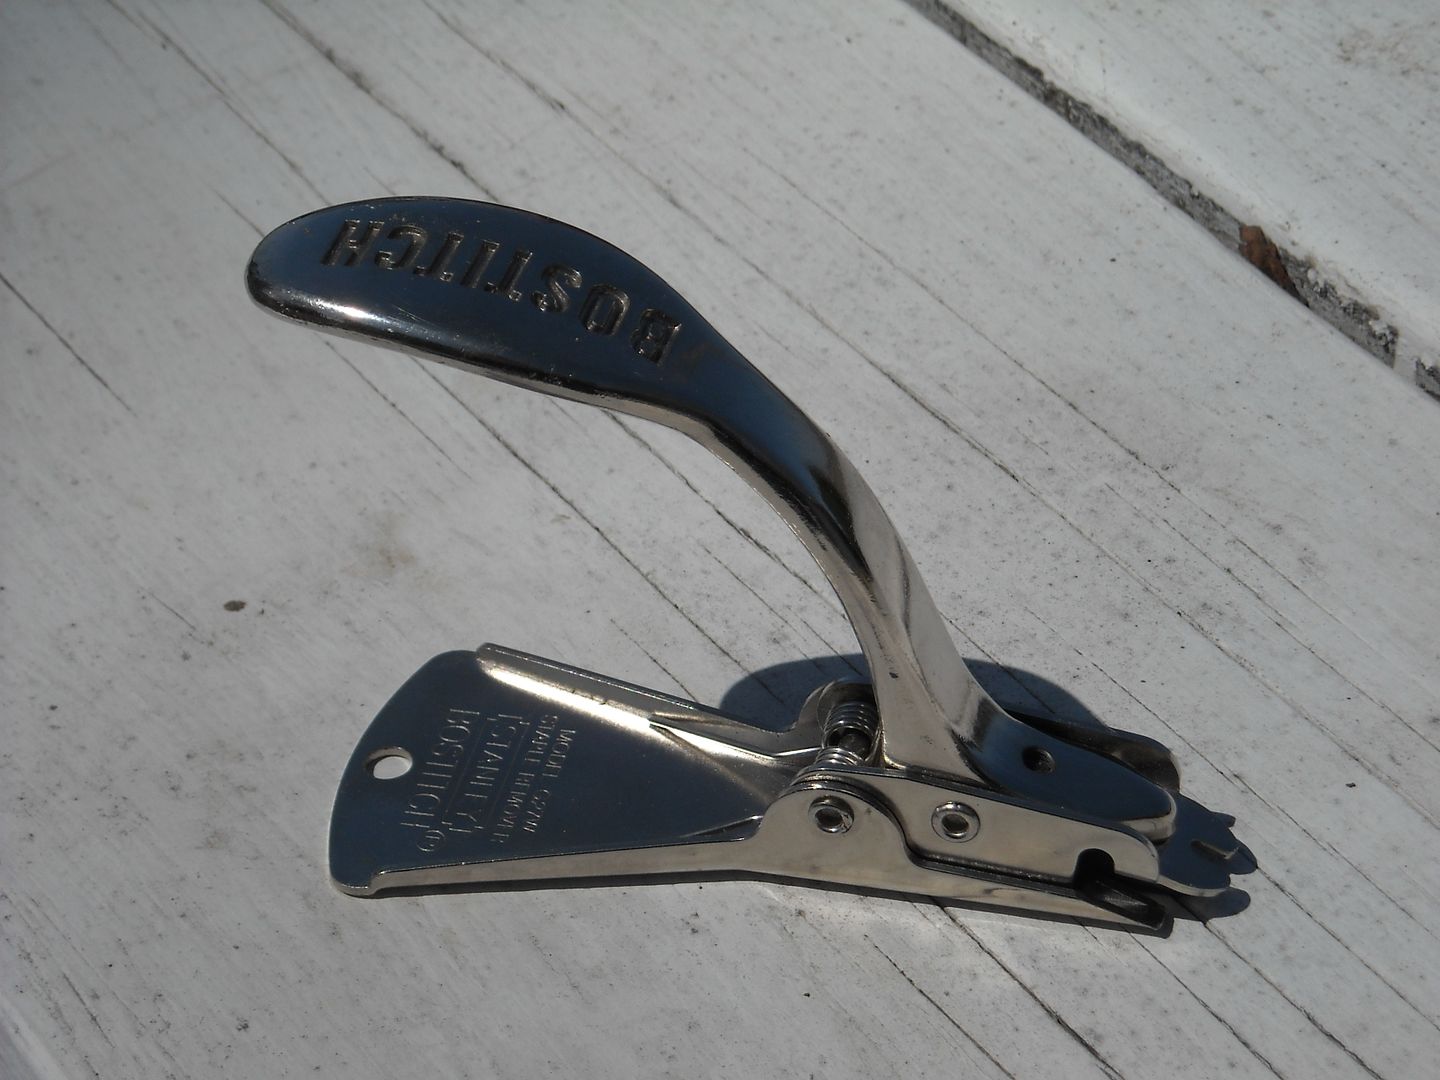
My favorite staple pulling tool. Available at some online Office supply stores. Fairly inexpensive, and a great tool ! Order two, incase you can get a helper !
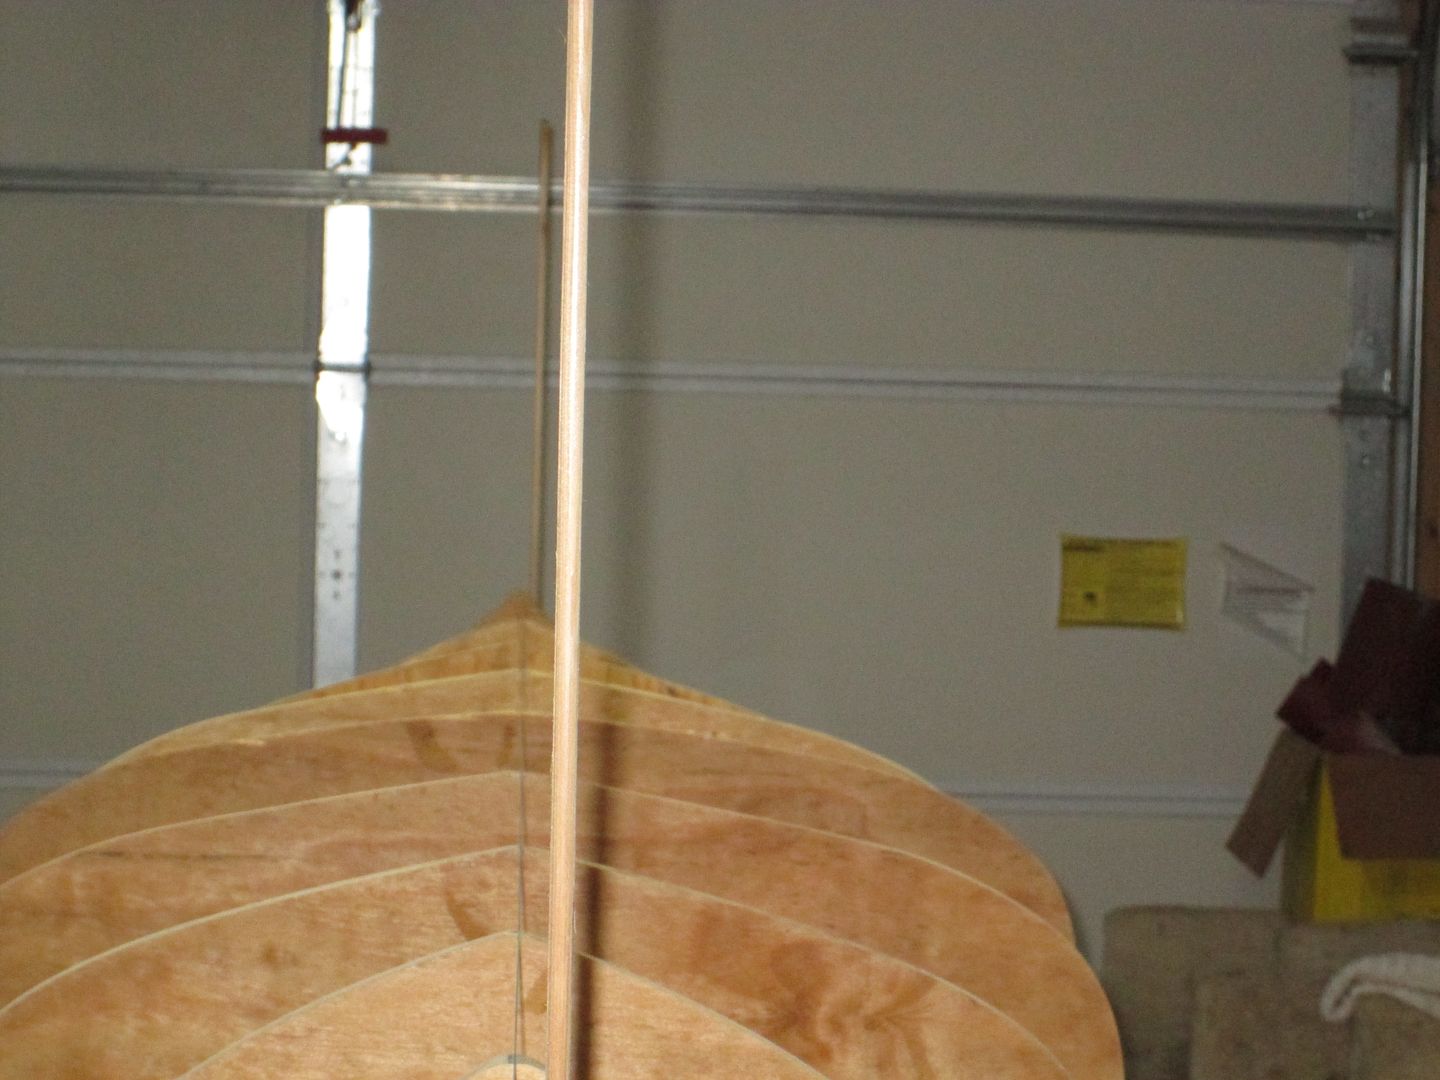
Last but not least ! I staple two temporary strips to the stem forms, one, sometimes two on each, to check vertical stem alignment.
I leave these on, until I'm at least half way up the sides, with strips. Or until they are in my way !
Thats a few tips, I hope will help during the stripping process !
Good Luck !
Jim
If you plan to use staples. adding several layers of tape to the bottom of your stapler, will prevent bruising of the wood, by sinking the staples too far in. Also makes it a lot easier to remove the staples !

When fitting strips, a light on the strongback helps to see where the strips need trimming.

I like to tape my center form a different color, as I always start stripping from the center out. Also I make a mitre box, that sits between the forms, for squaring up splice joints, right on the forms.

I like to fasten my forms to the cleats on the strongback with C-clamps. This makes it super easy to adjust the forms, during set up. They provide a clamping surface to persuade strips that don't want to stay tight to the forms. Also a handing holding place for my glue bottle. I love a small pencil shaped tip on the glue bottle.


For squeezing glue out of the bottle, I enlist the help of a 2" spring clamp ! It saves these Old hands a lot of suffering !

My favorite staple pulling tool. Available at some online Office supply stores. Fairly inexpensive, and a great tool ! Order two, incase you can get a helper !

Last but not least ! I staple two temporary strips to the stem forms, one, sometimes two on each, to check vertical stem alignment.
I leave these on, until I'm at least half way up the sides, with strips. Or until they are in my way !

Thats a few tips, I hope will help during the stripping process !
Good Luck !
Jim
Keep your paddle wet and your seat dry!
- jimlgordon
- Posts: 109
- Joined: Mon Nov 20, 2017 6:57 pm
- Location: Bainbridge Island, Washington
Re: 19' 9" Chaa Creek Expedition
They were a little uneven so I planed them slightly... just shaved a little off and knocked off some high spots.
- jimlgordon
- Posts: 109
- Joined: Mon Nov 20, 2017 6:57 pm
- Location: Bainbridge Island, Washington
Re: 19' 9" Chaa Creek Expedition
The molds are ready for planks now.
Re: 19' 9" Chaa Creek Expedition
Looks Great !
Now for the fun part ! I love seeing a hull take shape as it's stripped. The anticipation level rises with every strip !
Jim
Now for the fun part ! I love seeing a hull take shape as it's stripped. The anticipation level rises with every strip !
Jim
Keep your paddle wet and your seat dry!
- jimlgordon
- Posts: 109
- Joined: Mon Nov 20, 2017 6:57 pm
- Location: Bainbridge Island, Washington
Re: 19' 9" Chaa Creek Expedition
setting up mill the cove and bead on the mountain of strips