19' 9" Chaa Creek Expedition
-
jimlgordon

- Posts: 109
- Joined: Mon Nov 20, 2017 6:57 pm
- Location: Bainbridge Island, Washington
Re: 19' 9" Chaa Creek Expedition
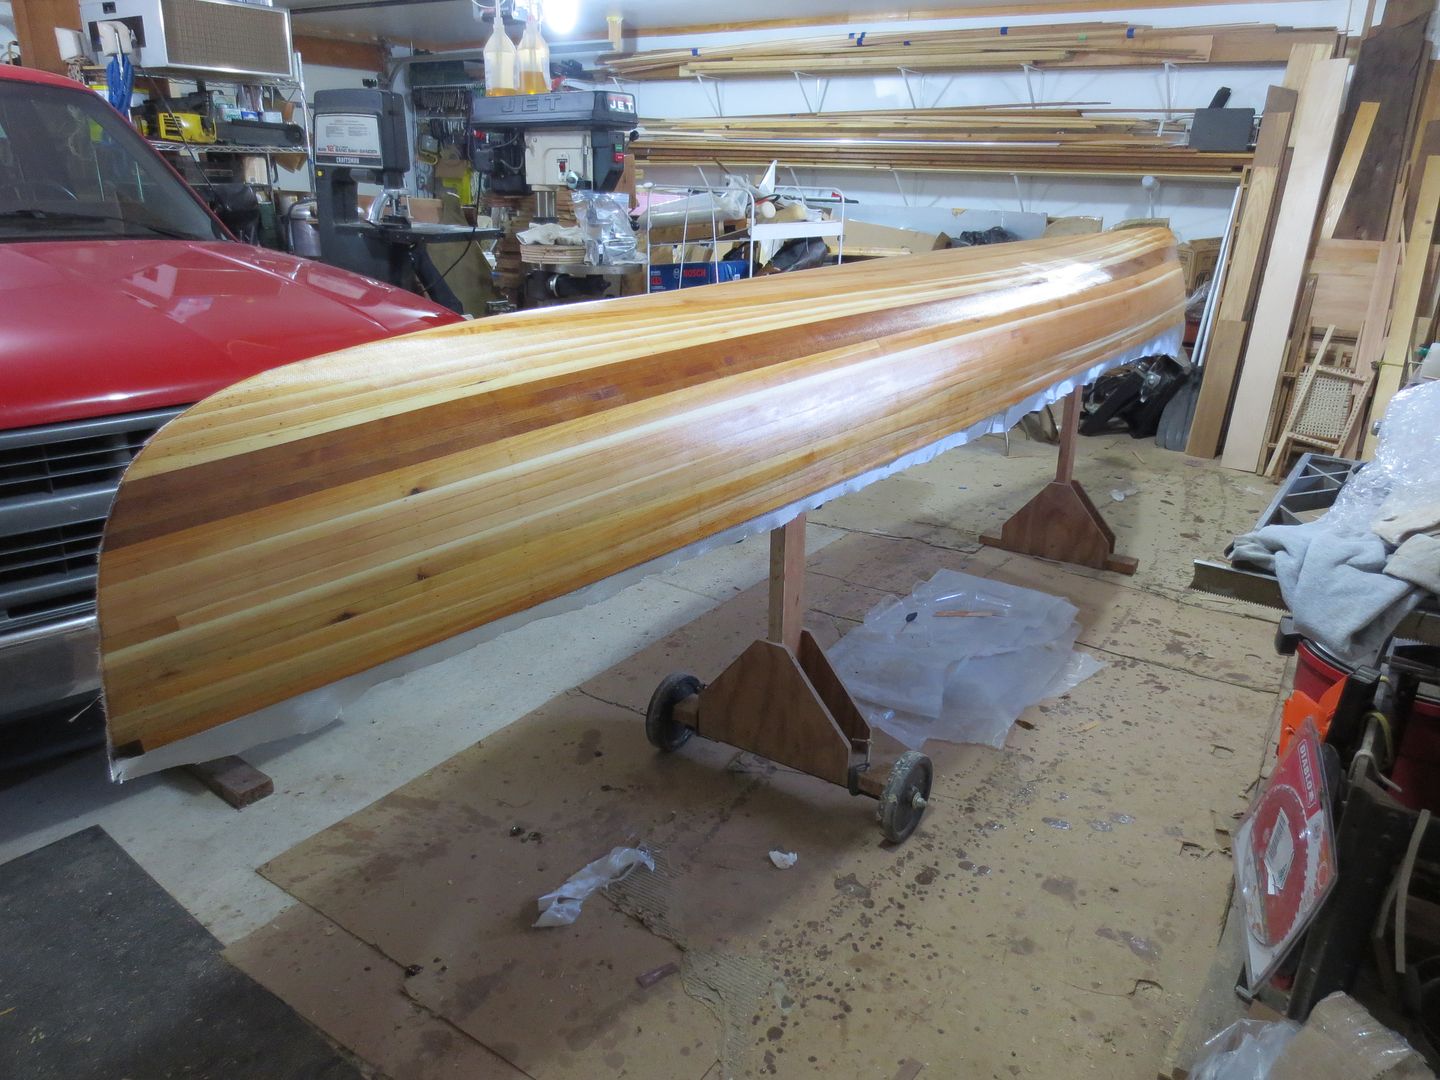
The bow and stern are taking shape and the hull is getting sanded with 40 grit with an orbital sander
-
jimlgordon
- Posts: 109
- Joined: Mon Nov 20, 2017 6:57 pm
- Location: Bainbridge Island, Washington
Re: 19' 9" Chaa Creek Expedition
thinking about outfitting it with rod holders for salmon or trout trolling and a removable pulley for hauling up crab traps
-
jimlgordon
- Posts: 109
- Joined: Mon Nov 20, 2017 6:57 pm
- Location: Bainbridge Island, Washington
Re: 19' 9" Chaa Creek Expedition
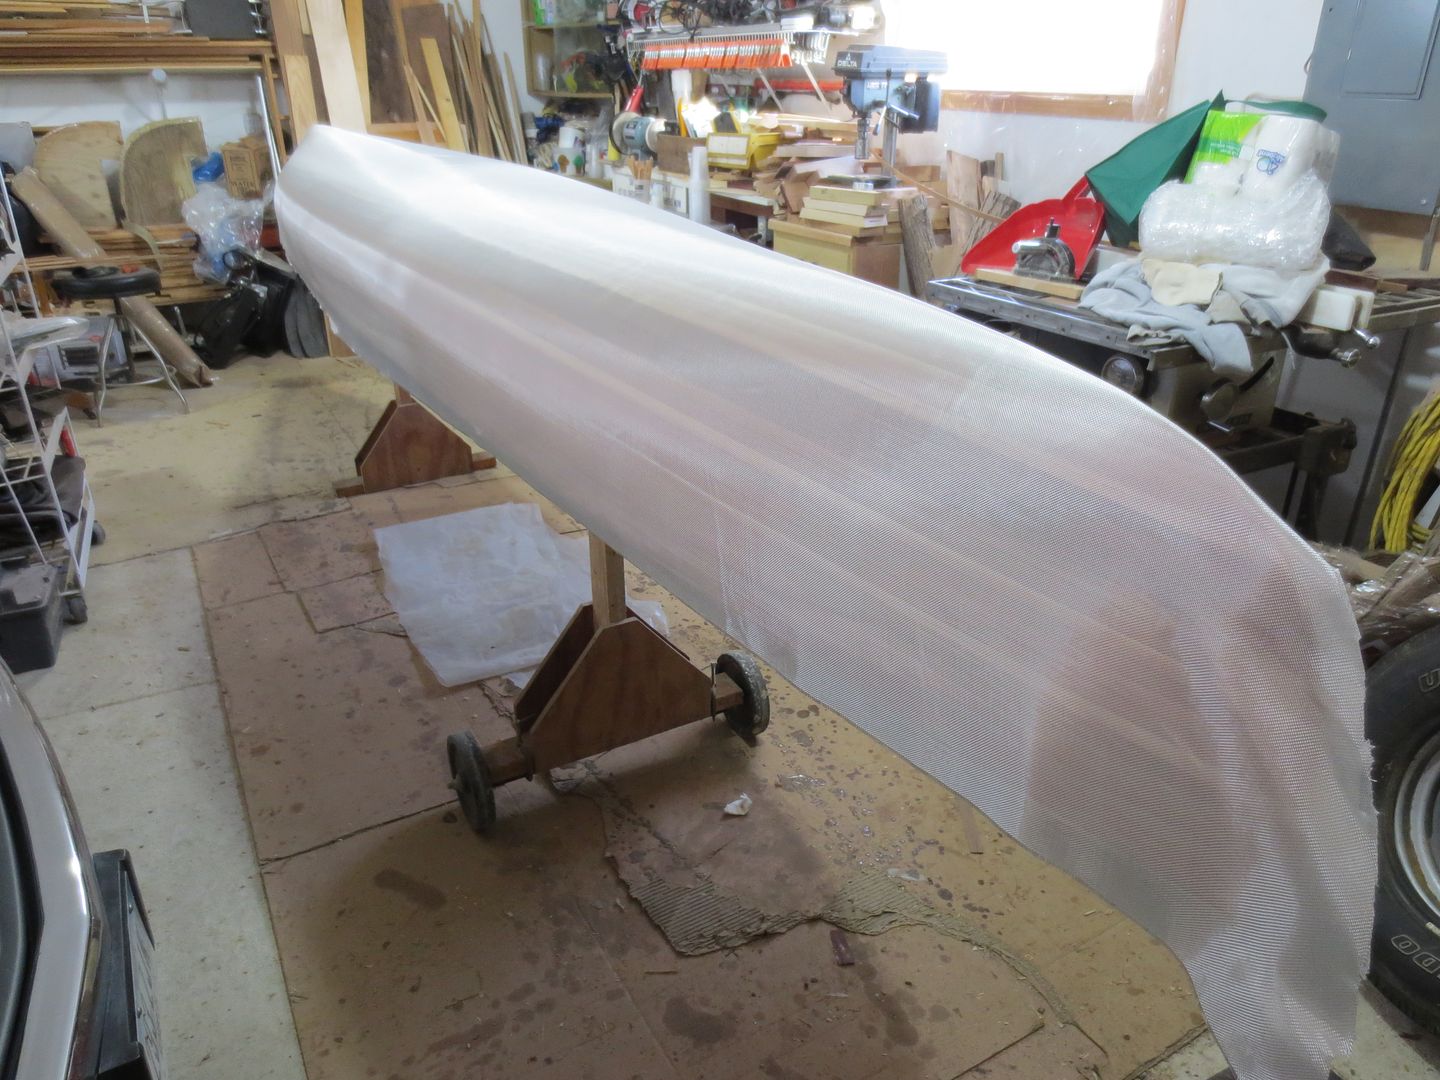
I did my primer coat and glass today. There are a few wrinkles that I just could not get rid of... any ideas on how to repair or smooth them if possible?

Re: 19' 9" Chaa Creek Expedition
Some one else just posted about epoxy woes here:
viewtopic.php?f=1&t=4775
I did a more complete response there if you want to check that out.
Basically, to fix it, there isn't a lot of choice IMO. Assuming you already have a good carbide scraper (if not, it is worth investing in) ... those creases need to be leveled. If you go into the cloth a bit that is OK as long as you don't go through all the way on a large swath of cloth. If you cut through the cloth and feel it needs to be replaced, then a patch can be applied and the edges feathered ... it will just disappear. I would fix those areas first, then do your rough sand of the hull. If you have a lot of cloth exposed by the rough sanding, just do a light seal coat with epoxy (hull is already smooth after this), then do the final, light, fine sanding.
Brian

Re: 19' 9" Chaa Creek Expedition
Wrinkles
Tugging on the ends of the cloth, both at the bow and stern, when laying the cloth on the hull, should eliminate wrinkles Before wetting out!
I start wetting the cloth in the middle, this helps work any wrinkles towards the end.
Usually, I have more trouble with wrinkles on the inside, than I do on the outside !
Inside the cloth, tends to crowd, Again start in the middle, and tug on the cloth, with a brush, or squeegee, if you have to.
The ridges so referred tom may have been flaws in the cloth. We had some 4 oz, that had one wrinkle, the full length of the 11 yds he bought. That was years ago.
Some pics of the wrinkles would be helpful !
Jim
Keep your paddle wet and your seat dry!
-
jimlgordon
- Posts: 109
- Joined: Mon Nov 20, 2017 6:57 pm
- Location: Bainbridge Island, Washington
Re: 19' 9" Chaa Creek Expedition
The chaa creek has a lot of tumblehome... I think the hull shape made wrinkles more problematic because of how the cloth hangs. I was able to minimize them and sand them fairly smooth.
Last edited by jimlgordon on Mon Mar 05, 2018 12:30 pm, edited 1 time in total.
-
jimlgordon
- Posts: 109
- Joined: Mon Nov 20, 2017 6:57 pm
- Location: Bainbridge Island, Washington
Re: 19' 9" Chaa Creek Expedition
When is the earliest stage I can remove the hull from the forms? I got the first fill coat on. I would like to get the strongback out of the shop since the hull will be lighter to move around and can be hoisted to the rafters when needed.
Re: 19' 9" Chaa Creek Expedition
I presume you are going with fill coats !
I would wait at least a week, after the last fill coat. Then sand, and then remove. Sanding uncured epoxy will Gum up your sand paper ! Not to mention what it can do to your lungs !
I've seen hulls, that were taken off the forms TOO early, and you could see the weave of the cloth, as it was stressed !
Patience ! You've done a lot of work !
My $.02 worth.
Jim
Keep your paddle wet and your seat dry!
Re: 19' 9" Chaa Creek Expedition
Cloth that was tugged on the ends. This hull has quite a bit of tumblehome/jimlgordon wrote:The chaa creek has a lot of tumblehome... I think the hull shape made wrinkles more problematic because of how the cloth hangs. I was able to minimize them and sand them fairly smooth.
Jim
Keep your paddle wet and your seat dry!
-
jimlgordon
- Posts: 109
- Joined: Mon Nov 20, 2017 6:57 pm
- Location: Bainbridge Island, Washington
Re: 19' 9" Chaa Creek Expedition
Looks great... I think my resin primer coat was still a little tacky which caused it to stick a bit here and there instead of sliding over the surface. I will do better next time.
-
Patricks Dad

- Posts: 1476
- Joined: Wed Oct 13, 2004 1:11 pm
- Location: Warrenville, Illinois
Re: 19' 9" Chaa Creek Expedition
I have never used a "primer" coat of epoxy. I don't see any good reason for it.
argument begins in 3...2...1...
argument begins in 3...2...1...
Re: 19' 9" Chaa Creek Expedition
+1 on Randy's comment, just seems like a lot of extra work and I bet an argument could be made that the bond to the primer isn't as good as it would be by going direct.
Brian
Brian
Re: 19' 9" Chaa Creek Expedition
I Hear some one Calling !
A Confession ! It took me a long time to consider building a hull, without a Seal coat!
My reasoning, was I wanted to fill imperfections, such as small gaps, and especially Staple holes !
I didn't want resin Weeping away from the cloth, through these imperfections ! Thus the Seal coat !
For a hull with said imperfections, and a First time builder, I'd Still recommend a Seal Coat !
After typing all that with these Old hands ! My last hull "Pearl" was wet out "Without a Seal coat" !
I was nervous, and stayed with the hull, until I was positive, I would Not see any resin Weepege. I did Not, see one Weep hole.
Bonding ! I've Never had an issue with a seal coat. But ! One needs to go over a Seal coat, and check for specs of dust, that can be felt by hand, before wetting out cloth!!! These need to be removed, as they Will lift the cloth from the hull !
OK ! (Still typing). Skip the Seal Coat ! But Stand Guard, in case you see a dry spot, or hole weepege !
There I said (typed) it !
Jim
Keep your paddle wet and your seat dry!
Re: 19' 9" Chaa Creek Expedition
Small steps Jim... small steps lol
I tried something a little different for filling, last build. I cleaned everything up for glass application ... then just before I put the glass on, I mixed up some thickened epoxy (just shy of peanut butter) and filled any cracks and wiped off excess with a cloth.
I immediately put the glass in place and started the application. the filled areas never got a chance to set, so the whole thing bonds up and the epoxy seems to get all smoothed out .... it seemed to work well. Well enough that I will be repeating it with this build in a day or so.
Brian
Re: 19' 9" Chaa Creek Expedition
Basically a Fillet. I've done this on a repair. Good method !Cruiser wrote:Small steps Jim... small steps lol
I tried something a little different for filling, last build. I cleaned everything up for glass application ... then just before I put the glass on, I mixed up some thickened epoxy (just shy of peanut butter) and filled any cracks and wiped off excess with a cloth.
I immediately put the glass in place and started the application. the filled areas never got a chance to set, so the whole thing bonds up and the epoxy seems to get all smoothed out .... it seemed to work well. Well enough that I will be repeating it with this build in a day or so.
Brian
Jim
Keep your paddle wet and your seat dry!