how do you cut scuppers?
how do you cut scuppers?
How do you cut scuppers? We tried a few last night on a scrap peice of wood. we got 1 out of 3 to sort of work. we are using a 3/8 straight router bit to cut. any tips or tricks for cutting scuppers?
-
Glen Smith

- Posts: 3719
- Joined: Sat May 08, 2004 9:08 am
- Location: Baie-St-Paul, Quebec, Canada
I used my table saw. I cut kerfs to position each scupper then switched to a dado blade to clean out the excess wood. Then I put a bearing piloted round-over bit in my router table to round over the edges. Some cleaning up with a rasp and sandpaper.
Kurt Loup once posted pictures of making scuppered inwales with a router and a template on the edge of a wide board then he cut off the inwale width piece with a circular saw. I checked his website but couldn't find the pics.
Kurt Loup once posted pictures of making scuppered inwales with a router and a template on the edge of a wide board then he cut off the inwale width piece with a circular saw. I checked his website but couldn't find the pics.
cutting scupers
clamp the inwales together,hullside to hullside,
for 1/4" use 1/2" bit .
drill the holes at the start and end of each scuper, centered at the join,
separate
then router out between the holes.
forstner bit preferred
for 1/4" use 1/2" bit .
drill the holes at the start and end of each scuper, centered at the join,
separate
then router out between the holes.
forstner bit preferred
Charlie
-
Glen Smith
- Posts: 3719
- Joined: Sat May 08, 2004 9:08 am
- Location: Baie-St-Paul, Quebec, Canada
-
John Michne

- Posts: 116
- Joined: Sun May 09, 2004 7:36 am
- Location: Clifton Park, NY
- Contact:
See my web site, http://michneboat.com. Click on Builder's Corner, then scroll down to Gunwales. A technique is described for making scuppered inwales by glueing blocks on to the straight inwale, then installing it. This allows you to use different colored wood for the scuppers.
- John
- John
Scuppers
Don't forgot about using separate blocks as spacers between the hull and the inwale. Glue them, or screw them when you attach the gunnels. I like to use a 4" x 1/4" piece and glue then at the same time I am putting screws in the gunnels. The screws serves as clamps and the glue keeps them from twisting later. This works well. Use a waterproof glue, such as Gorilla glue. Epoxy is a bit messy and you have to keep making up new batches as gunnel attachment is not exactly fast. If you want to round off the top edge of your scupper hole, make sure your spacer is wider than the bearing on the round over bit. You can round them over after the gunnels are attached.

Glen,
I guess I should add a link to the page with a write up. I don't have one on my webpage. I used a 1/2" spiral bit in a router with a template guide installed. It worked great. Just make the template to the size scupper you want to cut. Since I didn't have enough room in my shop to rip the strip on the tablesaw, I used a circular saw with a temporary fence added to it.
Kurt
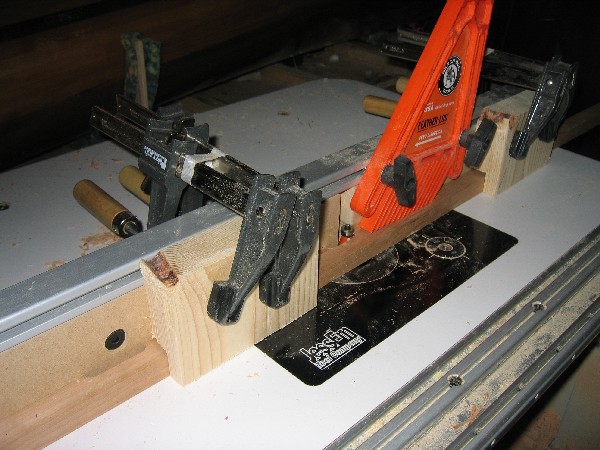
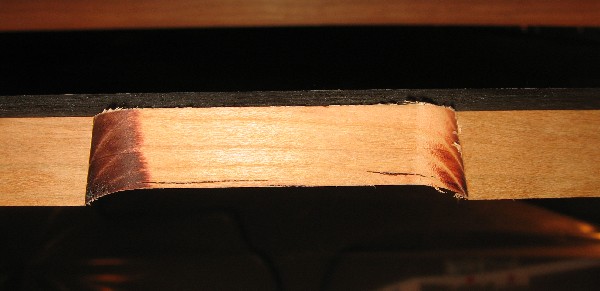
Well, we solved our problem. We found that when pushing the gunnel into the blade, up against the fence of the router table, the bit would sometimes catch and rip away on the edge (caused by there being no back support for the gunnel as it is being pushed in). Once the peice of wood was snug up against the fence, it was fine, so the problem was just going in. We ended up clamping the gunnel to the fence with 2 blocks of wood and a finger board on the top to hold the gunnel down. Then we could slide the fence and the gunnel at the same time. We put 2 clamps behind the fence to stop it at just the right spot and then we just turned on the router and slowly moved the fence with the gunnel clamped onto it into the blade. Because there was back support for it the whole time, there was no tearout on the back. When the fence was all the way back to the clamps, we locked it in place and then slid the gunnel along it like normal. It worked well and we got all 48 done last night with out a problem.
-
Patricks Dad

- Posts: 1476
- Joined: Wed Oct 13, 2004 1:11 pm
- Location: Warrenville, Illinois