17' 0" Freedom
-
Joan and Ted

- Site Admin
- Posts: 63
- Joined: Wed May 05, 2004 10:58 am
- Location: Peterborough, Ontario
- Contact:
17' 0" Freedom
Use this forum to post information specific to your 17' 0" Freedom project. Use POST REPLY when posting information. Please stay on topic. For general boatbuilding discussions, please use the Builders Forum instead.
-
Charles G. Clark, Jr.
- Posts: 72
- Joined: Tue Sep 12, 2006 5:06 pm
- Location: Huntsville, AL

Canoe website for Freedom 17
I built a Freedom 17 in 2000/2001 & built this website to document & share the construction process. There's some other boat and woodworking info there also.
www.pdxtex.com/canoe
I've been paddling the boat since early 2001 and LOVE it. Great design, way fun to paddle.
Enjoy!
Chris
www.pdxtex.com/canoe
I've been paddling the boat since early 2001 and LOVE it. Great design, way fun to paddle.
Enjoy!
Chris

Re: 17' 0" Freedom
I am just lofting plans for this boat from CanoeCraft (read that I am bored with winter already) and I wanted to check if there was any errors in the tables?
I did a search and there does appear to be a correction, but the link doesn't seem to have survived the redesign. Does anyone know a) is there corrections b) where can I get them?
Thanks for any help.
Brian
I did a search and there does appear to be a correction, but the link doesn't seem to have survived the redesign. Does anyone know a) is there corrections b) where can I get them?
Thanks for any help.
Brian
Re: 17' 0" Freedom
After struggling to understand (in my own way) how the tables work, and successfully getting a couple done, I moved on to the stems .... and presto, more questions.
Data supplied for the stems is just the WL measures, no profile or sheer data.
Since the stem is going to mate with station 15 (or 1) and seems to all ways be 1/4" less than that station profile, I am assuming the last point for the stems is the station 15 (or 1) profile height minus a 1/4". Input here would be appreciated.
Now for the sheer values, the bow starts at WL2 and the stern starts at WL4, do I assume these are in fact where the sheer is?
Overall, I am pretty happy with how straight forward this seems to be (famous last words) and would appreciate any guidance on the above questions.
Brian
Re: 17' 0" Freedom
So I have been searching the forum some on this and I came up with this post and links:
viewtopic.php?f=1&t=4494&p=27927&hilit= ... ror#p27927
It's from 2014 which isn't that long ago, but the links are broken, anyone have an idea how to fix or find the information?
Brian
viewtopic.php?f=1&t=4494&p=27927&hilit= ... ror#p27927
It's from 2014 which isn't that long ago, but the links are broken, anyone have an idea how to fix or find the information?
Brian
Re: 17' 0" Freedom
After all the preparation, I have finally started the Freedom 17. It will be made of NWC and be a stapleless build.
I drew up the molds from the table of offsets in CanoeCraft and that was very rewarding. I had to be in the Bear Mountain area and arranged to go pickup the plans, met Ted & Joan, what nice people, just wish I had more time, Ted was going to show me the workshop ... oh well, maybe next build.
I compared every mold to the plans and all of them were spot on ... so lofting from tables works.
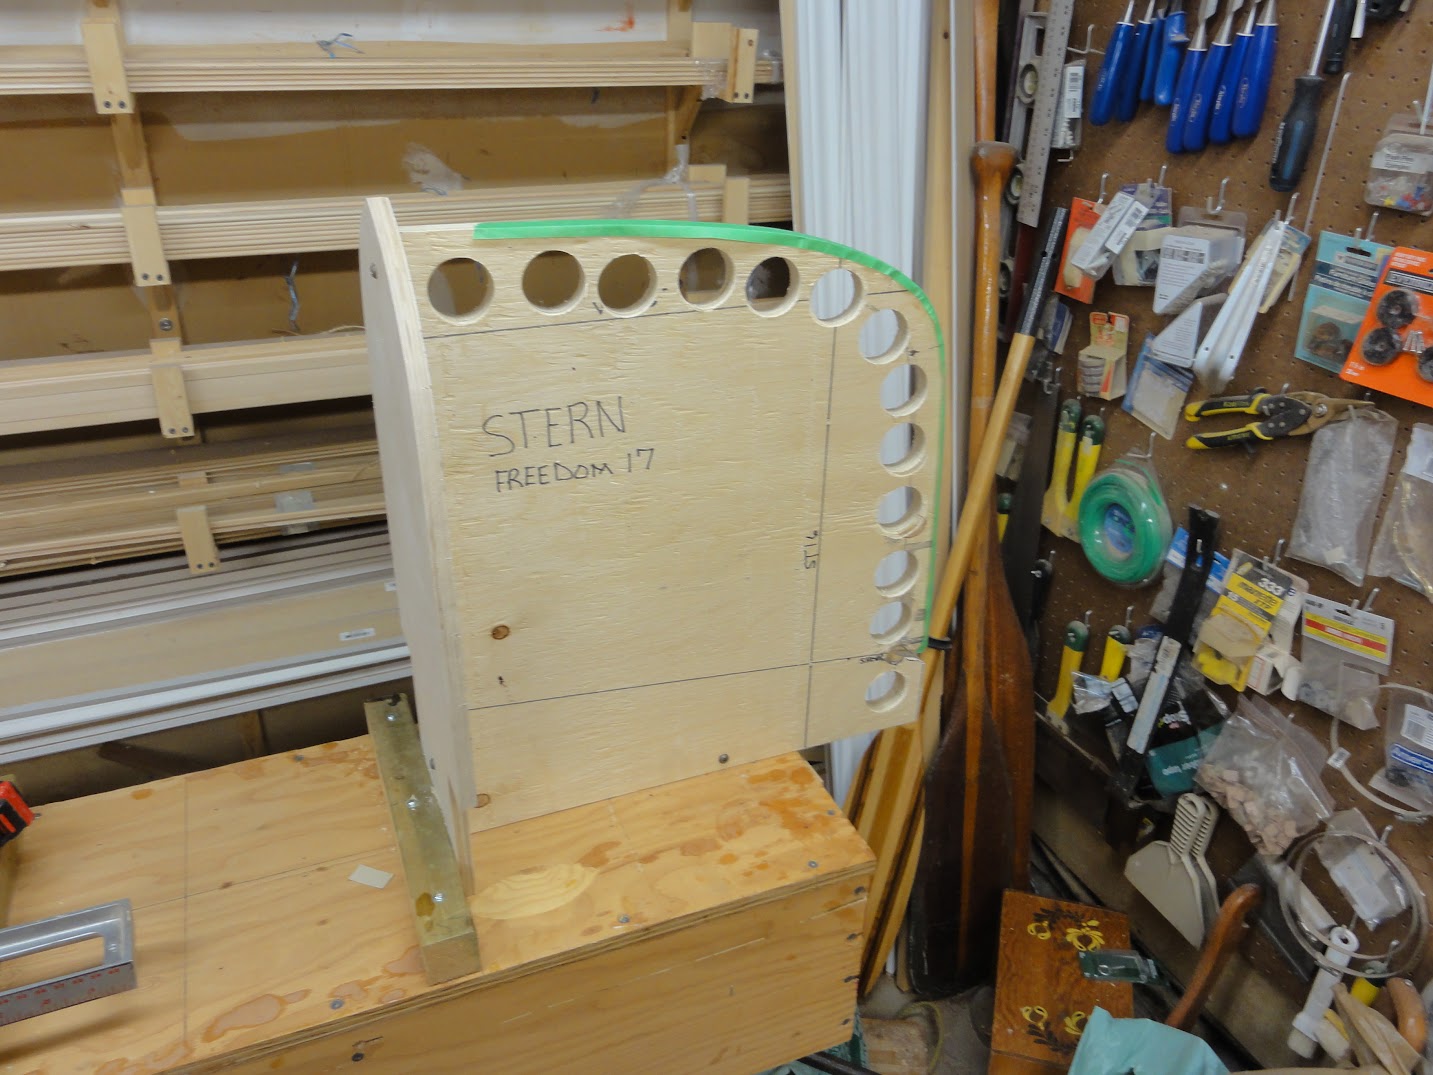
Stack of lofted molds ....

Setting the Stern and Bow stations

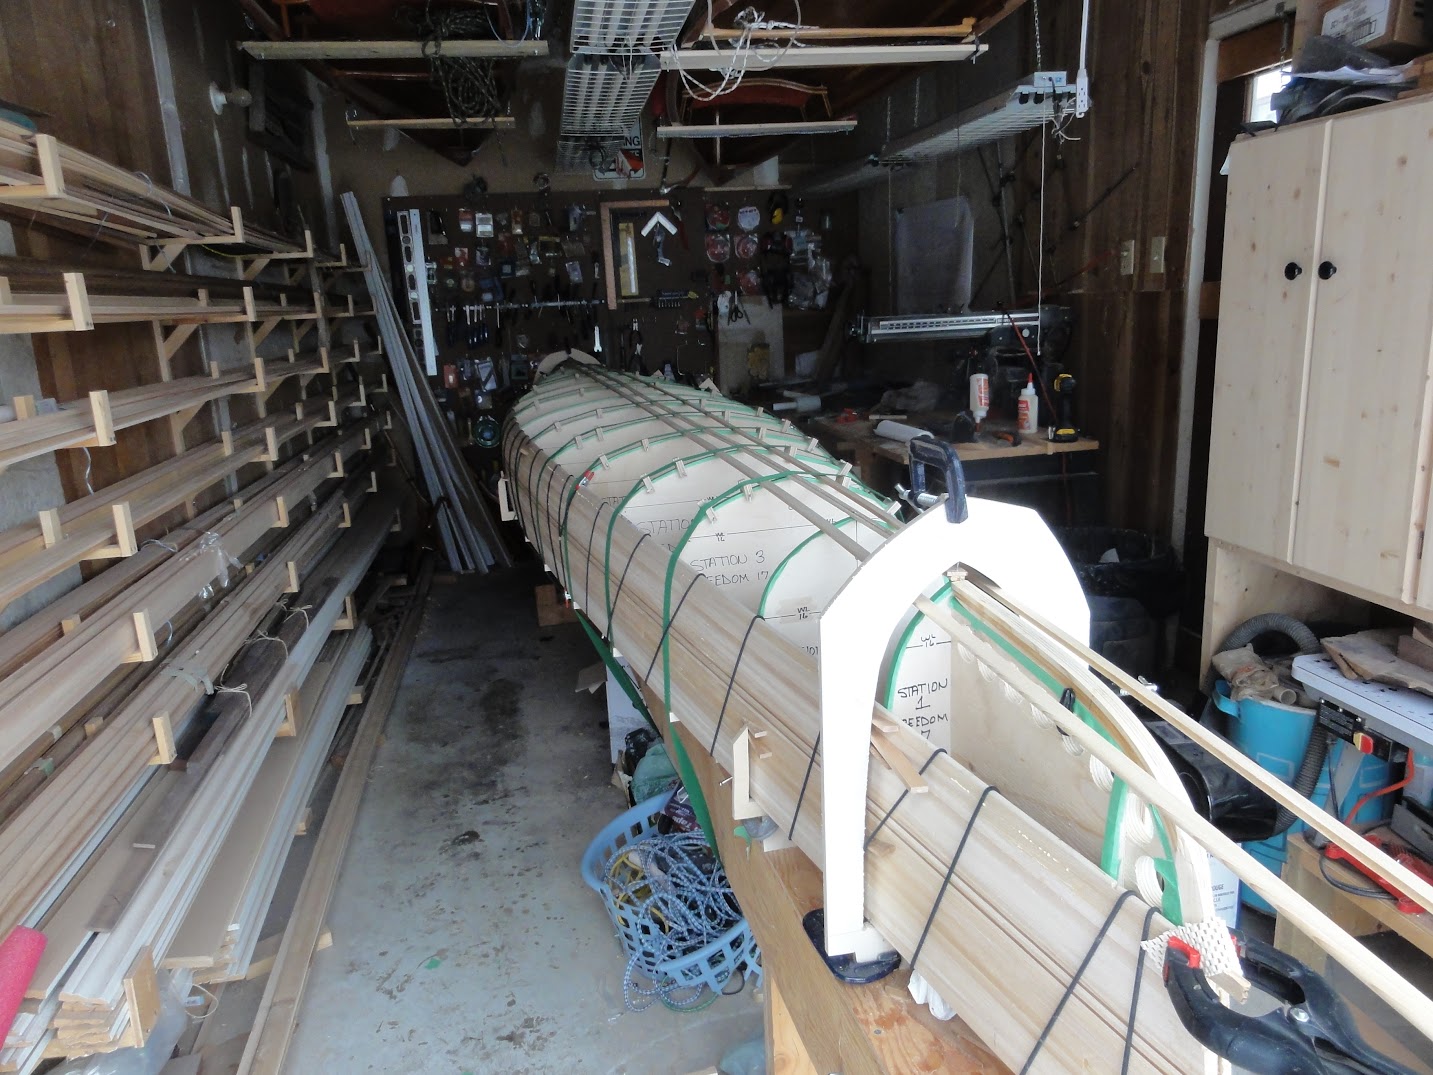
Setting up and aligning rest of mold stations
 ]
]
First few strips ... it is all going well at this point

For this boat I sourced NWC and I can see quite a big difference between this wood and WRC, which I used for my previous 2 builds. Seems lighter and a lot more flexible.
Since I am stripping in the winter, I had to change out the glue I was using, I went from Titebond Pro, which can only be used above 15C, to the 10 minute Express version, which can be used above 3C. This gives a lot more flexibility for shop temperature. There is some drop in strength, but for cedar most glues are overkill, so IMO this is just a little less overkill.
Brian
I drew up the molds from the table of offsets in CanoeCraft and that was very rewarding. I had to be in the Bear Mountain area and arranged to go pickup the plans, met Ted & Joan, what nice people, just wish I had more time, Ted was going to show me the workshop ... oh well, maybe next build.
I compared every mold to the plans and all of them were spot on ... so lofting from tables works.
Stack of lofted molds ....
Setting the Stern and Bow stations
Setting up and aligning rest of mold stations
]First few strips ... it is all going well at this point
For this boat I sourced NWC and I can see quite a big difference between this wood and WRC, which I used for my previous 2 builds. Seems lighter and a lot more flexible.
Since I am stripping in the winter, I had to change out the glue I was using, I went from Titebond Pro, which can only be used above 15C, to the 10 minute Express version, which can be used above 3C. This gives a lot more flexibility for shop temperature. There is some drop in strength, but for cedar most glues are overkill, so IMO this is just a little less overkill.
Brian
Last edited by Cruiser on Thu Apr 04, 2019 11:50 am, edited 20 times in total.
Re: 17' 0" Freedom
First few strips are done and i have a stable base, so it's time to swap to the cam buckles to hold the strips closely to the molds (modified from Randy's method using large nylon ties).
This build is with NWC which means every strip is going to be skarfed somewhere. I just couldn't see doing all that joinery after cutting, beading and coving the strips. I also had decided that I wasn't going to try and hide the joints, I was going to use them as accents. The wood was supplied in rough 2"x6"s and 8', 10' and 12' lengths. I used a 4:1 ratio skarf, used tinted epoxy and made 19'-20' length boards. Once planed, they looked like this:

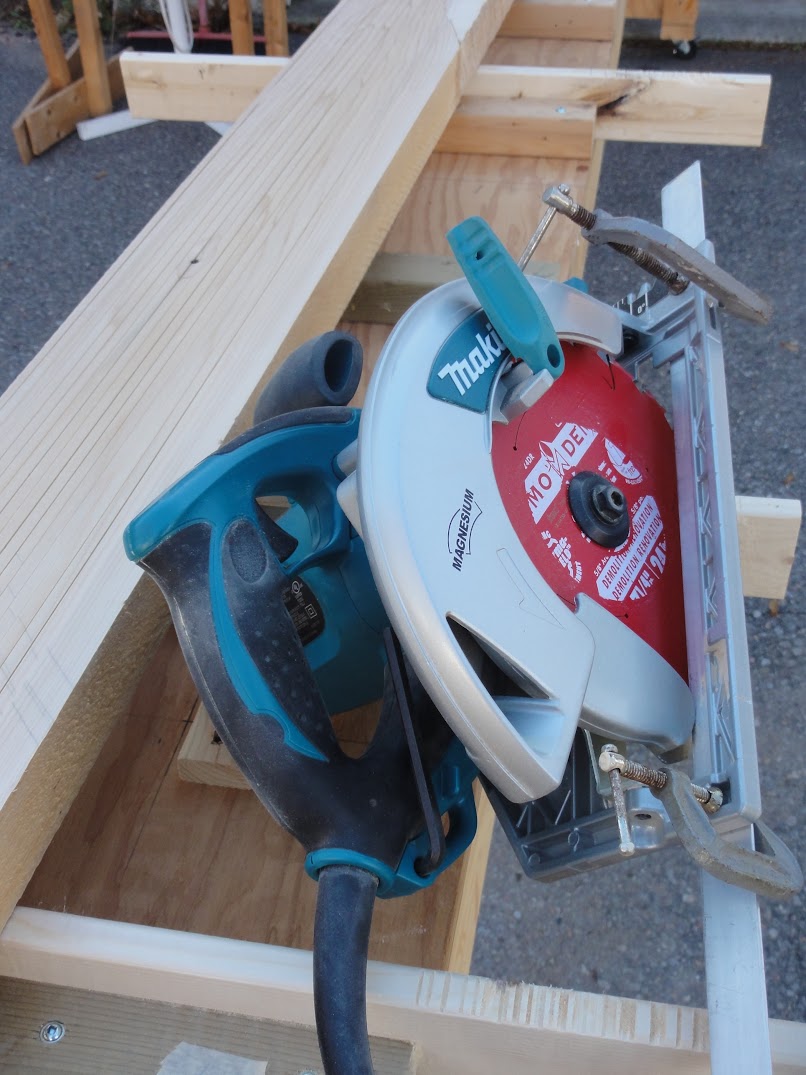
Next I used my skilsaw to slice up the strips
Although you don't have to plane strips after cutting, I did them a bit oversize and planed then to exactly .25", I also did research on setting up the router for bead and cove. I found this little trick on the Guillemot website for getting a perfect setup on the router.
Use a marker to make the wood black, then adjust your height and depth till it is perfect, the black really helps get it nailed down.

What I am finding is that the fit and finish of the strips seems to be vastly improved from my plain sawn strips ..... I think it is definitely worth it to spend the extra time on the strips. From what I can see on the surface, I will have a lot less sanding later on.
Brian
This build is with NWC which means every strip is going to be skarfed somewhere. I just couldn't see doing all that joinery after cutting, beading and coving the strips. I also had decided that I wasn't going to try and hide the joints, I was going to use them as accents. The wood was supplied in rough 2"x6"s and 8', 10' and 12' lengths. I used a 4:1 ratio skarf, used tinted epoxy and made 19'-20' length boards. Once planed, they looked like this:
Next I used my skilsaw to slice up the strips
Although you don't have to plane strips after cutting, I did them a bit oversize and planed then to exactly .25", I also did research on setting up the router for bead and cove. I found this little trick on the Guillemot website for getting a perfect setup on the router.
Use a marker to make the wood black, then adjust your height and depth till it is perfect, the black really helps get it nailed down.
What I am finding is that the fit and finish of the strips seems to be vastly improved from my plain sawn strips ..... I think it is definitely worth it to spend the extra time on the strips. From what I can see on the surface, I will have a lot less sanding later on.
Brian
Last edited by Cruiser on Wed Jul 12, 2017 8:10 am, edited 1 time in total.

Re: 17' 0" Freedom
To me bead and coving strips is a no brainer !
Curious if you planed your planks before cutting strips !
Jim
Curious if you planed your planks before cutting strips !
Jim
Keep your paddle wet and your seat dry!
Re: 17' 0" Freedom
Hi Jim,
I used bead and cove on the previous builds as well, I was referring to taking the extra time in making the strips .... I cut slightly oversize and planed both sides slightly to take them back to 0.25", was very careful with router setup etc. ... what I found is that strips directly from the saw are viable, but taking the extra time and effort seems to result in a better fit and finish as you install the strips. I don't think sand out and prep will be anywhere near the amount of effort with this build. I just passed the halfway point, hopefully I didn't just jinx the rest of the stripping.
I did pass them through the planer before I started cutting the strips. I knew I would need at least 1 flat side, as the next operation was to cut the 2" strips down to 7/8" (radial arm saw). The small left over strips (~1/4") was the rough "other" side and I collected those and made up a batch of stirring sticks for epoxy.
That epoxy joint stands out because I tinted the epoxy dark, I wanted the joints to "pop" a bit as a point of interest in the strip layout ... I won't know if I will like the result until I get to the initial wet out. With the different lengths I can stagger the joints quite a bit ... so hopefully it looks OK when I finally get finished.
Brian
Re: 17' 0" Freedom
I love working with uniform strips !
Looking forward to following your build Cruiser !
Jim
Looking forward to following your build Cruiser !
Jim
Keep your paddle wet and your seat dry!
Re: 17' 0" Freedom
Just a build update, it's moving along pretty well.
Starting the final "close in" push.

And a few days later, I only have the football area to finish.

Pretty happy with the build so far.
Brian
Starting the final "close in" push.
And a few days later, I only have the football area to finish.
Pretty happy with the build so far.
Brian
Last edited by Cruiser on Wed Jul 12, 2017 8:15 am, edited 1 time in total.
Re: 17' 0" Freedom
Lookin Good Brian !
I always love fittin that last strip !
Oh and the red cord in the seats above look cool too !
Jim
I always love fittin that last strip !
Oh and the red cord in the seats above look cool too !
Jim
Keep your paddle wet and your seat dry!
Re: 17' 0" Freedom
Got very lucky and the plans and vision for the football all seemed to work better than I expected ... so it finished up pretty fast.
this is an overview of what it finished up like ...

and just another shot for details ...

With this done, the real work can start.
Brian
this is an overview of what it finished up like ...
and just another shot for details ...
With this done, the real work can start.
Brian
Last edited by Cruiser on Wed Jul 12, 2017 8:21 am, edited 1 time in total.
Re: 17' 0" Freedom
Looks SWEET Brian !
What's your glassing plan ?
Jim
What's your glassing plan ?
Jim
Keep your paddle wet and your seat dry!