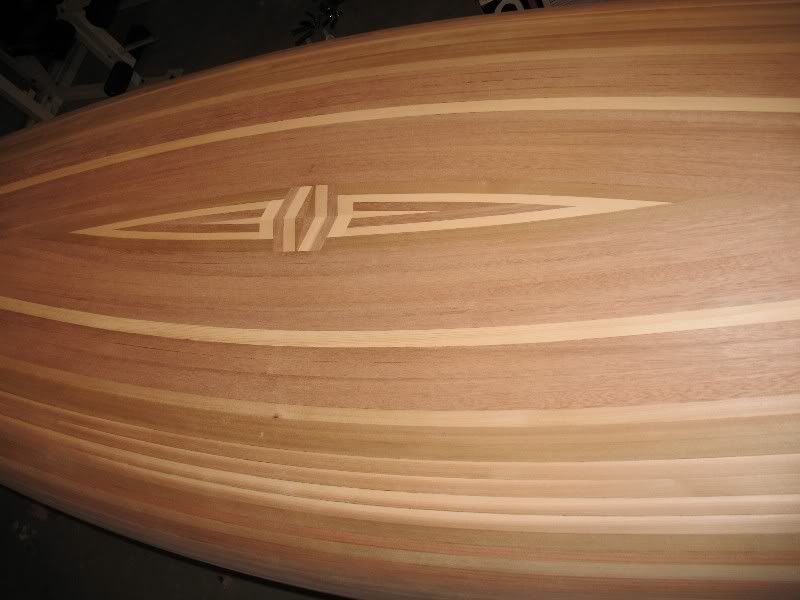
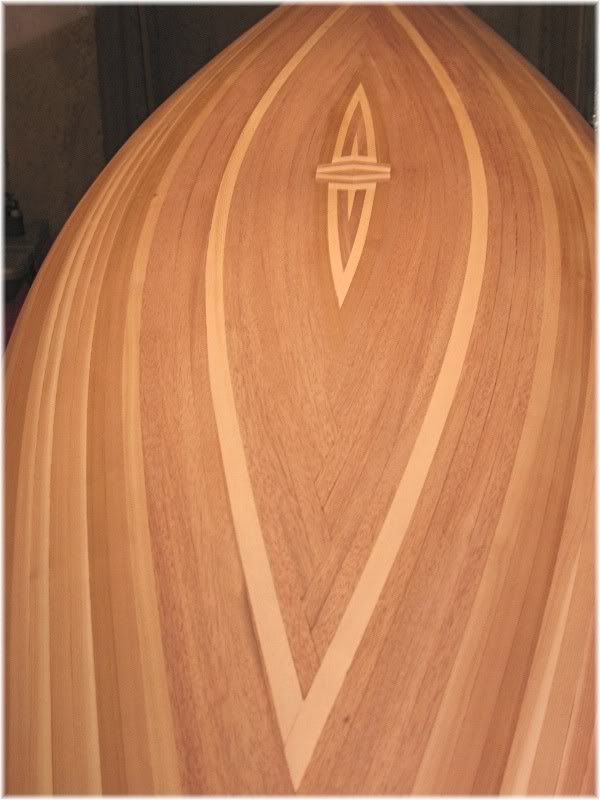
I am part way done building a Hiawatha as my first boat. I have all the strips on and am working on the outer stems. I tried something different on the inner stem and I regret not using the method in the book. I went cove side up with the strips, and it worked out great. On the football where it flattens out I used a double herringbone with a bead routed on the ends of the strips to fit into the cove on the other strip. I have not been able to work on my canoe much in the last year, but hope to get back on it more sometime. I'm building it in my unfinished basement. I went without staples.
I cranked up the sharpness and contrast on this picture a bit to make the double herringbone more visible.
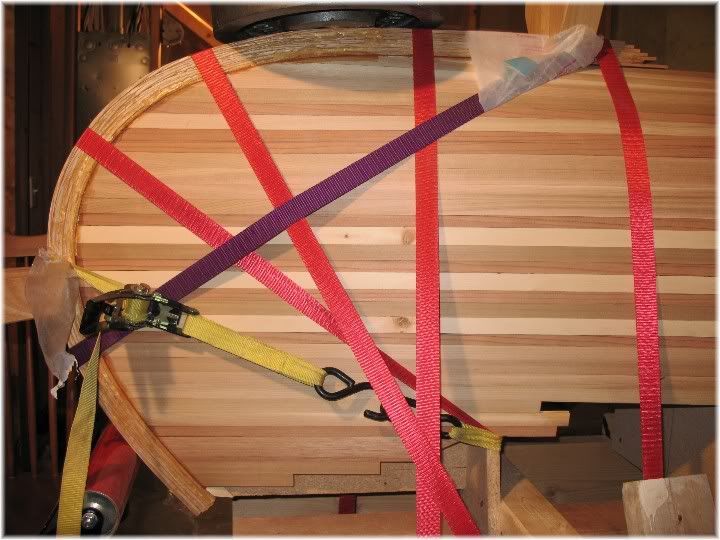
I got my wife to agree to let me buy a board, while we were at Lowes, to make the outer stems with. The only hardwood they had was red oak. So my stems are red oak. I cut the board into strips and planed them to 3/16ths of an inch thick. I tried bending them around the stem dry. the fist one bent well, than the next strip I tried snapped. So not wanting to set up a steamer, I soaked the strips in hot water and then strapped them in place. After letting them dry out, I took them off and they remained curved fairly close to the canoe(my form). I could not seem to sand the end perfectly to where there was no gaps between the stem strip and the lengthwise strips. And since I can't take my canoe in to work and CNC machine the mating surface. I was forced to mix up a paste of glue and sawdust like many others do to glue my first strip on and fill the small gaps. After gluing the first strip on and letting it set a day I glued the other six preformed strips on with just glue all at once. I had to work quick because my glue tacks up in about 25 minutes. I had drilled a hole in the very top end of all the strips and the top of the stem into the stem form. I glued all the strips together then screwed them down at one end and wrapped them around the strip which I'd previously glued down, and began strapping everything tight until I ran out of straps at about the time I squeezed the last visible gaps shut. I also had to use some furniture clamps to keep a couple of the straps from sliding. I used some scraps of plastic to keep the clamps from getting glued onto the canoe. Tomorrow I'll unstrap the stem and start shaping it. If everything works well I'll then do the other end the same. If not I'll learn from what went wrong and do the other end a little different.
I haven't decided yet whether to just have a rounded oak stem covered in epoxy and fiberglass, or to leave a flat edge to mount a brass stem band onto.
Is it worth the extra effort to make the brass end band, if I'm going to try to baby this canoe and don't plan to use it much?
I've made a couple of kitchen tables, using red oak. It is very porous !
Cut a very thin layer of end grain, say an 1/8" thick, and view it up against a light. It amazes me, how much air there is in red oak, for how much it weighs !
It will tend to split in time, unless you can seal it real good !
I'm not trying to be smart ! But if it were me, I'd shave it off, and find either white oak, or ash !
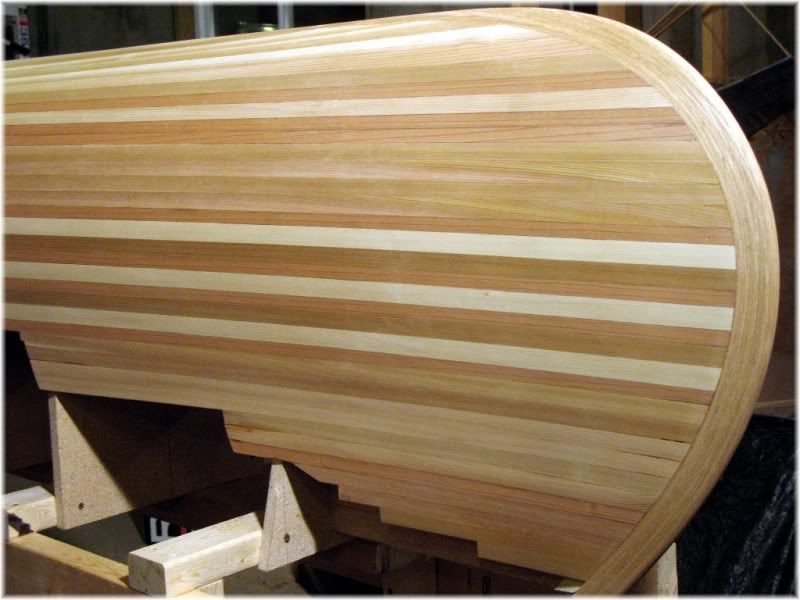
I sanded the first outer stem down to size, and things went fine.
There are a number of different oaks that can be labeled as red oak. Jim, the board I used had no evidence of splits at all, I've laminated the stem in seven 3/16" strips, and will eventually be encasing this all under epoxy, fiberglass, and varnish. So I think that the chances of the thin strips all bonded together splitting is small. But I'll keep a close eye on them, as I'm mounting and finishing the last stem.
The hull looks great !
I have a hull that is gunneled with Red Oak, and I too keep it well sealed .
Again it looks great !
And keep posting pics !
Good luck !
Hi,
I have just finished my Hiawatha and would like to thank all those who helped and gave advice. I was asked to show it at the Welsh Canoe and Kayak Show and it attracted much attention. The burning question now is, what will the next build be? A sea kayak seems to be top of the list.
Hey builders, canoe enthusiasts, I have purchased the plans for the Hiawatha 15'er from Bear Mountain Boats and have already assembled my strongback and placed the mold stations including stem molds on the strongback. My first of many questions is do I need to remove the stem mold from the strongback to laminate my inner and outer stems? I may have jumped the gun a little and centered and string-lined my molds before making the stems.. If I do remove the stem mold will this have a negative effect on my center line?
Another question I have is do I need to notch the #6 mold to make room for the stem to protrude? I have seen this done in videos and pictures of canoe builds but not sure if it is something I need to do. I have made sure that the #6 mold is 3/4 higher than the stem mold for proper alignment.
It's easier to use your stem molds in a way that you can extend the stem material beyond both ends of the final dimensions (and then trim later). If you have built a 16' strongback, I'm guessing that your stem molds don't hang out over the end of the strongback. I suggest you remove the stem molds from the strong back and mount them somewhere else so you can easily bend your stems (inner and outer) and clamp them to the molds without interference from the strongback. This might be as simple as moving them out 6" or so from their current locations). You can then remount them to the strongback without issue. You can either notch the adjacent station mold or but it up against the station mold (be sure to round over the inside edge/ corners first (It's easier to do it now rather than later after the stripping is done)
Thanks for the reply P'sD. I have removed them and clamped them to my vise and will do the bending from there it seems like it will be much easier. My strongback is a 16' footer, and your right about the stems being easier to trim cut to length after glue up then trying to mess around with getting it flush during glue up. Thanks for the advice on rounding over the inside of the stem now rather than later, I can imagine the frustrations on working on those in a confined space... I have noticed that my stem molds have warped and need to be forced straight using blocks, braces, and such.
Thanks again for the help. I will try and post pictures at various stages of the build for your viewing pleasure. (if I can figure out attachments on this message board)
PS. I'm sure I will be posting again soon with more questions, concerns, and comments.
I wouldn't feel too bad about this Jesse. Canoecraft actually has the setting up the molds step followed by the stem lamination step, with a very short paragraph on page 105 telling you it's best to do them in the other order. All ya gotta do is miss that one paragraph.
To be fair, in the 1983 edition Ted did recommend that novices would find it easier to laminate the stems after the molds were mounted on the strongback. I think he's changed his mind now, but the book is still structured the other way.
If you have questions about building your canoe, you may wish to post them in the Builder's Forum instead. You will probably have more responses, since I don't think people visit the Project Directories as often.
Ya, I went back and read CanoeCraft again and found the paragraph about stem lamination. I have my Stems sitting on the workbench with the WRC inner stems drying out. I did run into a problem where my stem mold was warped and if I followed the mold stems then my lams would come out warped as well. I laid the mold on my bench with a 1/2" riser block under the mold and glued my lams up horizontally as opposed to vertically to ensure the would come out plumb.
Thanks for your input I will post under builder forum from now on..