This is a normal situation when building a canoe that has a fine entry line at the ends. I use whatever I can get which is either 5/8", 1/2" or 3/8" thick wood for the stem molds and I still have to cut into them as I bevel the inner stems for some boats.
You are right, the stem molds in the book seem rather thick and there is no mention of this causing a "situation". However, on page 94 under "Materials", it states "3/8" or 1/2" particleboard or plywood" for the molds.
This is just one of those little things not covered in the book.
17' 6" RedBird


My old neighbour and I are working on a 16' Redbird. We shorted the plans by moving the stations to 10.75" and adjusted the measurements from station 7 to the Stem form. We added an extra strip above the sheer line for added capacity. We're building it from old cedar boards that I got from my Son's Father-in-Law. He still hasn't seen what his boards have turned into.
This is our first canoe but it defnitely won't be the last. My wife was somewhat skeptical at first especially when she saw the mushroom farm we can forms. We just finished a pre-coat last weekend and the latest photos sghow the result. This is my friends canoe and now my wife wants one of our own. Talk about being converted.
I'll add more photos as we progress. I have placed some photos in photobucket but I'll only try to copy a few here. Let's hope this works.
Edited by Glen:
Red Bird
All,
My name is Ed and I live in Stillwater MN. This is my first canoe. Ripped the strips from 20 Ft lengths of clear cedar. Inner and outer stems Ash. Tite Bond II for glue. After months of set up and Prep. Have finally started the fun part, stripping. Learning how to fix mistakes and those that can’t be fixed I am learning to live with.
I would post some pictures but can not figure out how.
-
Glen Smith

- Posts: 3719
- Joined: Sat May 08, 2004 9:08 am
- Location: Baie-St-Paul, Quebec, Canada
You can find photo posting info here: http://www.bearmountainboats.com/phpbb2 ... php?t=1150
-
nicktheww2fanatic
- Posts: 16
- Joined: Thu Jan 15, 2009 10:24 am
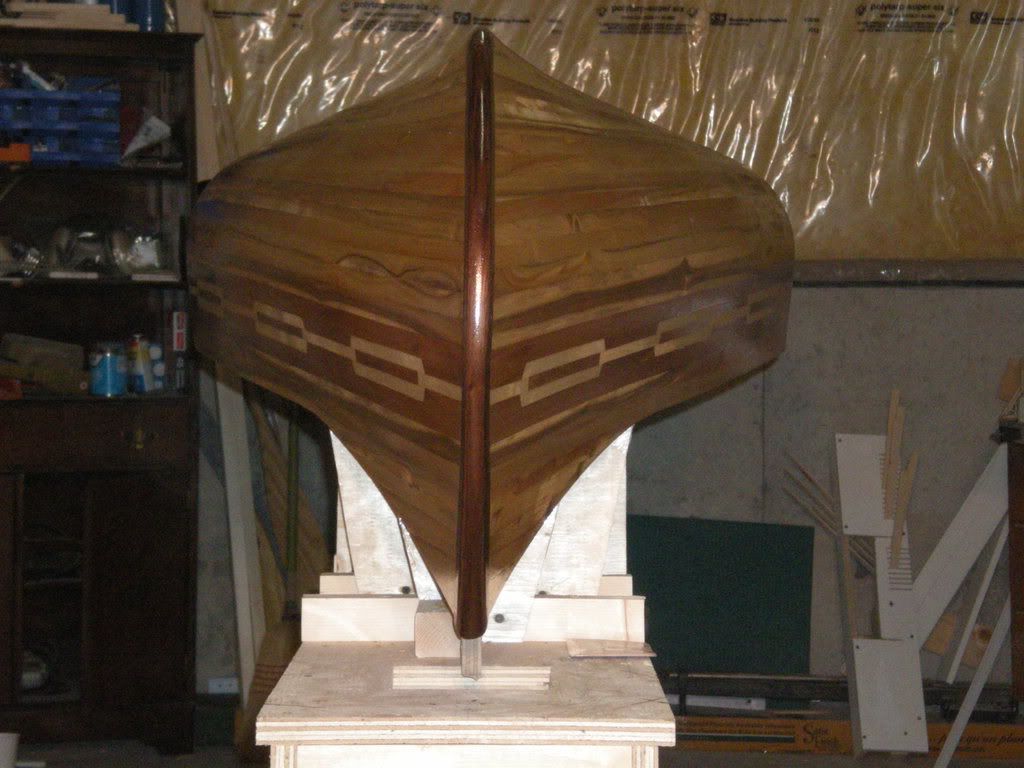
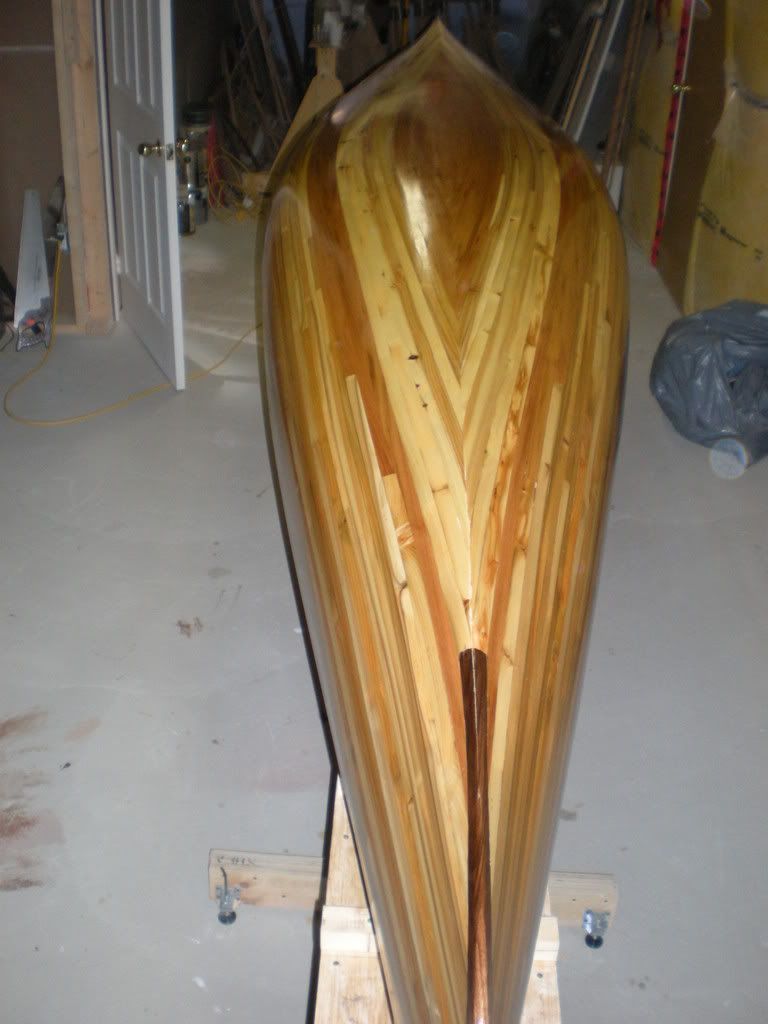
Most of the strips are approximately 3/4" wide. However, the accent strips were made up of 1/2" wide strips of basswood and red cedar. We glued the three rows of strips for the accent strips together and stored them while we assembled the strongback. The centre row uses square butt joints using strips long enough to make 24" repeat pattern.
We made sure to start with the basswood in the centre at bow and stern since we liked that look the best.In order to give the appearance of a chain the centre strips are different lengths so that the outer basswood strips overlapped the centre basswood. We also had to make adjustments because the cove of one strip hides the true end of the beaded edge. The end of the strip that you see is actually offset by over 1/16".
We made sure to start with the basswood in the centre at bow and stern since we liked that look the best.In order to give the appearance of a chain the centre strips are different lengths so that the outer basswood strips overlapped the centre basswood. We also had to make adjustments because the cove of one strip hides the true end of the beaded edge. The end of the strip that you see is actually offset by over 1/16".
-
nicktheww2fanatic
- Posts: 16
- Joined: Thu Jan 15, 2009 10:24 am
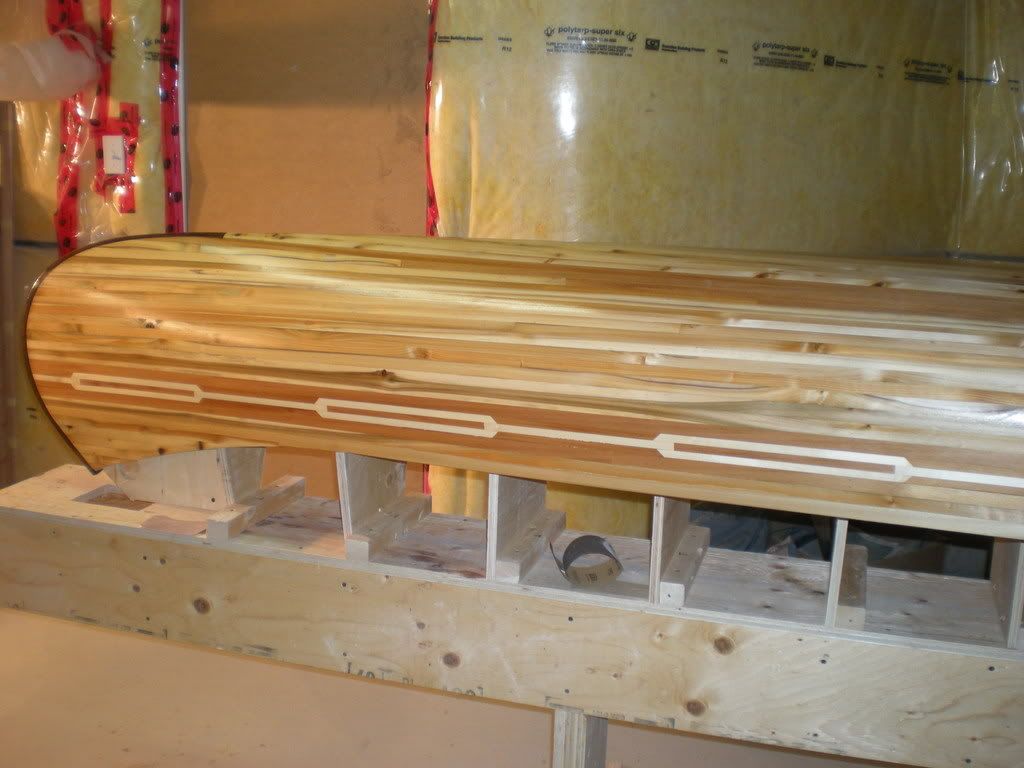
Almost all of the cedar used was from some planks that I got free from my son's Father-in-Law and they were rough boards 1" thick and 2" thick. From this we ripped 1/4" strips and then split the 2" in half. With the saw kerf taken into account this dropped them down slightly less than 1". We then put bead and coves on them and reasoned that if we made the strips any narrower we would have more wood in the form of sawdust on the floor than strips on the boat.
My biggest concern was maximizing usage while minimizing waste (i.e. being frugal). The strip width was a direct result of that.
We did find that some of the rough lumber was thinner than 1" and so we did make some strips at 1/2". These got used at the turn of the bilge since they were easier to work with but that was only on a few rows. For the most part 3/4" strips work well when there is not a lot of curve in the forms.
This project is coming to a close. The only thing left now is the finish coats of varnish. I will be prepping the surface this week so that everything is ready to go for this weekend. I've been waiting for the weather to warm up so I can transfer the canoe from the basement to the garage. I was able to create sufficient ventilation for the epoxy when I glassed the boat but the fumes from the varnish will be much worse. An added bonus is that the wife will be away and the fumes bother her a lot more (if she were home).
The seats have been dry fitted so they will need to be permanently installed as well as the port hole we are putting in the stern storage.
The seats have been dry fitted so they will need to be permanently installed as well as the port hole we are putting in the stern storage.
Re: 17' 6" RedBird
Hi
I'm not sure if this is the right topic to ask... I want to build a RedBird. The question is: is it solable in the leaned to position? I allready made a Prospector Ranger but the RedBird is eye candy :-).
Thanks!
Alex
I'm not sure if this is the right topic to ask... I want to build a RedBird. The question is: is it solable in the leaned to position? I allready made a Prospector Ranger but the RedBird is eye candy :-).
Thanks!
Alex