repairs underway - a cautionary tale

Welcome to the new Bear Mountain Builders Forum - an interactive internet service we provide to encourage communication between canoe and kayak builders
Rabbit
Posts: 121
Joined: Tue Sep 06, 2011 8:20 pm
Location: Downunder

repairs underway - a cautionary tale

Post by Rabbit »

since glen said to post in the builders forum, i thought i'd start a new thread for this. hopefully it will help others.

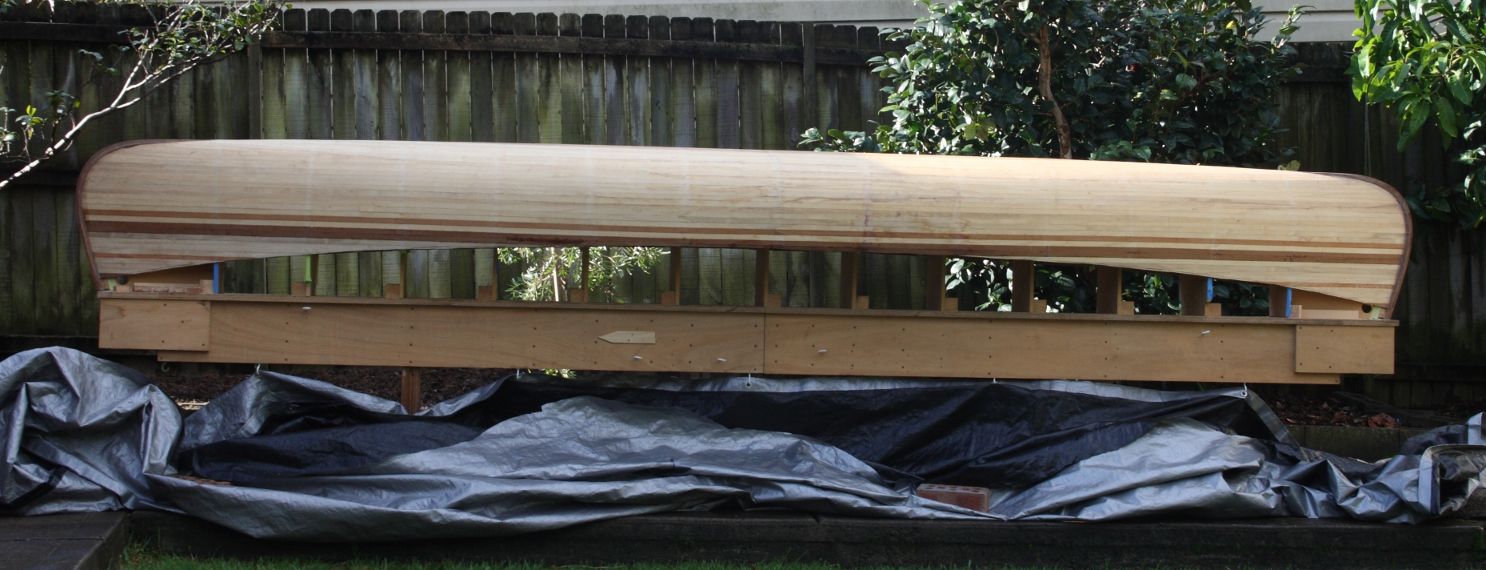
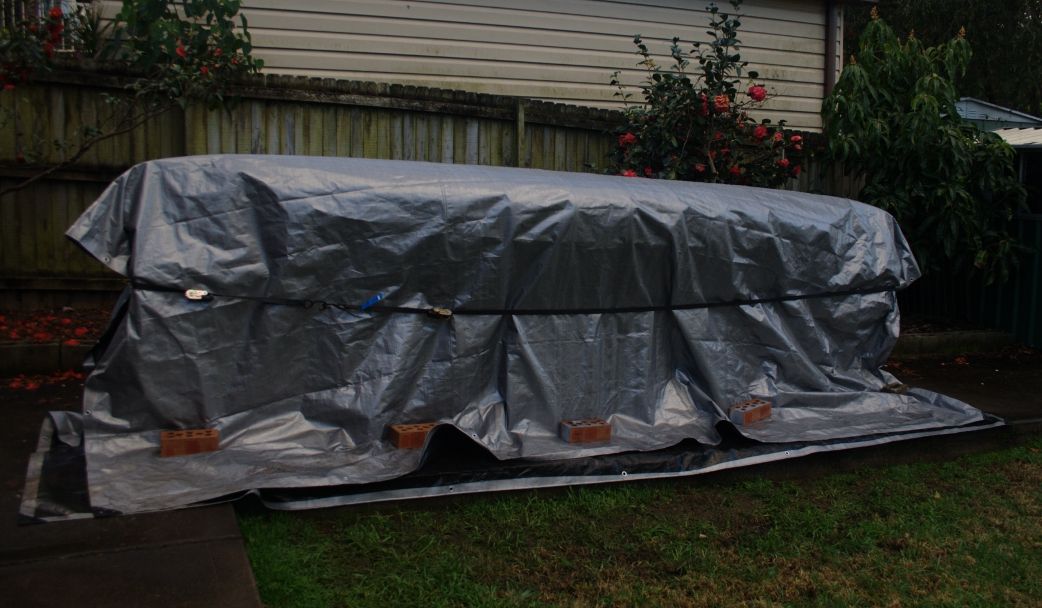
the story so far......due to a lack of available space elsewhere, my build takes place in the back yard. the strongback lived on a concrete slab on top of heavy duty polytarp which covered everything in an envelope when not in use, like so:
Image

the strongback and station moulds together weigh in at 130kg (about 286lb). nice and stable. no way that's gonna shift in a hurry, she'll be right mate! :tu

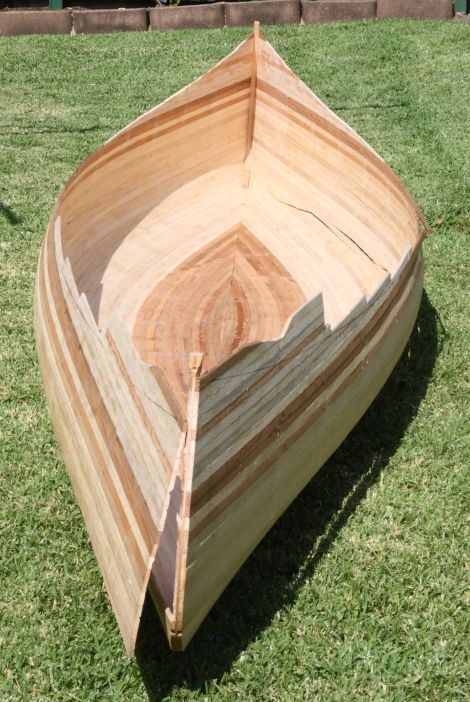
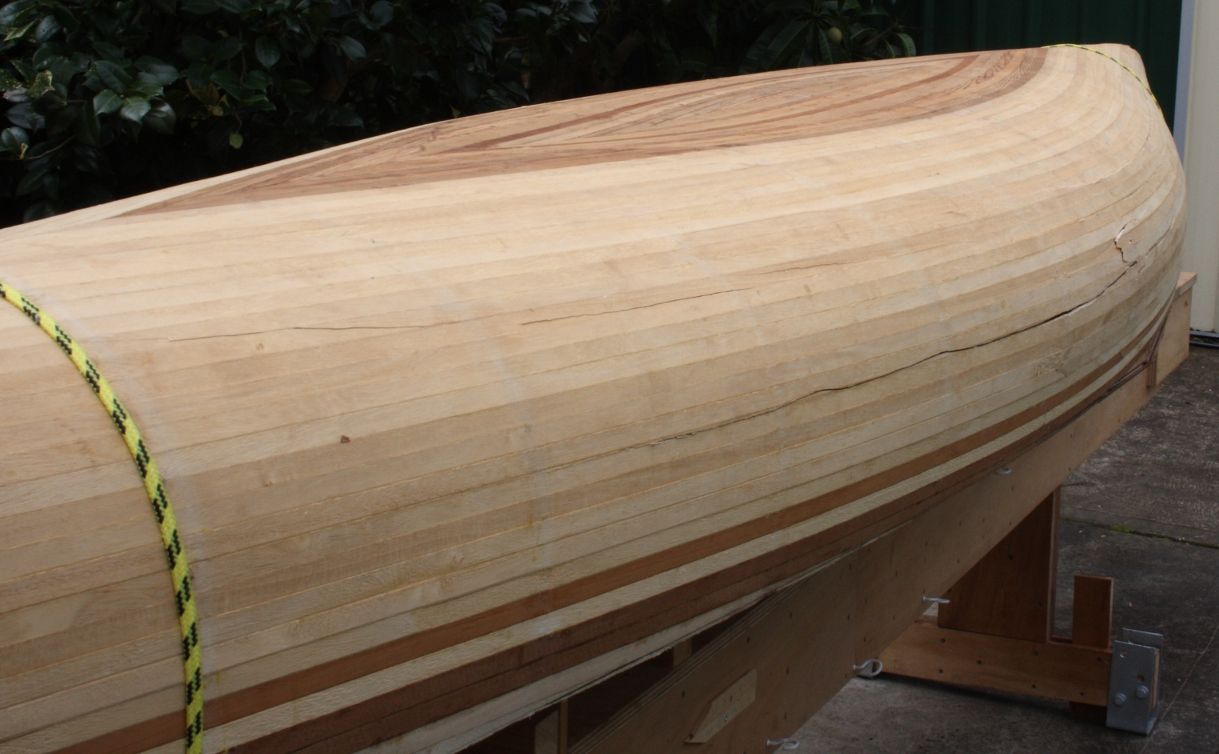
well, we had storms and wind and it weathered it all.....untill we had a day of very strong gusts of wind, then *bang*! over it went. so... on to the damage:

Image

Image

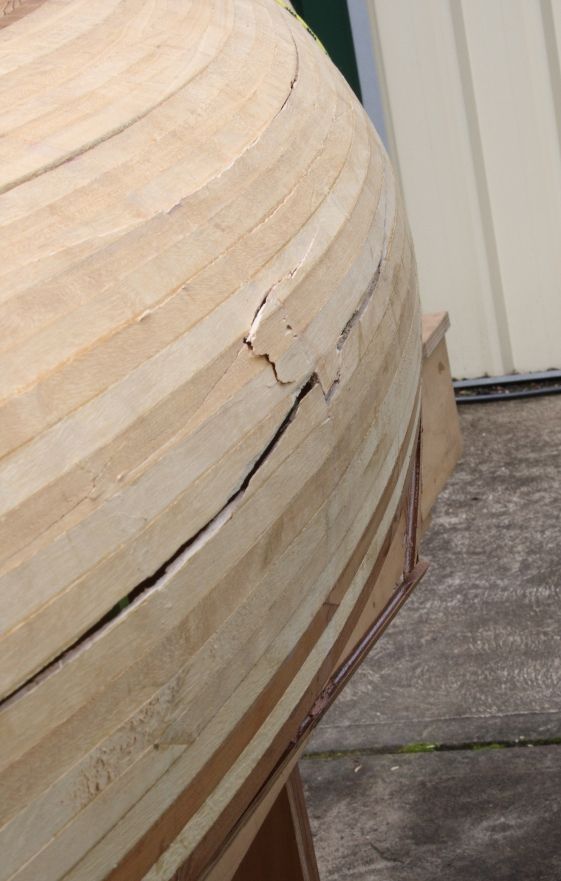
since it's going to be primarily a solo craft, i've already decided which end will be the blunt end and which is the pointy end, so those were the port side images. and the starboard side (where the impact happened) follow:

Image

Image

Image

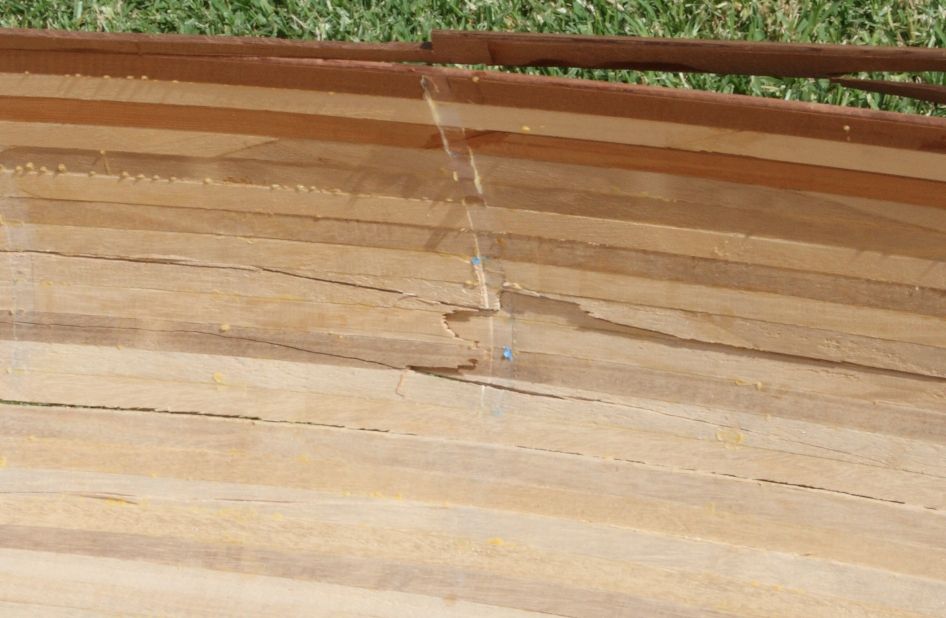
the inside of the last picture:

Image

Image

the whole setup was too heavy to just lift back up again, so i had to jack up the edge of the strongback to get the side of the hull off the ground and remove the station moulds to remove the hull and get a better idea of the damage. first assessment was kindling. i threw a couple of spring clamps on the flappy stem end and was able to tape across the split on the port side and it went back together perfectly. weather was closing in so i had to get the broken hull under cover, where it sat on the ground. i sent a shout out to the forum, and to quote patrick's dad "I'd get it back on the molds as soon as possible. " wise words which i left late. after a week of it sitting on the ground with no support, the tape had come away, one of the two clamps fell off. the weather and the weekend were playing ball so i was able to get the hull out on the lawn where i proceeded to start repairs. i started with the stem. threw some wood glue on the stem and clamped the hull back on:
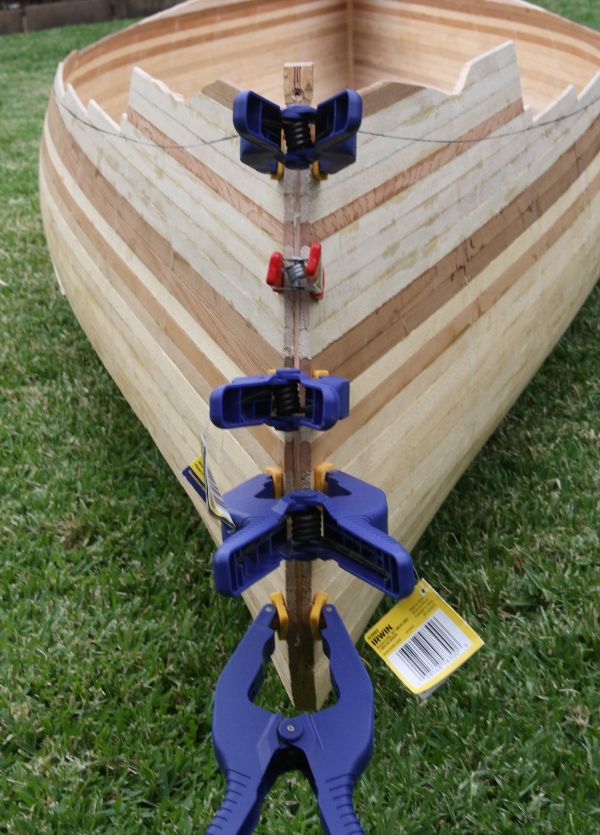
Image

this went well, i decided to start repairing the crack at the other end to the stem with some wood glue in the open crack :
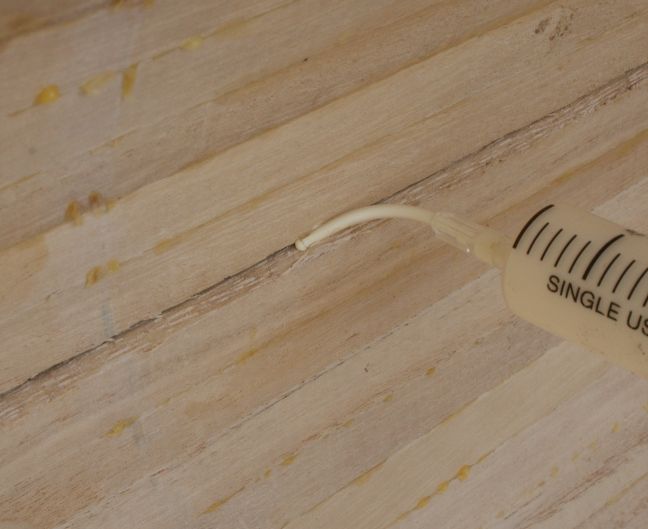
Image

i fugured i could just tape it together like i had when it first broke. things didn't go together quite so neatly, and those words by patrick's dad came back to haunt me. the glue was drying and the bast thing i could manage was :
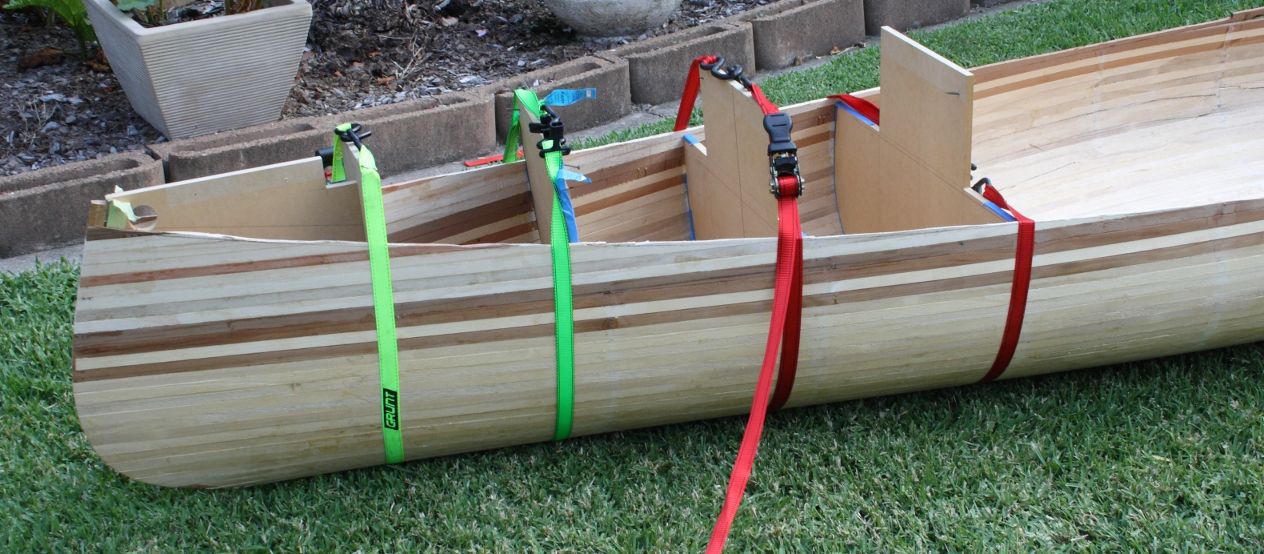
Image

i managed to get the bit that i'd glued (which wasn't the whole split) sort of together reasonably well. this was clearly not the way to do this repair. while all this was happening, i took care of the strongback so it shouldn't being going anywhere this time (i hope) :
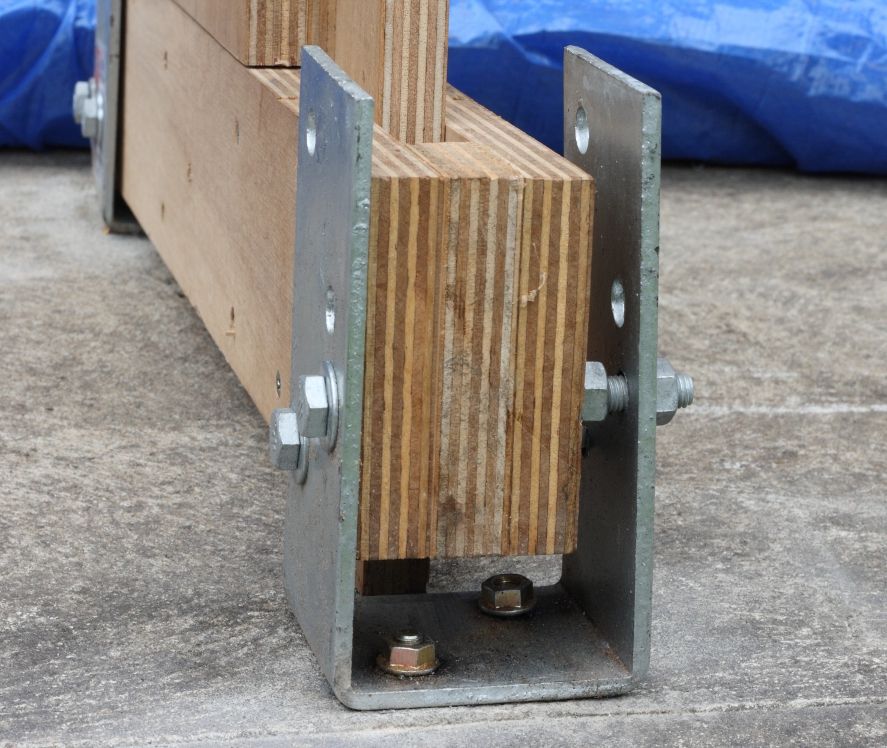
Image

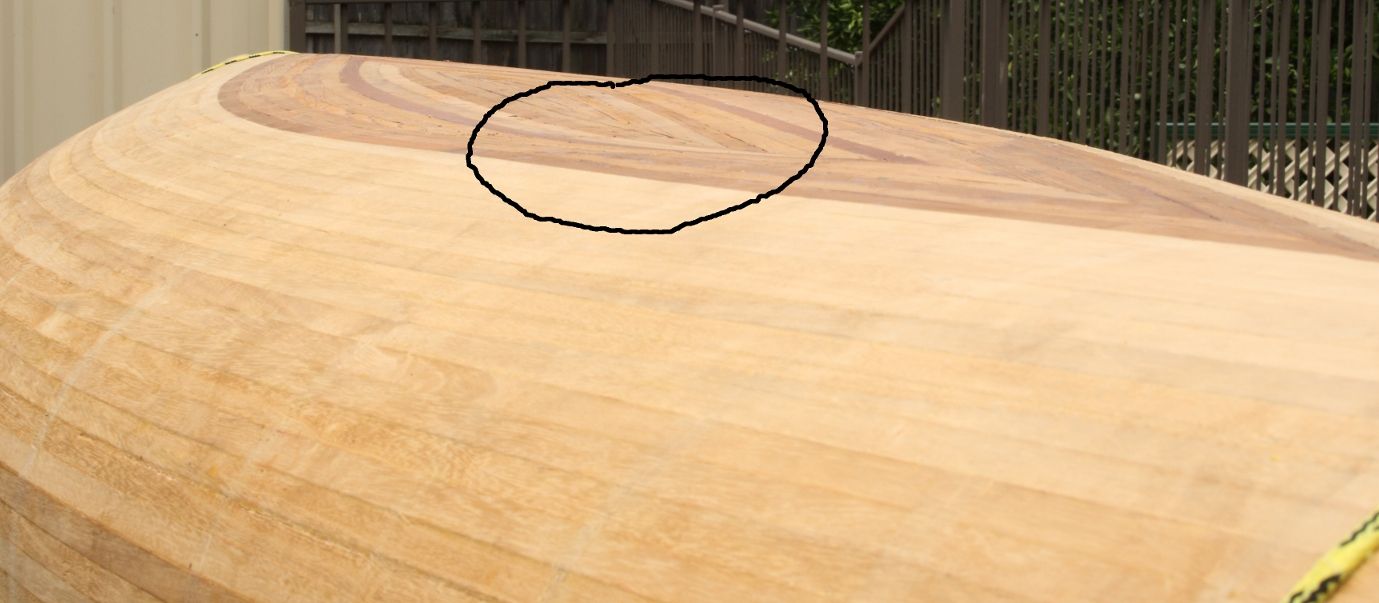
i installed the two stem stations, and strapped in the middle station and station 4s, and with some help and a lot of care got the flimsy hull back onto the strongback and secured the stations in the hull back on their blocks. that's when i noticed:
Image

instead of a nice convex curve there was a concave dip in the bottom. to quote patrick's dad "I'd get it back on the molds as soon as possible."
yeh, you've heard this before, but i thought it was worth another mention...
after some warmth from the sun and installing the rest of the stations, the bottom is back the way it should be. the next step was to get the hull conforming to the stations and getting those splits closed. one option presented to me was to use long cable ties. these would be cheap, secure, and glue wouldn't stick to them. another option was luggage tie downs, which could be tightened down well and are easy to remove. a third option would have been to use the flat bungees that i used when i was stripping in the first place. aside from one pair of bungees, i didn't think they exerted enough pressure. the cable ties i nixed because where i am it's hard to get long cable ties and i already had enough tie downs on hand to do the job.
but before that, i decided to attack the sheer damage:

Image

this was the very first strip i set down before i worked out what sequence of actions to follow, how much time i had and the use to tape between stations. hence it was never fully glued along the full length of the strip. i sanded what i could get to and laid a generous bead of glue :

Image

and taped it up:

Image

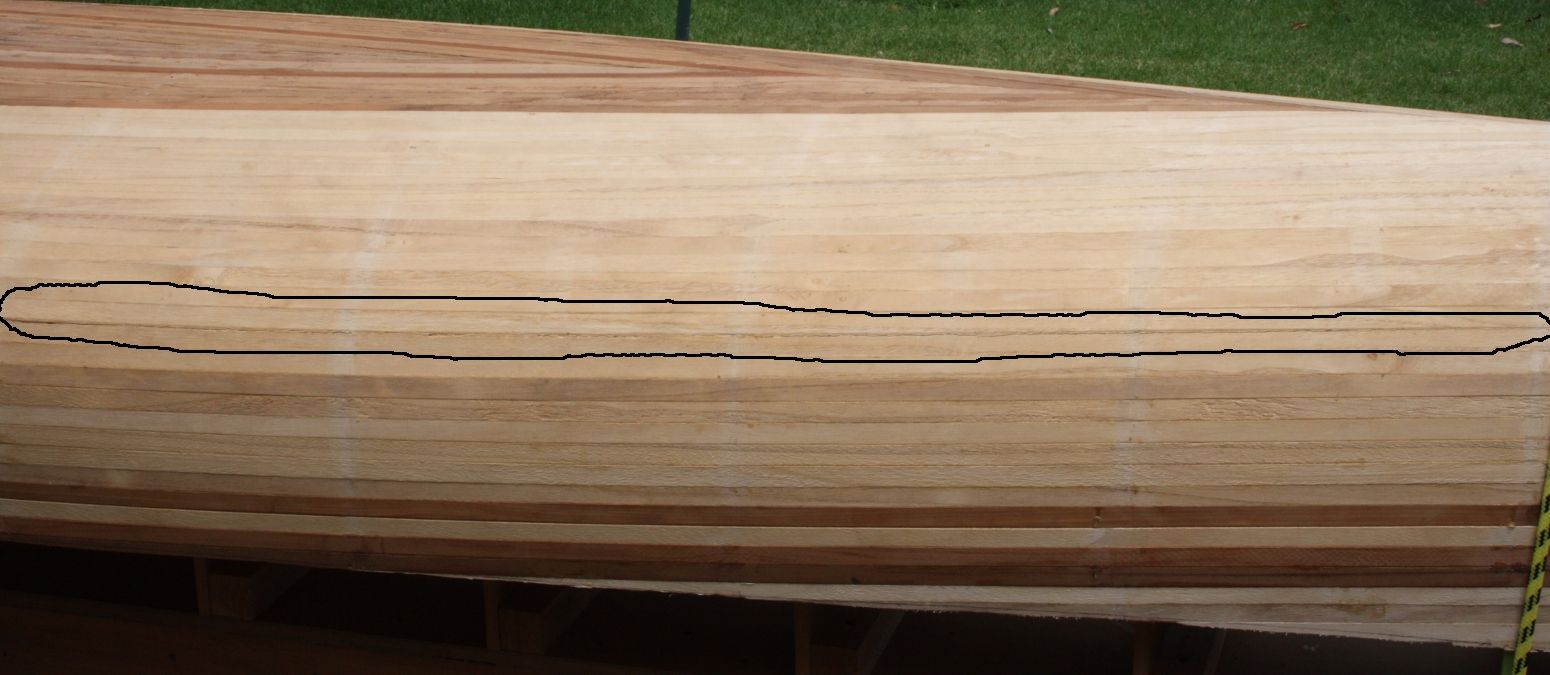
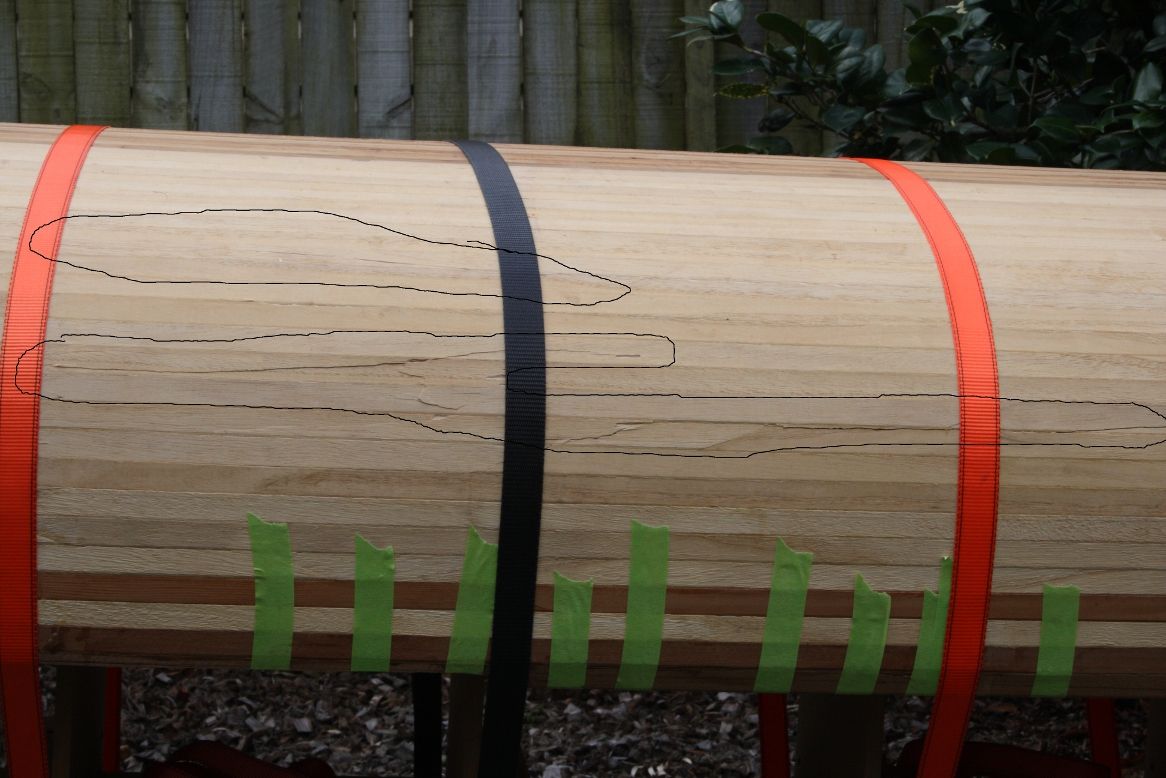
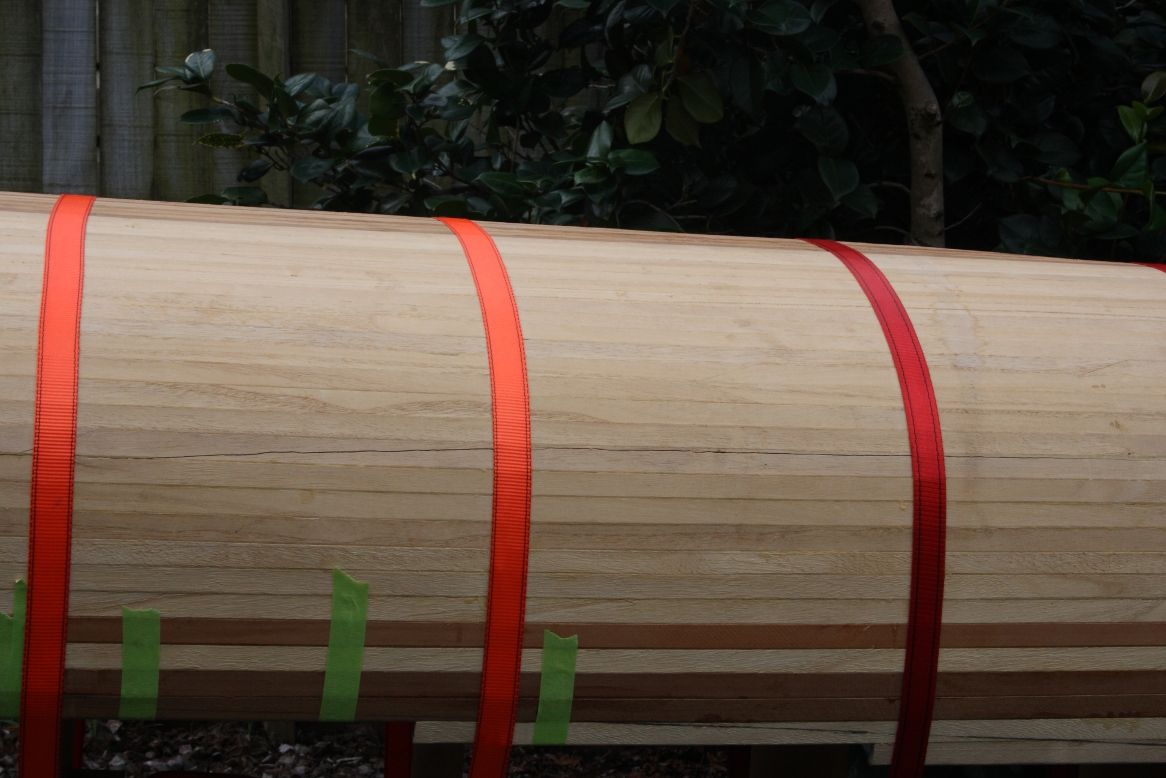
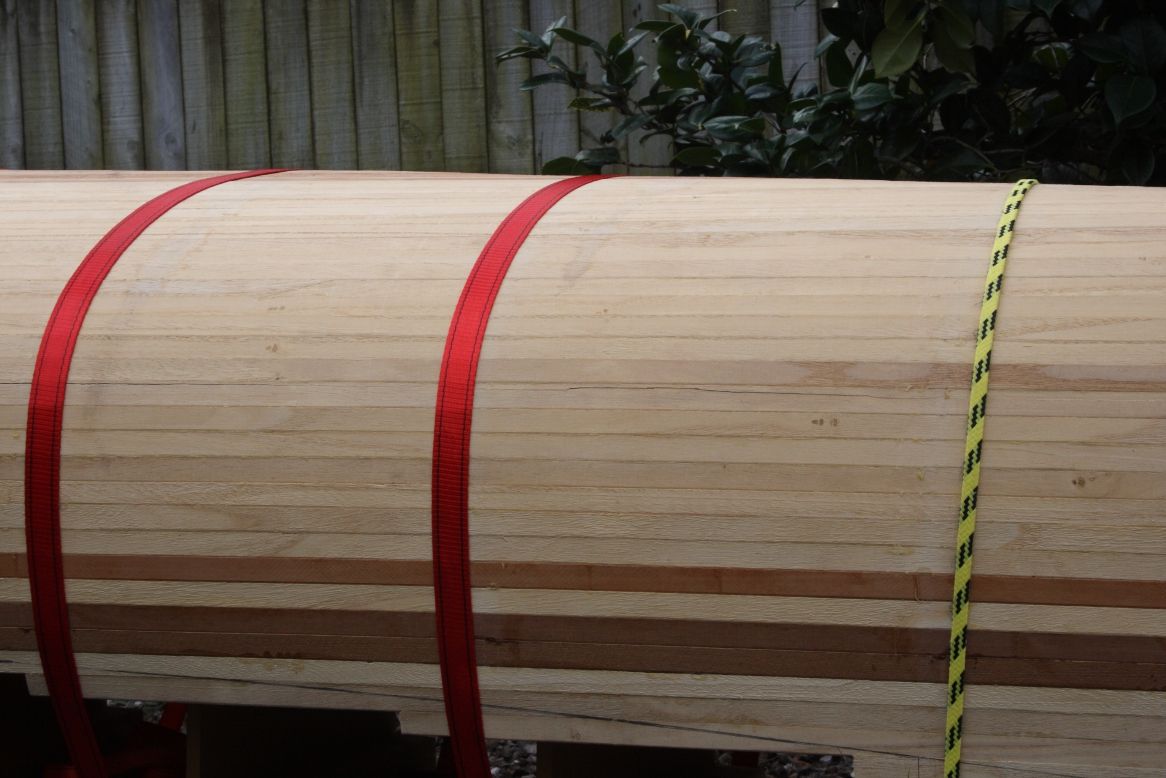
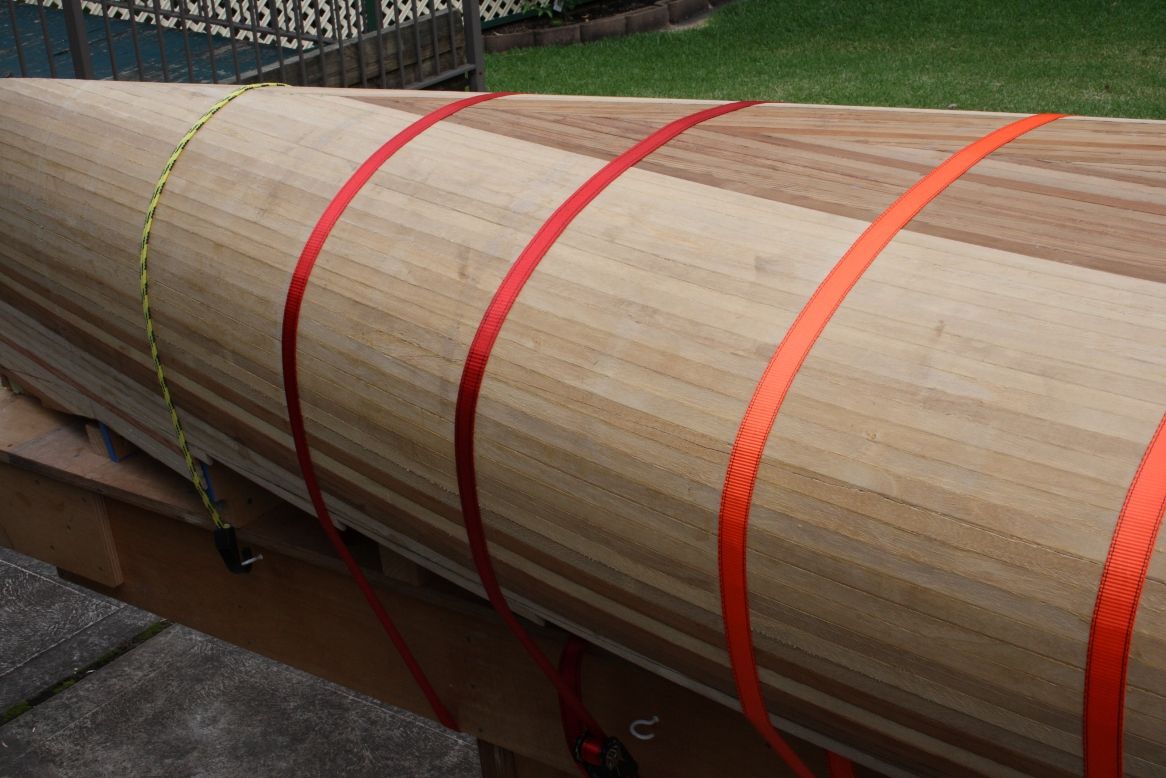
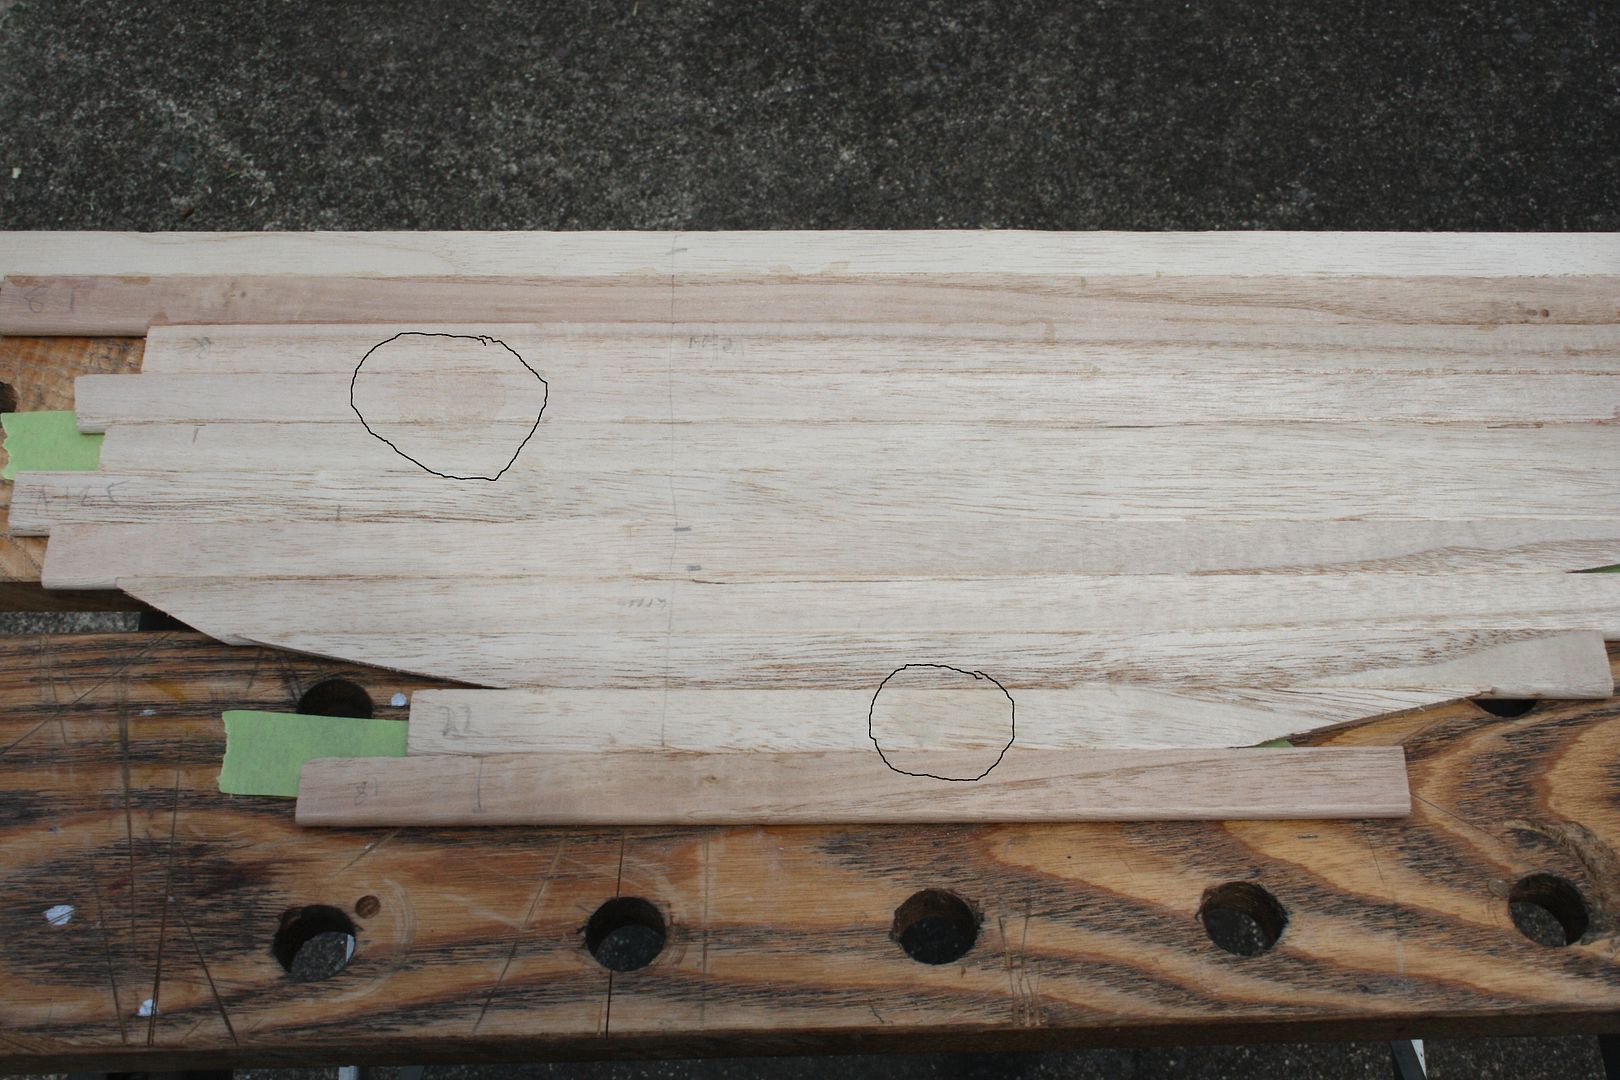
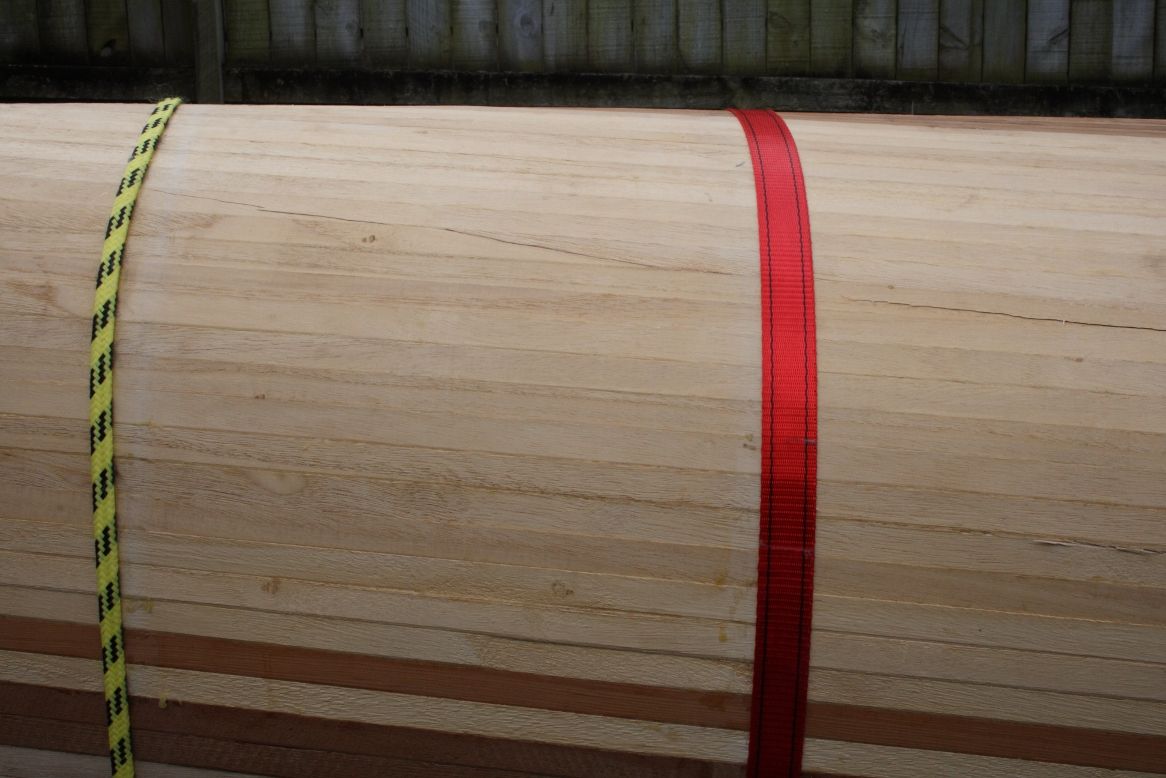
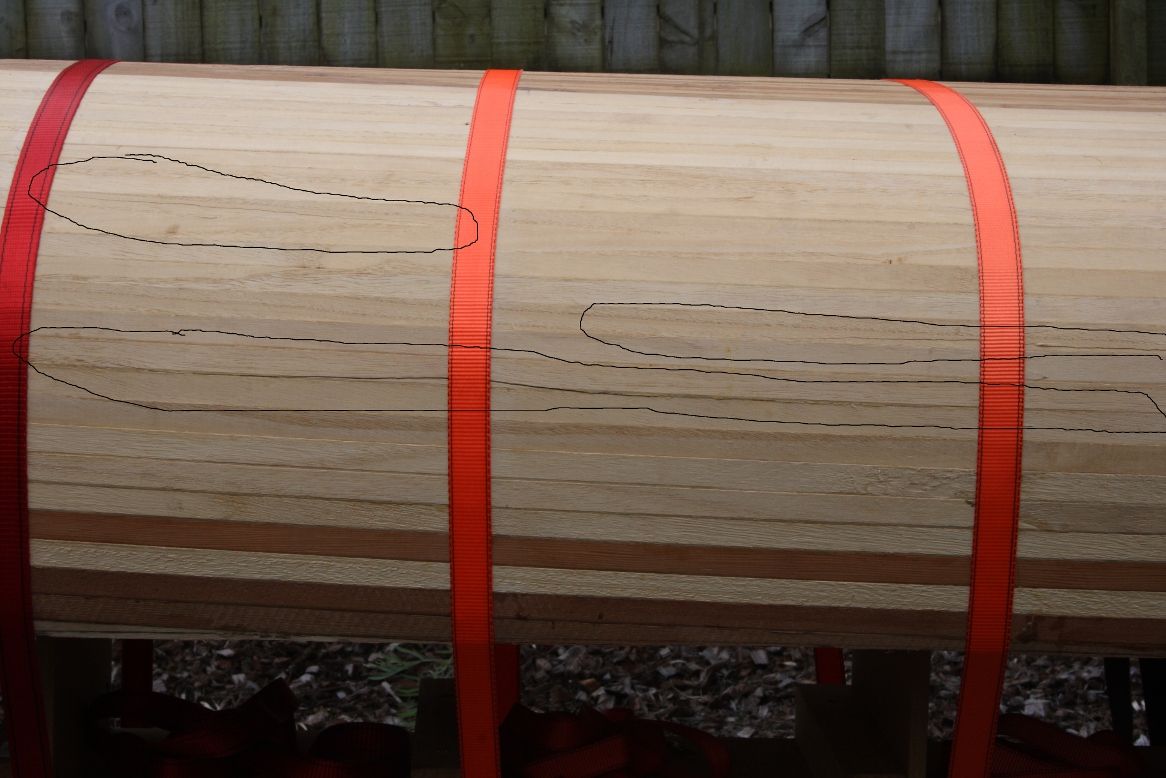
once this had a chance to dry i proceeded with the strapping. starting with the starboard side, i've circled some of the spits because they came together so well they arn't obvious in the photos.:
Image

Image

Image

Image

Image

and the port side:

Image

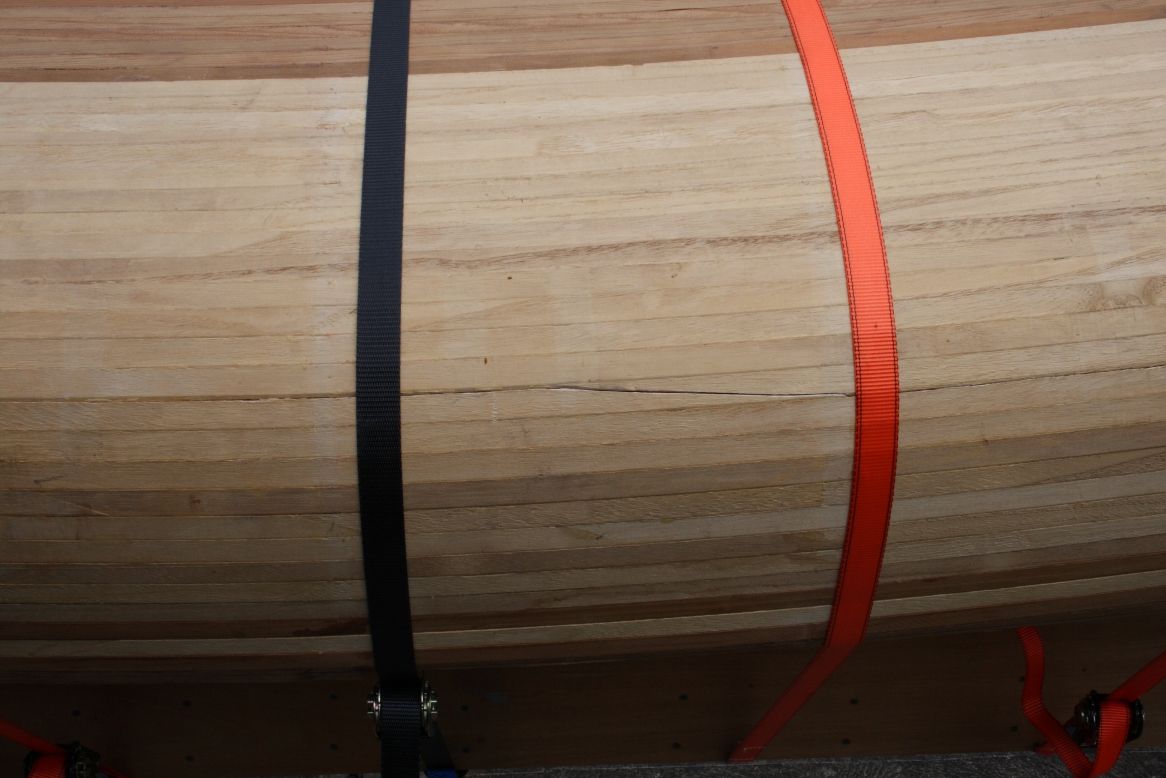
i couldnt quite get the damage in the middle on that side to close completely:
Image

well, that's what i'm up to so far. patrick's dad had suggested seeping unthickend epoxy into the cracks. i'll probably do that in some places, but when i saw the way those splits came together it made me think of my modelling days. another option to epoxy would be to put tape on the crack on the inside, and carefully seep cyanoacrylate adhesive such as hotstuff or zap into the cracks. most ca manufactures have a low viscosity formulation for good joint penetration amongst their stable of formulations. so as not to glue the straps i could do between the stations and finish off with the staps off another day. my only concern is that i'm not sure if the ca will show up as blotchy under the glass once its faired.
User avatar
HighPlainsDrifter
Posts: 77
Joined: Tue Mar 22, 2011 9:30 pm
Location: Brookings, SD USA

Re: repairs underway - a cautionary tale

Post by HighPlainsDrifter »

Your repairs are looking very good........ as is your canoe. Keep at it and good luck.

I think I would put tape on the inside and fill the bad cracks and voids with epoxy. You may even try thickened epoxy for the real bad spots. Your cyanoacrylate adhesive may show up as a nasty looking wound under the glass
Rabbit
Posts: 121
Joined: Tue Sep 06, 2011 8:20 pm
Location: Downunder

Re: repairs underway - a cautionary tale

Post by Rabbit »

hpd: that thought had crossed my mind. i've used ca with ply and balsa and never noticed anything out of the ordinary. now that the hull is back on the moulds again i don't feel the need to rush. on the weekend i will get some hotstuff, grab some pieces of bead and cove and seep glue them together, then snap it along one of the strips and seep glue it as well. then sand and glass as if it was the hull to see what it looks like. up close 90% of the damage has closed up very tight. i think thickened epoxy will only be needed on the outside of the hull in one or 2 small places. the inside may be another story.
User avatar
HighPlainsDrifter
Posts: 77
Joined: Tue Mar 22, 2011 9:30 pm
Location: Brookings, SD USA

Re: repairs underway - a cautionary tale

Post by HighPlainsDrifter »

Your experiment with glue should tell the story......... and that is a good safe way to proceed.

On my last build, I created a supply of 3 different colors of saw dust just in case I needed it. I sanded scrap plank (not glued up) of 3 different colors with my RO sander and collected what was in the bag. That dust was used where I needed to fill with thickened epoxy.

I see at least 2 major colors in your canoe. You might consider using your dust to fill any trouble spots.

I admire your approach to rebuilding your canoe. That must have been a real heart breaker to see your canoe knocked about and broken by Mother Nature.
Rabbit
Posts: 121
Joined: Tue Sep 06, 2011 8:20 pm
Location: Downunder

Re: repairs underway - a cautionary tale

Post by Rabbit »

hpd: since i knew early on that i'd need wood flour matching the hull materials (i had planned on going over the seam of every strip with thickened epoxy before fairing to fill any voids that could trap air when i glass), i had already run some paulownia and western red cedar in separate lots through the disk sander and collected the dust. :wink

yeh, when i saw the whole lot on it's side, and especially when i got the tarp off, my heart sank. but, luckily, i had the support of people like you to fall back on and tell me that all was not lost. :tu
cff
Posts: 33
Joined: Thu Oct 07, 2010 5:45 am

Re: repairs underway - a cautionary tale

Post by cff »

Don't worry about the ca./ super glue.. I had trouble with building my skiff, scarfing around knots. I tried my regular glue but found that the ca was the best. Quick too. After the boat was finished you couldn't see the glue line at all. As far as filling cracks or gaps use a darker wood flour to thicken the epoxy. The darkened epoxy won't stand out as much as a lighter fill will.. Good luck. it can be saved.. cf
SevenTenths
Posts: 12
Joined: Wed Nov 03, 2004 5:58 pm
Location: Seattle WA

Re: repairs underway - a cautionary tale

Post by SevenTenths »

Looks like a great job on the save Rabbit! Good going...


Staying tuned,
7/10
Rabbit
Posts: 121
Joined: Tue Sep 06, 2011 8:20 pm
Location: Downunder

Re: repairs underway - a cautionary tale

Post by Rabbit »

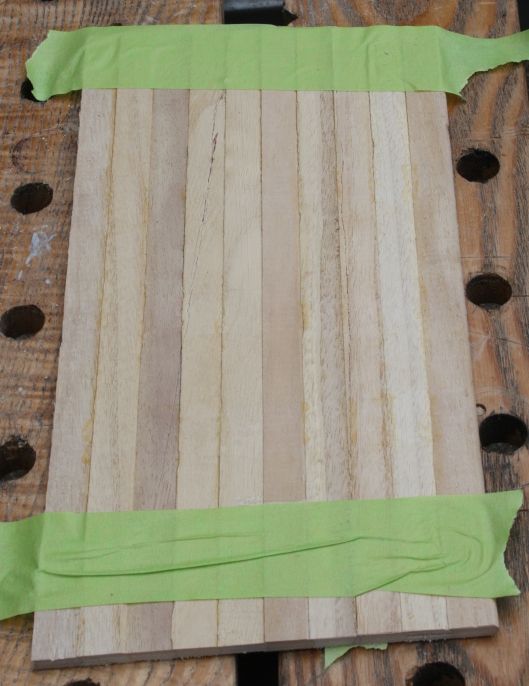
welp, i did a couple of experiments. the first experiment was purely with ca. i was using the 3 formulations of hotstuff, because that was what was available from the wood tool shop. first i took some pieces of bead and cove strips and taped them together across what was going to the the back:

Image

i taped across in a couple of places on the front:

Image

and proceeded to glue by seeping the strips:

Image

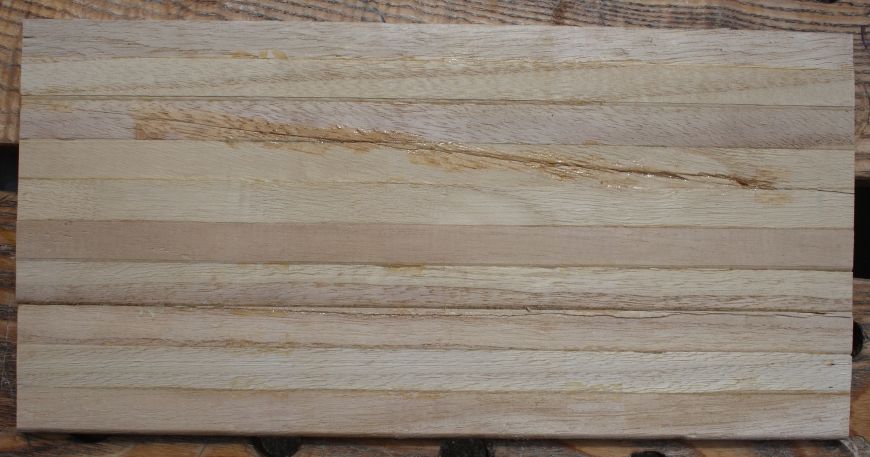
i tried both the thin (red) and gap filling (yellow) formulations. the red one was by far the better choice for this.when the glue had dried, i untaped it. it was kinda flimsy because i had gone too quickly and didn't apply enough glue to penetrate the full thickness of the joints. i went over the joints from the back to finish it just to get some strength back, then snapped the board in a couple of places:

Image

i pushed the pieces back together and taped across the back, then using the red formulation, seeped the ca into the joints, this time making sure to get the penetration. i also smeared on a couple of places some of the ca to see what effect it would have once sanded and glassed. :

Image

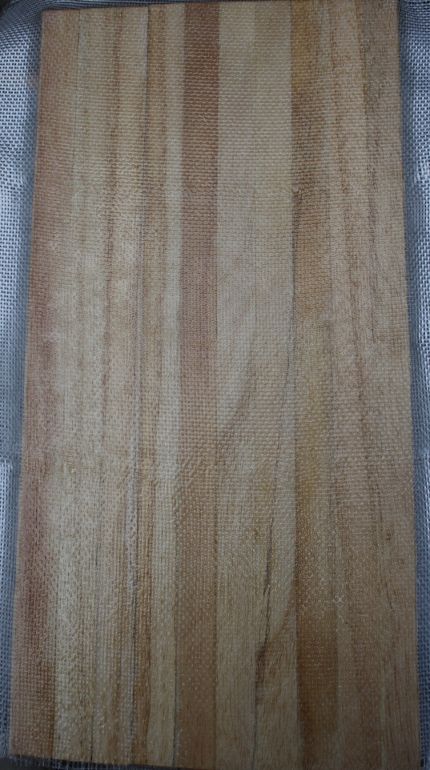
i decided to try using the ultra gap filling formulation (green) to level out some spots before sanding. these when sanded were still on the surface of the timber and looked cloudy. after sanding, i glassed using just 2 coats (i didn't think there would be any point in filling in the weave).:

Image

as you can see, the places where the green formulation was used, it shows. one of the spots where the red formulation had been smeared, did not show up after glassing. the other part was covered by ultra gap filling formulation. prior to glassing the patch that disappeared could still be seen level with the timber surface (it was filling the grain rather than sitting on top of it). from this it would seem that providing you sand properly so that none of the ca is just sitting on the surface, it could be used for this type of repair.

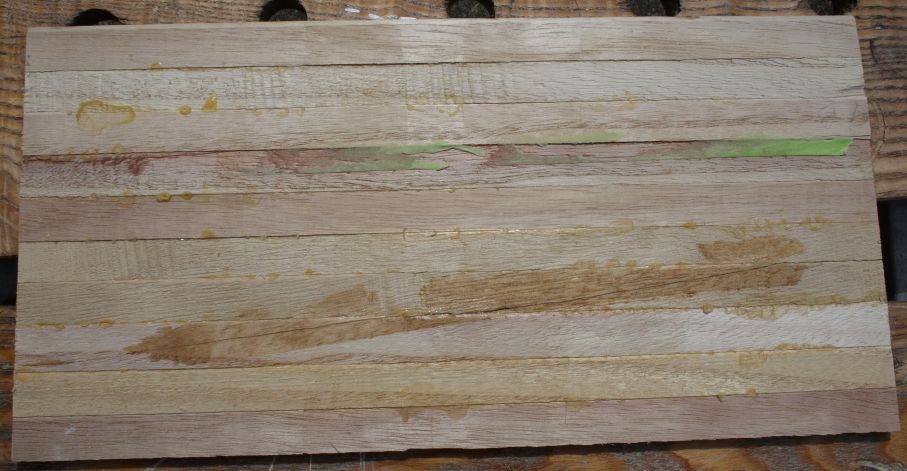
now for the down side. removing the tape from the back of the repair was a pain, and left behind nasty sticky gummy residue the width of the tape, when the tape did come away. ok, so.. on to the second experiment.

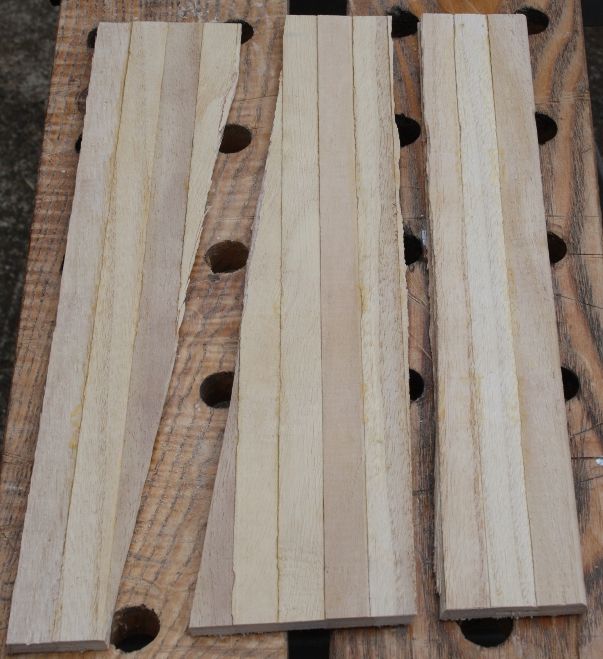
this time i glued some strips together the usual way with good old carpenters wood glue. again i broke it in a couple of places:

Image

and put it back together, using tape to apply clamping pressure and taping across the joints at the back :

Image

this time i used red hotstuff ca on the strait joint, and seeping unthickened epoxy into the diagonal joint. the epoxy i'm using recommends using their timber treatment additive for the first coat on bare timber. this has the added effect of thinning the epoxy mix still further increasing penetration. :

Image

as you can see, it is possible to use the ca without making a mess... or so it seemed. the back however....:

Image

tells a slightly different story. again the tape was difficult to remove and left a gummy, sticky residue. the epoxy on the other hand clearly shows that it too gained full penetration to the joint, however, the tape was easily removed with no residue at all.

a quick bit of trial with a scraper did seem like it would be effective in removing the residue from the ca joint, but its slow and tedious.

the front once sanded and glassed:

Image

for the epoxy joint i also used unthickend epoxy to fill, but for the hull i'll use sawdust and microsphere thickened epoxy. whilst i can see that ca could have many application in strip constructed builds, i think i'll go with using epoxy for my repairs.
User avatar
Glen Smith
Posts: 3719
Joined: Sat May 08, 2004 9:08 am
Location: Baie-St-Paul, Quebec, Canada

Re: repairs underway - a cautionary tale

Post by Glen Smith »

You seem to be on the right track.
but for the hull i'll use sawdust
I hope you mean "sanding dust" because sawdust is much too coarse.
Rabbit
Posts: 121
Joined: Tue Sep 06, 2011 8:20 pm
Location: Downunder

Re: repairs underway - a cautionary tale

Post by Rabbit »

glen: umm, yeh :laughing

if you read up to the post on the 17th'ish you'll see what i'm using :cool
Rabbit
Posts: 121
Joined: Tue Sep 06, 2011 8:20 pm
Location: Downunder

Re: repairs underway - a cautionary tale

Post by Rabbit »

welp, i got the repairs done, at least in the segments between the tie downs. when i had a look today i noticed that the sheer line on one side seemed to overhang more than the other. when i looked under the hull, i noticed that in the middle, the keel line was about 6mm off centre. i loosened off all the tie downs, pulled the hull away from the stations to crack the bond there seemed to be between the hull and the stations and pushed it into the correct alignment before tightening down the straps again, checking the keel line was in the right place at each station as i tightened each strap. i think it will take a little while for the hull to settled into this new position, so it will be a little bit before i take pictures with the straps off. so, another lesson learned to pass on.

and now, a tale of repair......

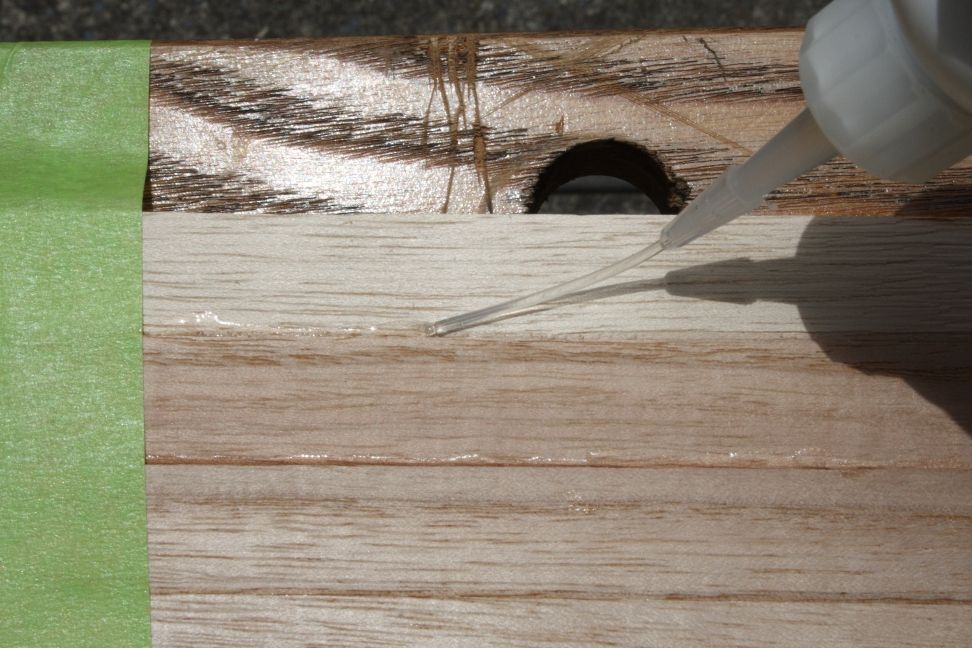
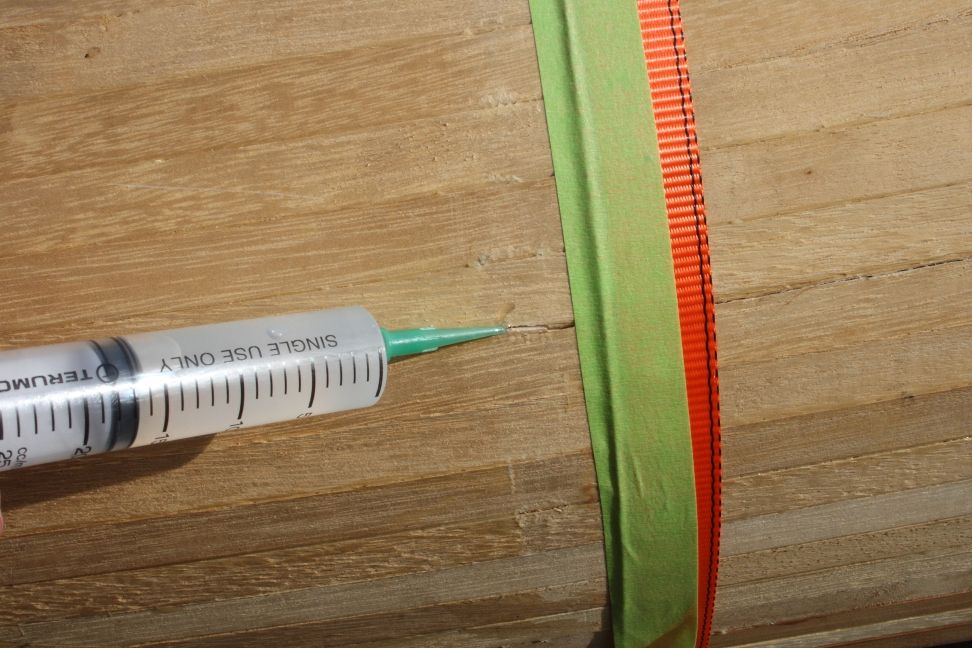
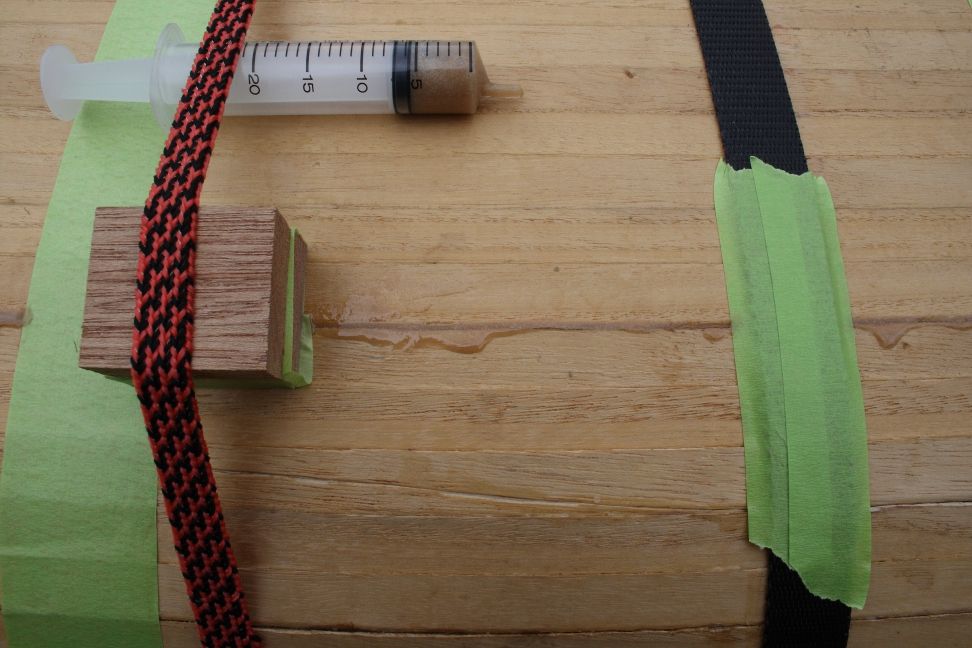
the hull, which had been sitting on the ground for a couple of weeks or so had taken on a flatter, squatter set than the correct curves of the stations. as a result, even though most of the cracks came together nicely initially, the hull was still not conforming fully to the stations, despite the tie downs. during the time i spent doing my little experiment with ca and epoxy, the hull took on the set of the stations, and the splits opened up. i loosened up straps and pushed the gaps closed as well as i could. i had to work in several sessions. my weapon of choice for most of the repair was unthickend epoxy thinned with a timber treatment made by the epoxy manufacturer, in a 20ml syringe with a tapered 18 gauge tip:

Image

if you don't happen to have these around, the syringe set from lee valley tools would do.
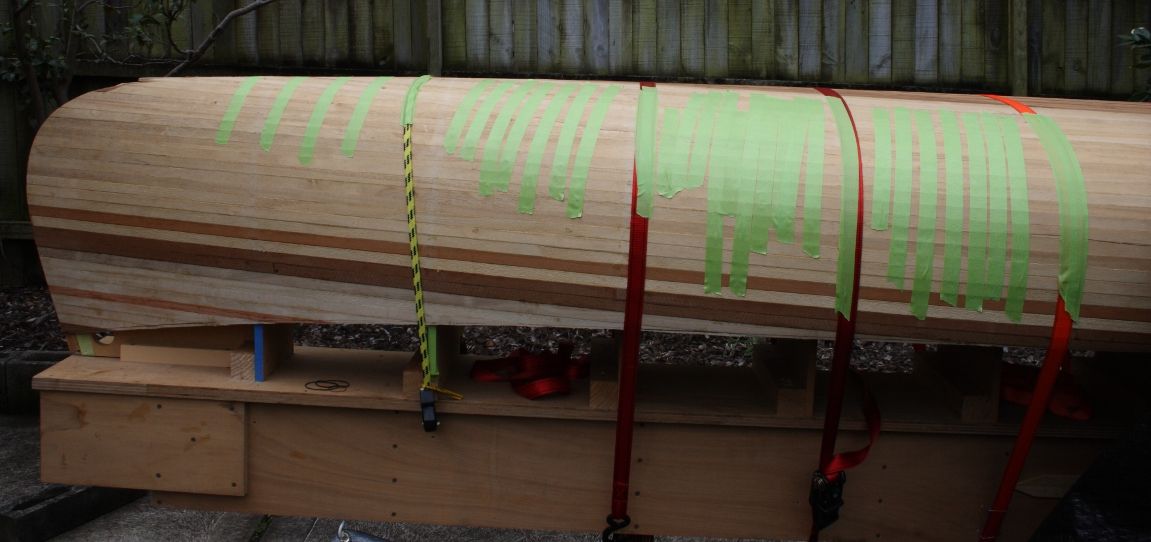
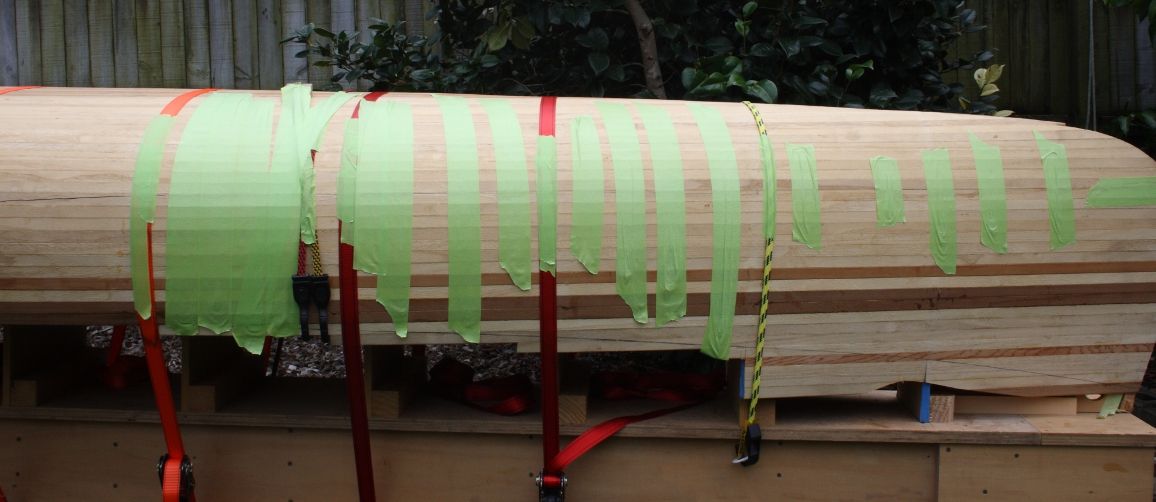
due to the weather, the first session was not a lot. i had to work between showers, so the epoxy started to gel before i could get much done:

Image

Image

the tape i used was 1inch green automotive masking tape. it stretches nicely to give a bit of clamping pressure. i also used this tape along the cracks on the inside of the hull to prevent epoxy going everywhere that had fully penetrated the cracks.
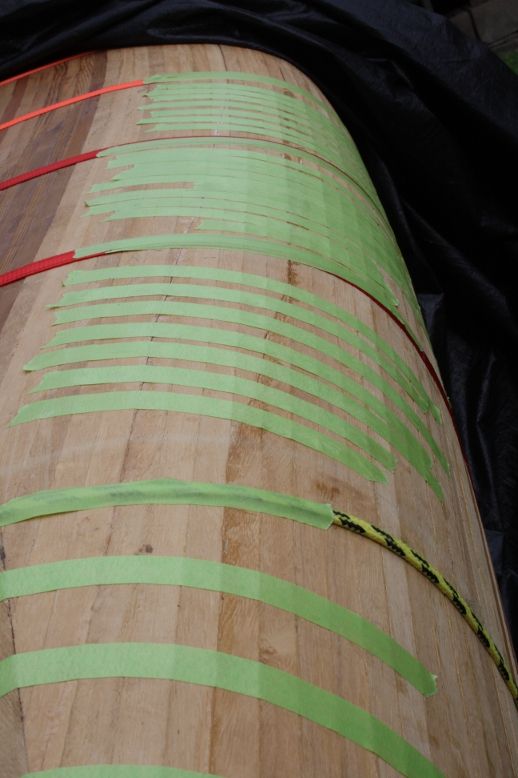
the next session was broken into 2 chunks. the first was between the next 3 stations:

Image

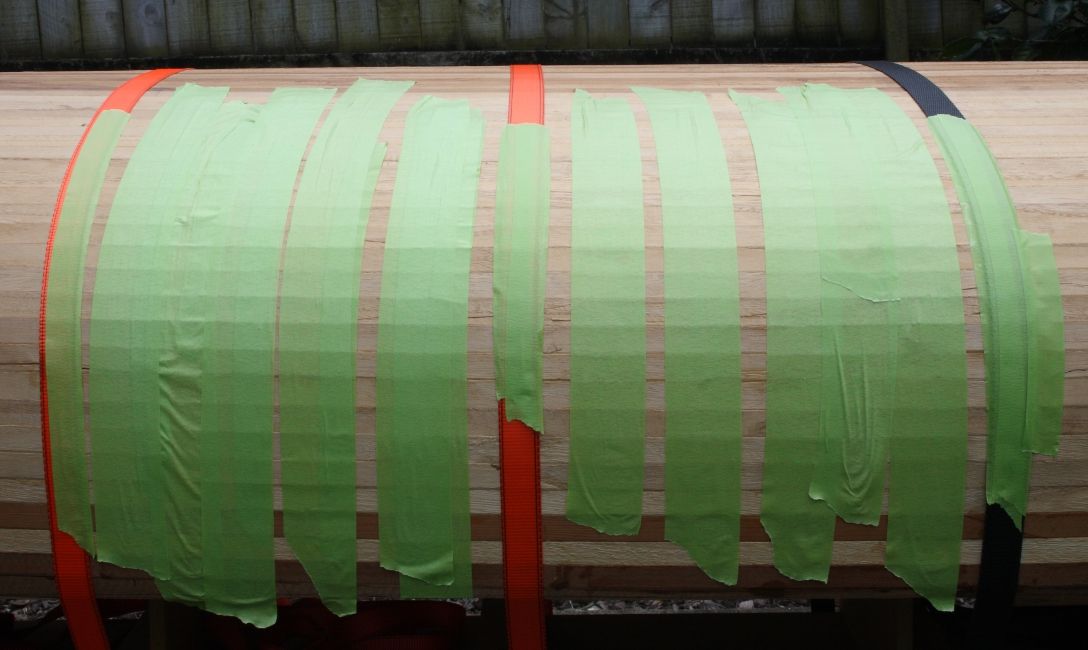
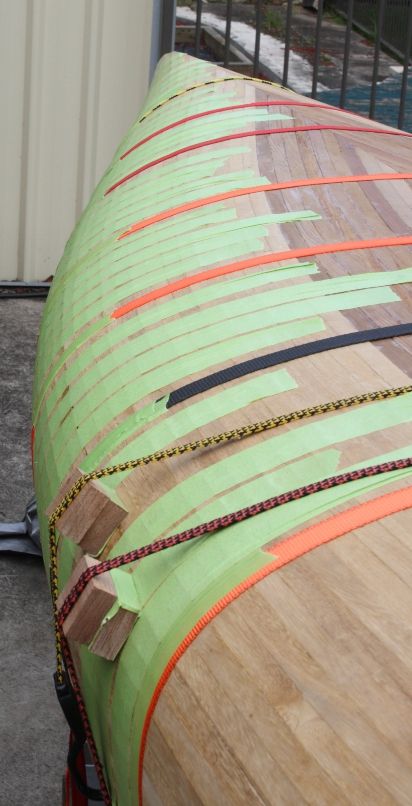
i changed to 2 inch tape because i found this gave better clamping pressure. i wasn't happy with what was going on for the next few stations, but the gaps were fairly good further down, so i decided to address them while the epoxy was still runny:

Image

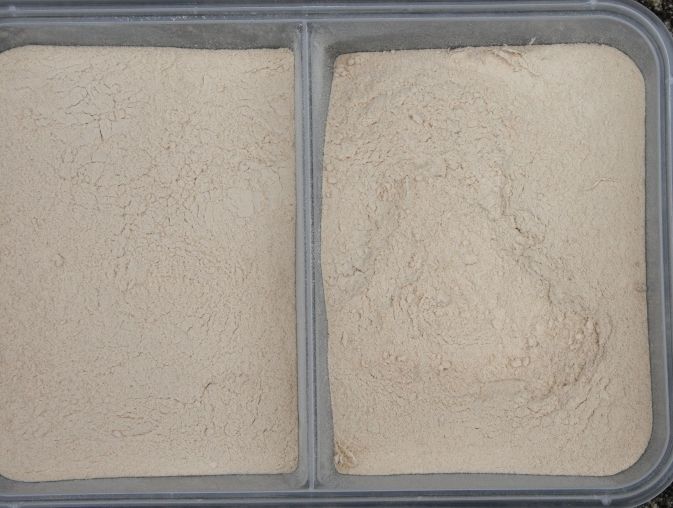
you'll notice the bungee which helped with closing one of the cracks, as well as providing something to support some blocks to push down on a joint to close it more tightly. i found that after going along a crack with epoxy, pushing down gently and then relieving the pressure several times along the joint helped to work the epoxy into the joint. about 5 hours later i did the next session. the final section on the side that took the impact had a big gap that could not be closed just by pushing up from the sheer. i needed to first deal with the section between the gap and the next crack down to anchor that bit before then closing the cracks closer to the sheer. since there was still enough of a gap that you could see light , i decided to use epoxy thickened with wood flour. it's amazing that this:

Image

ends up looking like this after mixing with epoxy:

Image

this was an exercise in patience because i really wanted to get the repairs finished, but i knew i'd have to wait while that epoxy set before i could get on with the rest of that final section for that side. the next day i closed the rest of the cracks, but no photos. in the afternoon i dealt with the other side.

like the impact side, big gaps had opened up as the hull had settled, so i had to loosen all the straps on half of the hull, so i took the opportunity to finish cutting the sheer line that i had started the day before the accident. i figured it would give me less floppy excess material to cause problems when i started to push, pull and prod the parts together.

the weather was good and i didn't have any odd big gaps , so i was able to do the other side in one session:

Image

again, i needed to apply some pressure down in a couple of spots to close the gap.
once the hull has settled after its keel line correction i'll post pictures of the repairs without the straps in the way. :dancing
cff
Posts: 33
Joined: Thu Oct 07, 2010 5:45 am

Re: repairs underway - a cautionary tale

Post by cff »

Another trick to closing those gaps you might like to try.. Hot glue clamping blocks equally on both sides of gap all along split. Then fill split with thickened epoxy and clamp gap closed while epoxy sets.
After the epoxy has set, simply chisel the blocks off and scrape away excess hot glue.
It wouldn't be that hard to test out on a small sample. Good luck. cf
Rabbit
Posts: 121
Joined: Tue Sep 06, 2011 8:20 pm
Location: Downunder

Re: repairs underway - a cautionary tale

Post by Rabbit »

nice idea, but a bit late ccf. i've already completed the repairs, cut the sheer line and installed the outer stems.

Image

an idea i had toyed with was drilling holes either side of spits and gluing in tooth picks, then using cable ties on both inside and outside of the hull between the toothpicks to tighten it up. once the epoxy in the crack had set the toothpicks could be cut flush with the hull. the timber used to toothpicks closely matches that of the paulownia used for the hull.

once i've finished with some gap filling it will be on to the fairing. once it's glassed i'll post pics of the glassed hull to show how the repairs went from a visual point of view. the integrity of the hull is back to what it was before the accident, so now it's just down to the aesthetics. either way i'll still have a boat to go fishing in. :laughing
User avatar
Glen Smith
Posts: 3719
Joined: Sat May 08, 2004 9:08 am
Location: Baie-St-Paul, Quebec, Canada

Re: repairs underway - a cautionary tale

Post by Glen Smith »

Great progress! You are going to have to come up with some catchy name for this beast.
Rabbit
Posts: 121
Joined: Tue Sep 06, 2011 8:20 pm
Location: Downunder

Re: repairs underway - a cautionary tale

Post by Rabbit »

thanx glen!

i was toying with the idea of calling it "the flounder"..... :laughing
Post Reply