First build; Ranger 15!

Welcome to the new Bear Mountain Builders Forum - an interactive internet service we provide to encourage communication between canoe and kayak builders
Maddog
Posts: 30
Joined: Mon Dec 02, 2019 5:17 pm

Re: How far to sand first fiberglass epoxy coat?

Post by Maddog »

Cruiser wrote: Sat Apr 18, 2020 7:53 pm
A thought on the fillet on the inside of your stems .... if I were building with stemless (maybe next build), I would question the "why" of adding that fillet.
You bring up good points about the fillet. After my previous post I read your comments on that topic in another one of your threads, and how the fillet almost negates the weight savings of a stemless build. The interlock should add quite a bit of structural integrity as opposed to just butting them up to each other (as demonstrated in a book I've been referencing during the build), and I do plan to apply 2 layers of fiberglass to the outside of the stems. You've helped to talk me out of the fillet! One less step closer to getting on the water is also welcome 😂
Simon
Posts: 11
Joined: Sat Aug 31, 2019 5:17 am

Re: How far to sand first fiberglass epoxy coat?

Post by Simon »

Thanks I really like the stemless approach. Halfway through a redbird and found the stems problematic, but it is my first build. Thank you all for the info.
User avatar
Jim Dodd
Posts: 1359
Joined: Wed Feb 08, 2006 11:08 pm
Location: Iowa

Re: How far to sand first fiberglass epoxy coat?

Post by Jim Dodd »

I promise NOT to stir things up !

Some great pics and builds !

The raised staples tells me you know what you are doing Maddog! You will Not need to sand deeply to remove the bruises left by staples driven too deep !

I've tried a bunch of ideas, to deal staple holes.
For one ! If you don't fill them ? They weep resin away. That is a problem I deal with in two ways.

One. Fill them so they don't Weep ! If you seal coat, and I USED to. Apply seal coat. Then 1/2 - 1 hr later ? Mix a small, 3 oz batch of resin and hardener. With a small foam brush, wipe over the staple hole line. This second coating will seal those holes, and you will not see the extra coating.

Two. Fill them so they aren't "AS" visible !
After the first initial sanding, I take a glue bottle with a small tip. My favorite glue for this is Elmer's MAX. for some reason it is slightly less noticeable than my second choice Titebond III. I dap a little glue on the holes. Once I have completed a line, I take my finger and go over the glue, forcing it into the holes. Some will say this takes a long time, but not really. You are done with the holes. Go ahead and finish sanding. You are good to go ! This is my favorite method so far !

I give Ted full credit for inspiring me to switch to bead and cove ! The Minnesota builders that I had first learned strip building from then, and some even now, refer to it as Heresy. I view bead and cove as essential !

Glassing the inside of a stemless stem. I simply overlap the cloth layers on the inside. No need for a fillet. You can if you want. I don't. Two layers of Bias strips on the outside is all you need, unless you are real hard on your stems. I have great luck with this method. I Also add flotation chambers. I suspect this adds strength also. With a stemless build ? This is a little easier.

Maybe do a search on this site for Flotation chambers. I believe I have one. Commercial builders are required to provide some form of flotation ! I'm sold on it, and so put them in all my builds.

My last comment ! Veterans to this site know this is coming ! I'm a big fan of cutting strips using the Skilsaw method. Again you can find the thread here !.

I'm looking forward to seeing your canoe when done !

The best of Luck !


Jim
Keep your paddle wet and your seat dry!
Maddog
Posts: 30
Joined: Mon Dec 02, 2019 5:17 pm

Re: How far to sand first fiberglass epoxy coat?

Post by Maddog »

Jim, thanks for the advice. Not only in your previous comment, but through all of your previous threads and comments. I came across them through my countless hours of research during my current build, and have used a lot of the information you've made public on multiple forums already!
Maddog
Posts: 30
Joined: Mon Dec 02, 2019 5:17 pm

Re: How far to sand first fiberglass epoxy coat?

Post by Maddog »

It's been a while so I thought I'd post an update! Being my first boat I don't work as fast as some of you veterans, but it is still coming along nicely! My next build will go much smoother as I'm picking up some time saving tips, and figuring out what works for me in certain stages of the build.

I completed the sanding, and applied coats two and three to the outside; timed it appropriately in order to do these with a chemical bond. Second coat was applied as described in Canoecraft, and the third coat was rolled on with a "cigar" foam roller. The third coat turned out spectacularly smooth which made the final epoxy sanding very easy and pretty much flawless! I'm very happy with how the outside has turned out.

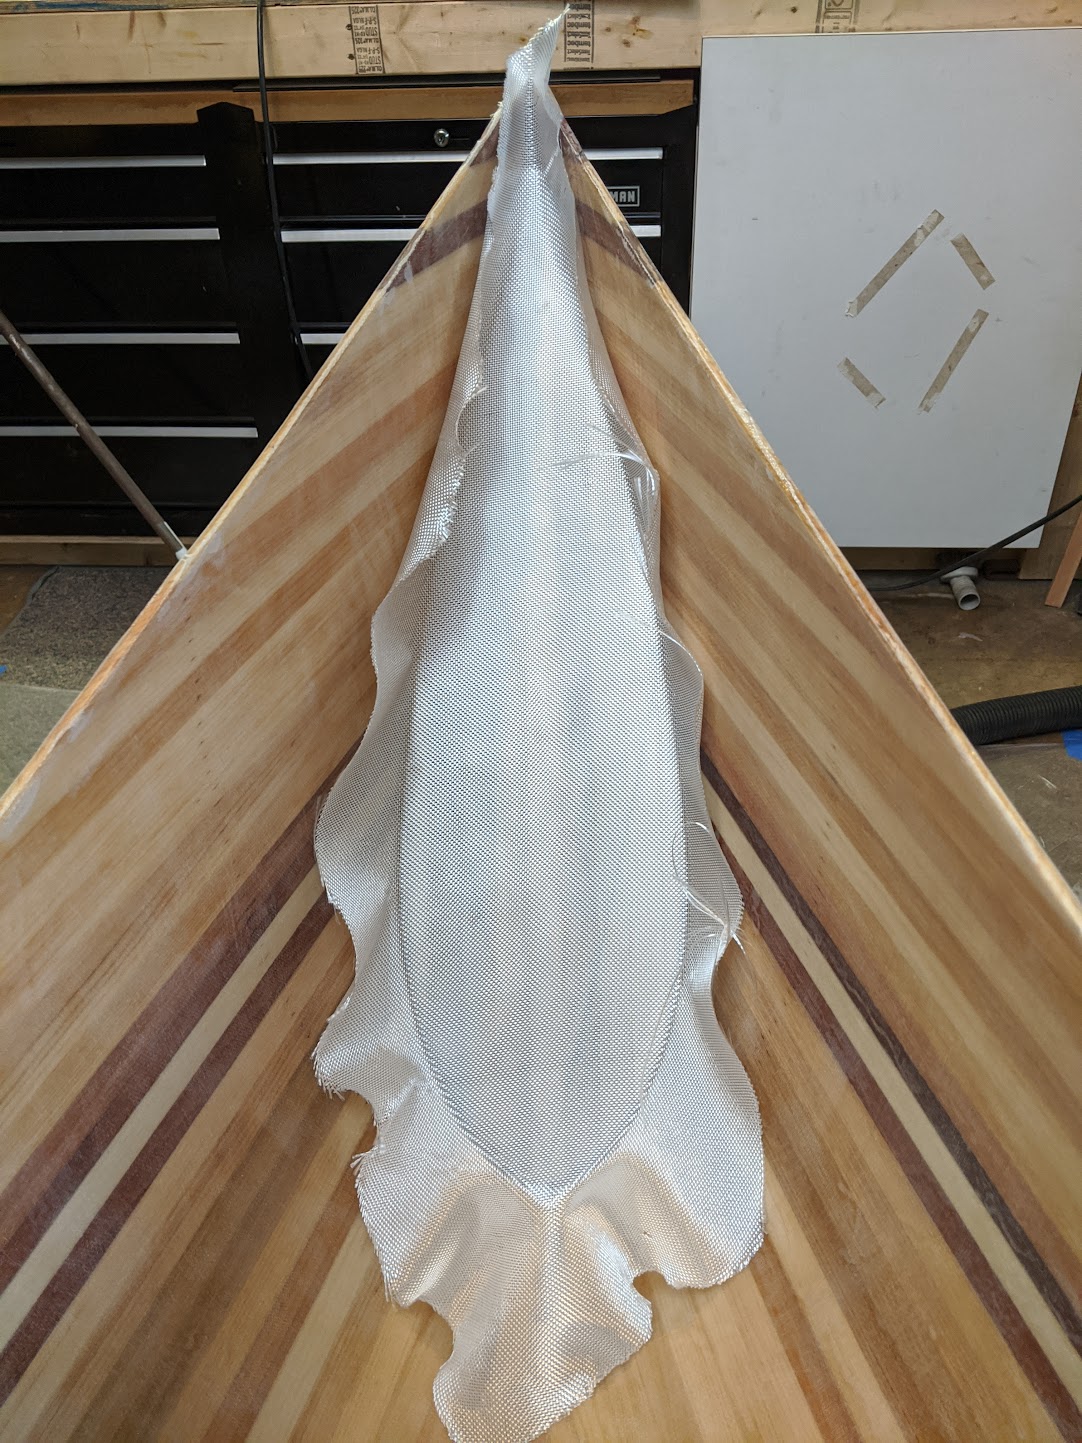
Stem reinforcement strips. I didn't have enough cloth left over to do full length or width cut on the bias, so i just did regular strips, and feathered them into eachother which turned out great. They were feathered after this step, and before the final coats of epoxy. Forgot to take pics of the feathering process.
Image
After coat 3. Can't even tell there are two additional layers of cloth at the stems!
Image
Third coat applied
Image

While waiting for the epoxy to fully cure I was able to get some of the woodwork done. Got the seats built, gunwales milled, and deck blanks made.
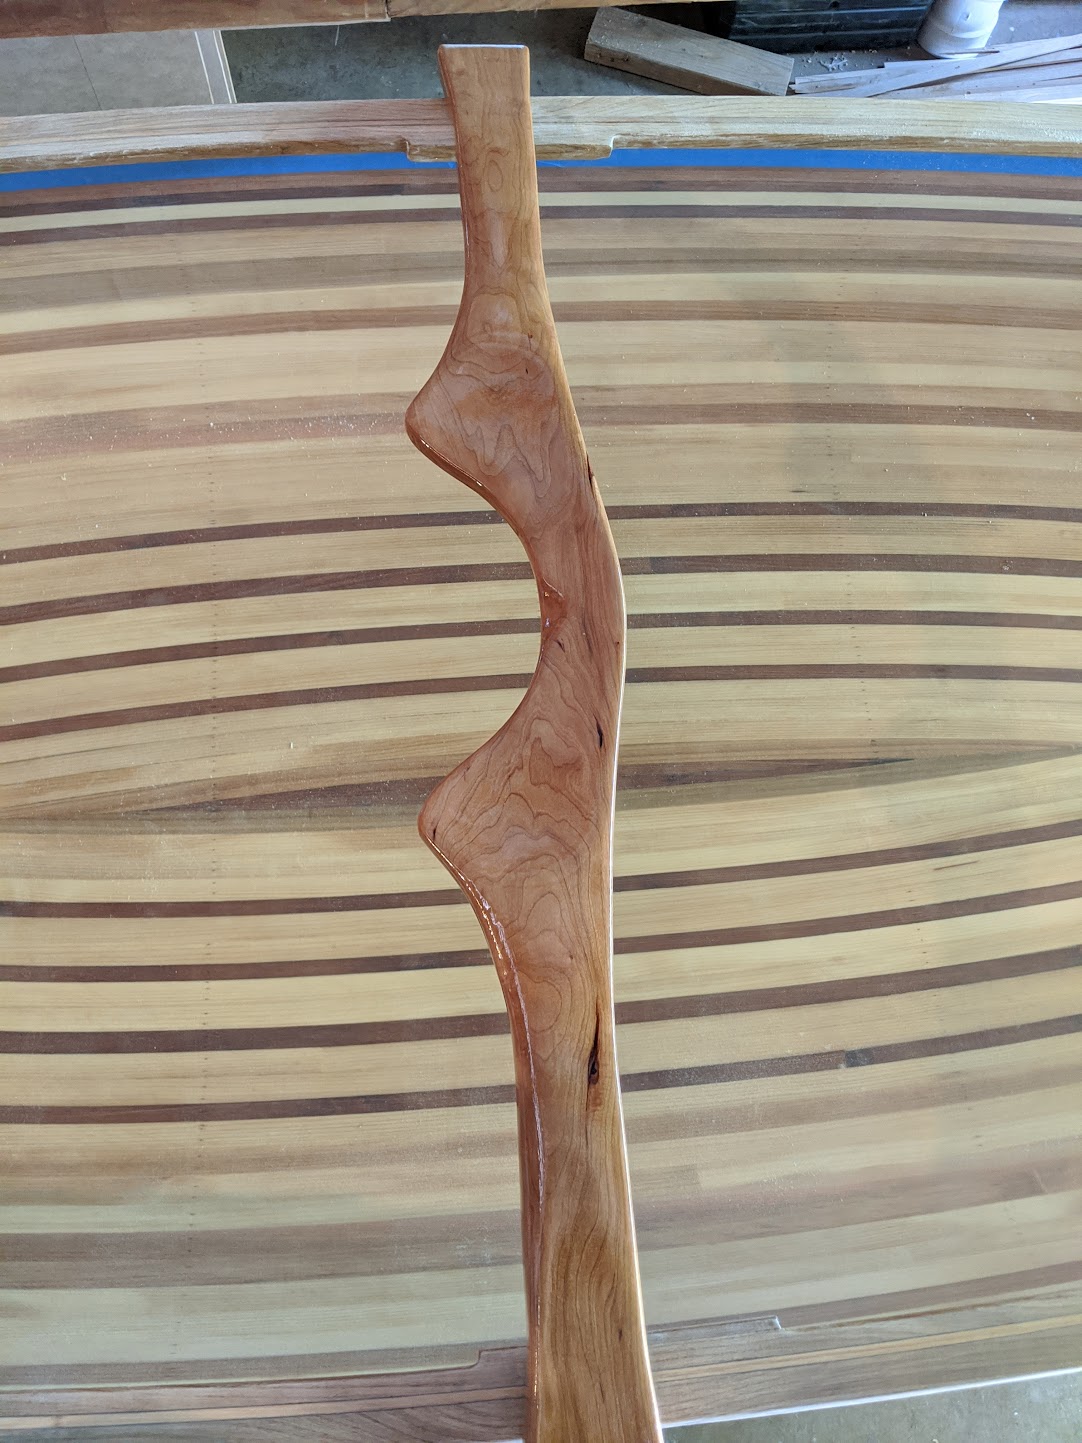
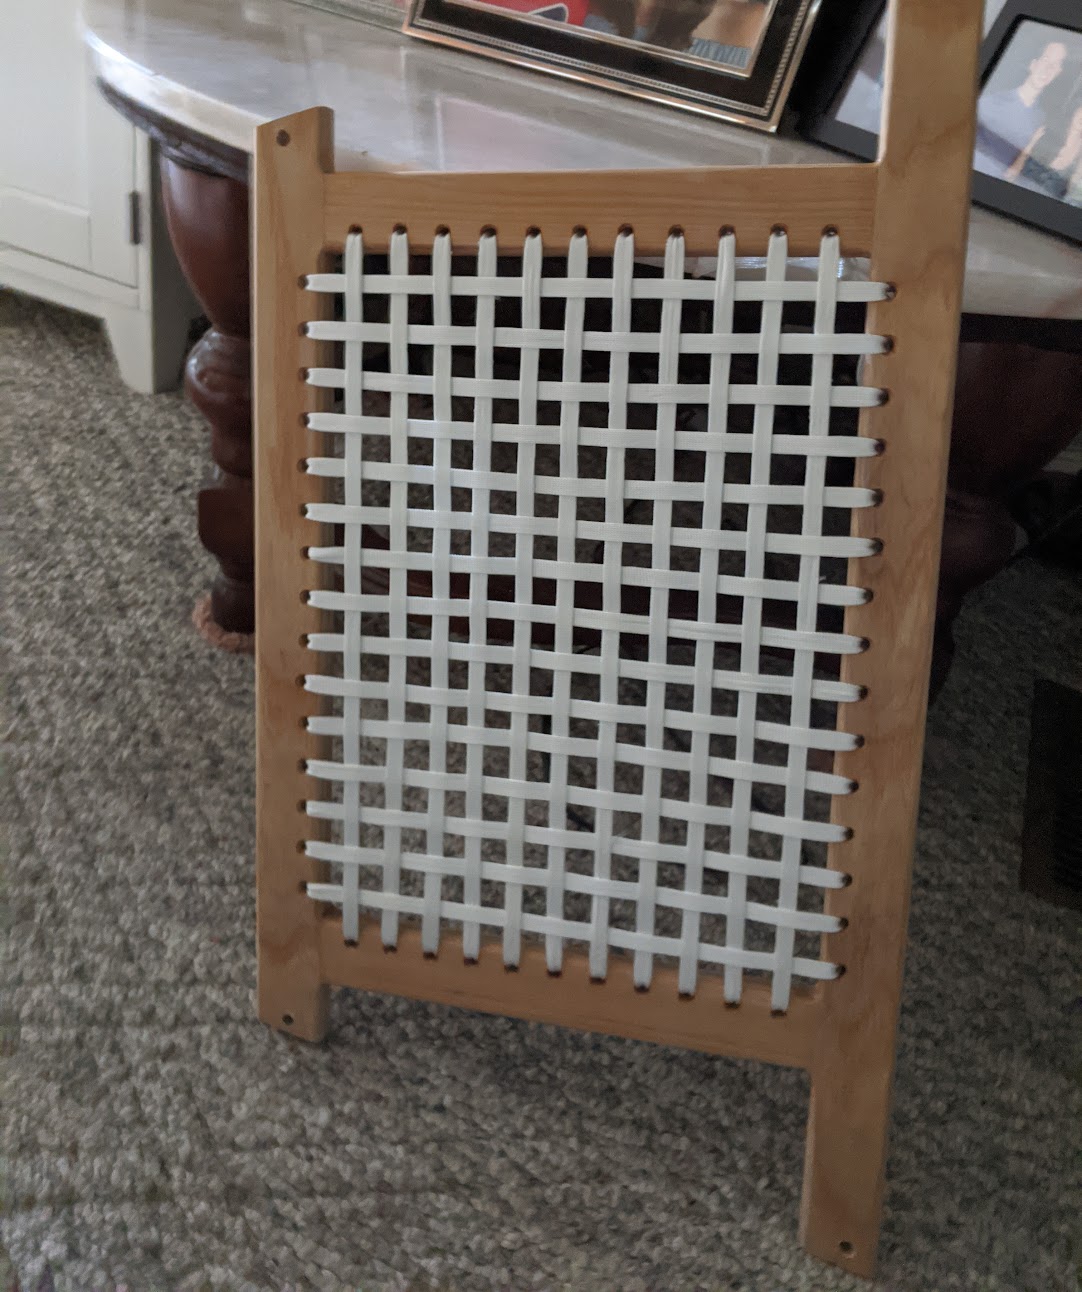
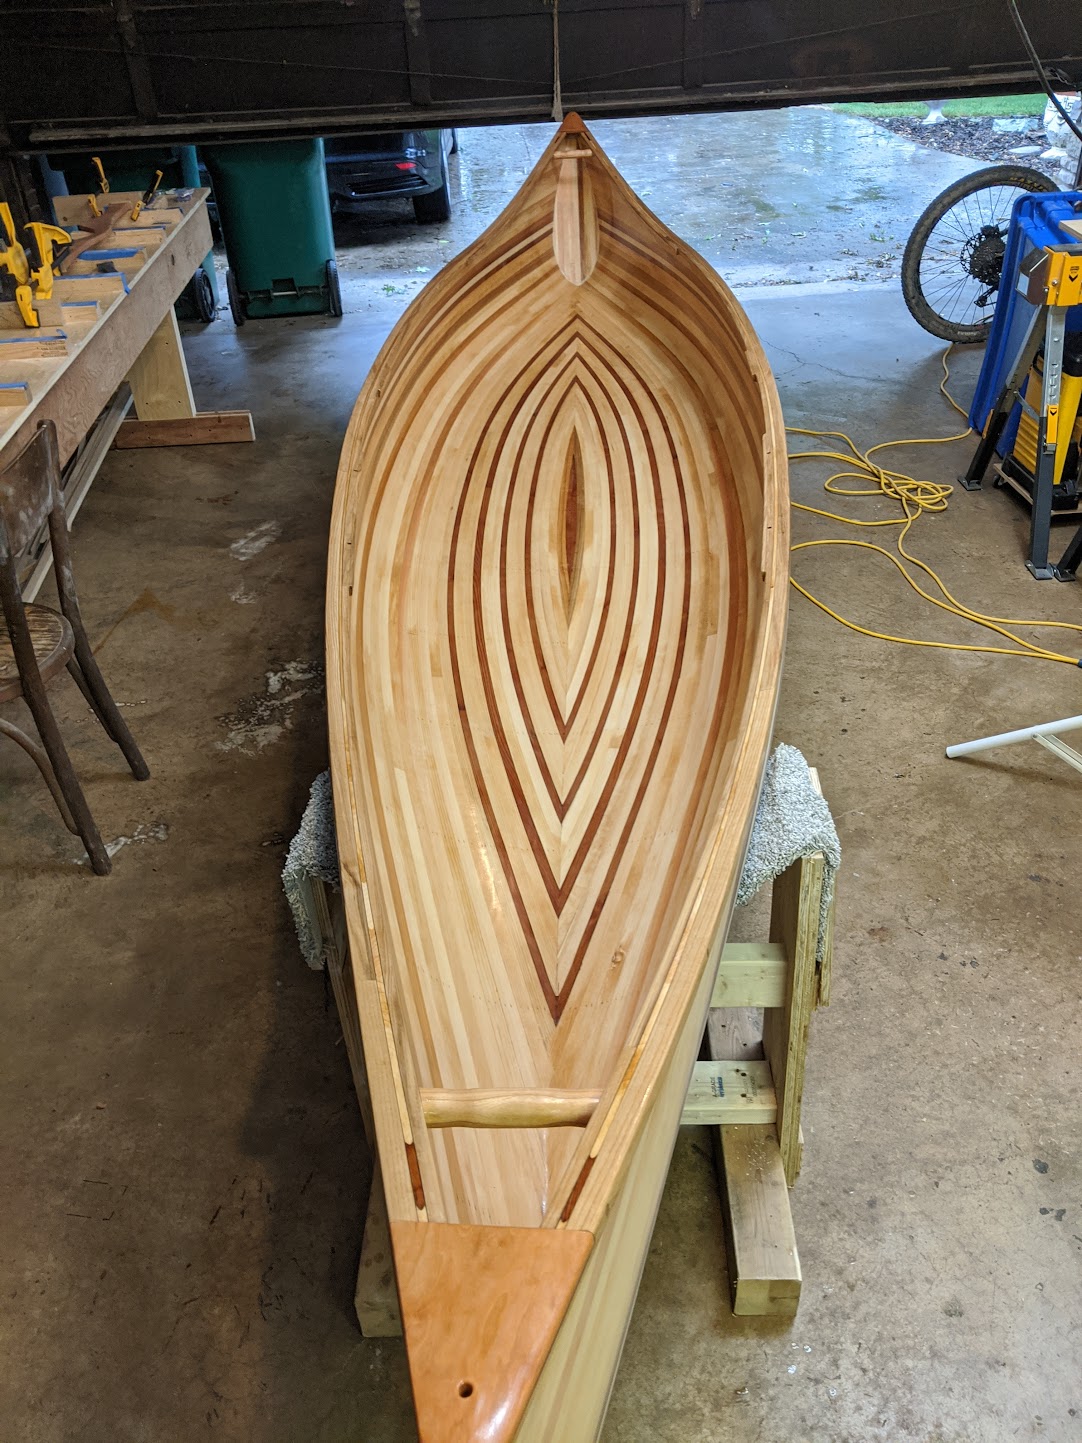
For the seats I made one of ash and one of cherry (not matching, but I had some leftover ash laying around..). They are made with 1.5" x 3/4" pieces joined with hidden dowels and glue then rounded over all the edges. The inside dimensions are 10"x15". The long pieces are hardwood, and I decided to make the shorter 10" pieces out of cedar. Thought it would give some minor weight saving, and neither me nor my wife are heavy. I did some unscientific strength testing with the frames by sitting and some bouncing on them, and they remained sturdy. I predict they'll last plenty long so long as we don't go slamming down onto the seats. I will be webbing them with 1/2" nylon showshoe cord as Jim does. I feel that it gives a traditional look without having to weave cane. Pictured is the rear seat.
Image
Milling ash gunwales.
Image
Inwales will have bevel for water runoff when flipped over which isn't picutred here. Outwales measure something like 11/16" x 11/16", and the inwales are 3/8" x 11/16". The exposed edges will also be rounded over.
Image

After the final sanding.
Image

Following the final sanding I removed it from the strong back, and placed it on cradles. The cradles I built were the same as the ones described in Canoecraft. This was a very rewarding milestone! One HUGE lesson I learned was DO NOT use painters tape ESPECIALLY AT THE STEMS!!! What a nightmare painters tape proved to be at the stems. I used clear packing tape for about half of the stations, but switched to painters tape because I ran out of packing tape. The painters tape got glued to the hull in so many spots whereas the packing tape gave absolutely no fuss. The stuck painters tape required a lot of scraping, and a ton of sanding in the stems where it really got wedged and stuck. Time saving lessons for next time..
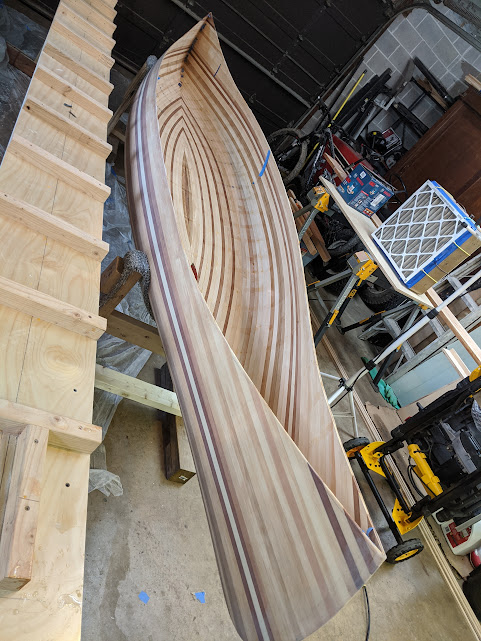
First time off the strongback!
Image
Smoothing the inside went very quickly with a paint scraper ground to a curve.
Image
Another tool I used to aid in smoothing the bilge area was a sanding drum which I place in a drill. Sanding the inside went extremely fast with this tool. Just be careful by throttling the drill speed and not taking too much material! This is the one I use (one could very easily be made, but the foam pad between the drum and the sandpaper helps prevent gouging if it's not held evenly against the hull) https://www.woodcraft.com/products/sand ... -x-3-x-1-2
Image

After fairing and sanding the inside I was on to fiberglassing the inside. I did a HORRIBLE job on one section of the floor of the canoe, and the stems turned out pretty shoddy too. I should have taken my time and slowed down at the stems, and they would be much better. If I cant get the stem areas to look as nice as I want I will just add float chambers to cover it up! I have been on and off about installing them anyways.. I was hoping to get away with 2 epoxy coats on the inside to save a bit of weight, but that ship (or canoe?) has sailed since I'll have to do a thin third coat in order to smooth out the waves in the problem area. I didn't notice how poorly the fiberglass/epoxy job was on the inside until after it had dried, so more sanding in order to bond a third coat. Sanding the inside went quickly especially with a random orbit sander, and that drum sander.

Inside glassed
Image
Sanded, again, waiting for the final coat of epoxy inside.
Image

And that is where currently I stand. We got hit with a cold snap in the Midwest so I am back to waiting for suitable weather to apply the third and final coat of epoxy to the inside.

Thanks for following along!
User avatar
Cruiser
Posts: 867
Joined: Sat Apr 27, 2013 10:21 am
Location: Bowmanville, Ontario

Re: First build; Ranger 15!

Post by Cruiser »

MD .... the inside is easier to apply IMO, but requires more babysitting. The epoxy will flow back to the bottom from the sides until it sets up enough that it stops flowing, which is sometime well past the time it kicks.

If you don't keep squeegeeing, this flow can collect and lift/float the glass cloth near the bottom, I suspect that may be what you are seeing with the waviness .... that is just a guess. The cure is to make sure you keep squeegeeing until the epoxy wants to grab the card, at this point, it is very thick and sticky, so you walk away.

As far as the outside, I do all applications on the outside with a larger, 7" thin foam epoxy roller and that suits my build style (inside is almost all squeegee).

Your boat is looking awesome BTW ... you are the builder, you will sweat the details, but you have a better start than you realize. Also, take your time from here on in, cleaning up epoxy/glass can get frustrating ... the key is good carbide scrapers (I have different shapes) and patience. If you are getting frustrated cleaning up one area, move to something else for awhile, just don't push any one area.


Brian
Maddog
Posts: 30
Joined: Mon Dec 02, 2019 5:17 pm

Re: First build; Ranger 15!

Post by Maddog »

Brian, you're probably right. During the process I thought I was doing a pretty good job keeping the squeeging even, but I definitely didn't continually keep an eye on the bottom like you describe. So far I've been pretty good about not rushing, the mistakes I've made have been more due to inexperience. Overall I'm very happy with how it has been turning out. Thanks for the encouragement!
User avatar
Jim Dodd
Posts: 1359
Joined: Wed Feb 08, 2006 11:08 pm
Location: Iowa

Re: First build; Ranger 15!

Post by Jim Dodd »

Looks like an A+ to me !

Flotation Chambers . I highly recommend them. They aren't that tough ! Besure you seal the inner stem seams. Add a bias strip if needed.

viewtopic.php?f=9&t=4350#p26972

I'll offer note, remember to lace the Snow shoe cord Loose ! The Nylon cord shrinks when varnished. I'm trying to come up with some way to describe how to gage, how loose to lace the cord !

After you lace the seat, make a fist and lightly press down in the middle ? It should stretch about an inch below the frame !

I have done a few, that I thought would be too loose ? They came out very comfortable !

Again Great work !

Jim
Keep your paddle wet and your seat dry!
Maddog
Posts: 30
Joined: Mon Dec 02, 2019 5:17 pm

Re: First build; Ranger 15!

Post by Maddog »

Jim, awesome advice on how loose to weave the seats. I knew not to weave them tight, but that reference to how much stretch and slack definitely gives me some perspective now.

Have you ever added screw out deck plates to the float chambers to have them double as dry storage? I have been contemplating that idea as well.
User avatar
Jim Dodd
Posts: 1359
Joined: Wed Feb 08, 2006 11:08 pm
Location: Iowa

Re: First build; Ranger 15!

Post by Jim Dodd »

I too have contemplated adding a hatch to the chambers !
I'd think it is a good idea !
Just haven't done it.
It would make it easy to inspect the chamber, and keep things dry, such as a phone. You might want a bracket to hold the phone !

Come to think about it ! It would be cool to see people looking at your canoe, and then ring it up with Dueling Bango music ! :laughing
Jim
Keep your paddle wet and your seat dry!
Maddog
Posts: 30
Joined: Mon Dec 02, 2019 5:17 pm

Re: First build; Ranger 15!

Post by Maddog »

Time for an update. I had left off with two coats of epoxy on the inside, and needing a 3rd. I got the 3rd coat applied and sanded once it warmed up.

Following the final coat I had then installed flotation chambers. Being a novice paddler who will often have one or two dogs along in the canoe I thought it would be a good idea to put in some additional buoyancy. I glued together some left over strips, and cut out the shape of the chambers from a template I made of 1/4" plywood. I then ran them through the thickness planer to get them smooth and flat, and fiberglassed the back side. Once in place I fiberglassed the front and secured it to the hull simultaneously. Had some gaps between the wood and the hull so I filled it with thickened epoxy prior to laying up the fiberglass so there wouldn't be any air gaps.
Image
Image

Then I took a break from the build to go on a road trip to Idaho with the dog for some good outdoor time
Image

Once back from the much needed getaway I started working on attaching the gunwales. I did the inwales and outwales at the same time. I made a little alignment block out of scrap wood to ensure the inwales and outwales were even. I did a dry fit of both, then predrilled and ran screws from the outwale into the inwale. The screws helped align the gunwales once wet with epoxy, and aided in clamping. The holes are spaced every 12" and clamped inbetween. I coated the screws in paste wax so they wouldn't get epoxied in place. Once the epoxy cured I backed the screws out, drilled a 1/4" hole, and plugged the screw holes with a cherry dowel. Some of the dowels go through into the inwale for added strength between the gunwales and the hull, the others are only about 1/4" - 1/2" deep just to cover the screw hole.
Image

The prodruding part of the hull got belt sanded down to be even with the top of the gunwales, and the rest of the gunwales got sanded smooth.
Image

Next came the decks, and carry handles. The decks are of the cap style. The carry handles are epoxied to the hull and gunwale. The decks and carry handles are made from cherry. I also drilled a hole from the top of the deck to the corner of the hull. I like the idea of allowing water to drain from that area when flipped over or the option of having another rope attachment point.
Image

The gunwales and decks then got a coat of epoxy. I made the mistake of not putting an epoxy coat on the carry handles, and now regret it as it doesn't match the deck which got a coat of epoxy. The hull got taped where the gunwale meets the hull so that I wouldn't make a mess of the painstakingly sanded hull. After the epoxy cured I hand sanded everything to smooth it out and prepare it for varnish.
Image

As the epoxy coat dried I was able to weave the seats, and shape my yoke. The yoke is carved from cherry. I cut the initial shape out on the band saw, and the rest of the shaping came from an angle grinder with a flap disc. Then it got hand sanded smooth. I carved the neck a bit too thin so I epoxied a bit of fiberglass on the underside of the questionable area for some strength. Then came an epoxy coat. After the epoxy cured I gave it a sanding to smooth it all out, and prepare it for varnish.
Image
Image

Finally, I did a thorough check of the entire boat to ensure smoothness, and gave everything a light hand sanding with 220 to get it ready for varnish. The shop got dusted, and the hull completely cleaned. As I write this I have done 2 coats of varnish on the gunwales, decks, carry handles, and inside hull. I am using system 3 gloss spar urethane. This is where I regret not epoxying the carry handles as that cherry doesn't pop like the deck and yoke; oh well. A third and final coat will be applied tonight.
Image

Next comes the 3rd and final coat of interior varnish, then I will do 4 coats of varnish to the outside, and varnish the seats, seat hanging blocks, and yoke at the same time as the outside of the hull.
User avatar
Patricks Dad
Posts: 1476
Joined: Wed Oct 13, 2004 1:11 pm
Location: Warrenville, Illinois

Re: First build; Ranger 15!

Post by Patricks Dad »

Awesome progress!
Randy Pfeifer
(847) 341-0618
Randy.Pfeifer1@gmail.com
User avatar
Cruiser
Posts: 867
Joined: Sat Apr 27, 2013 10:21 am
Location: Bowmanville, Ontario

Re: First build; Ranger 15!

Post by Cruiser »

NICE ... thank you for posting pics

Brian
Maddog
Posts: 30
Joined: Mon Dec 02, 2019 5:17 pm

Re: First build; Ranger 15!

Post by Maddog »

Thanks everyone for the encouraging words! The least I can do is post pics. Everyone who has posted pictures and written build reports on this community and other forums on the internet have helped me immensely with my own build. My little way of giving back and paying it forward.

Just finished the 3rd coat of varnish to the inside and trim!
Image
User avatar
Jim Dodd
Posts: 1359
Joined: Wed Feb 08, 2006 11:08 pm
Location: Iowa

Re: First build; Ranger 15!

Post by Jim Dodd »

The pic in the Last post, didn't show.

What I've seen so far is Great Maddog ! How did I miss this ?

Nice match of the strips on the centerline ! You know what you are doing !

Hope you never need those flotation chambers ! But if you do ? You will be glad you installed them !

How do you like the seats ?

Jim
Keep your paddle wet and your seat dry!
Post Reply