The day before...

Welcome to the new Bear Mountain Builders Forum - an interactive internet service we provide to encourage communication between canoe and kayak builders
User avatar
Chris
Posts: 105
Joined: Sat Nov 06, 2004 4:32 pm
Location: NorthWest Germany
Contact:

The day before...

Post by Chris »

Hello,
after finishing all the sanding of the outside hull, I spend the whole afternoon cleaning the shop to start the fiberglassing tomorrow. I have two questions before starting, maybe you can give me some advice :thinking

I have to start around noon, because the friend of mine, who will be "the mixer" can`t start earlier. Has anyone an idea how long the time between the coating wirth west system 105/207 special coating hardener would be reakky. The temeprature in the shop will be probably between 17 and 20 degrees. Do I have to work out the third coat late in the night??

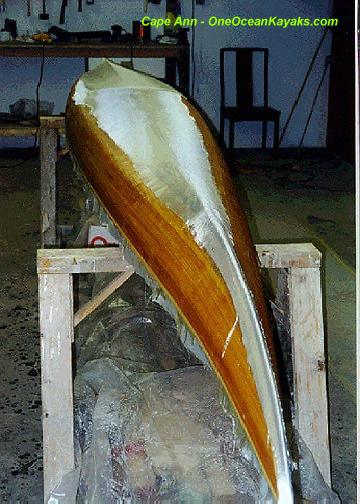
After reading Ted Moores chapter about the fiberglassing several times I think it will work. I´m wondering a little bit how to work with the glas at the stems: I´m not sure where to cut it: Should I make hems on the middleline of the outerstem or should I cut the way that there is no glas on the frontside of the stem (I talking about the area where thebrass stemband will be installed).

Thanks & best regards

Chris
---------------------------------------
www.natur-im-sucher.com
User avatar
mtpocket
Posts: 562
Joined: Wed Sep 08, 2004 2:48 pm
Location: Indiana

Post by mtpocket »

Chris,

I won't be any help to you on the West System products, but I might be able to help on the glass at the stems. In the video I got from Newfound Woodworks, they say to stop the glass just before the curve of the stems. The cloth will not lay down correctly otherwise. Then use a piece of cloth cut on a bias (diagonal) and overlap the cloth on both sides of the stems. This method worked very well for me. Bias cut cloth conforms to curves much better.
Some of the more experienced builders can help you on the West System products and might agree or disagree with my analysis on the bias cut cloth, so wait for their response before you take my word as the gospel.
User avatar
hoz
Posts: 201
Joined: Wed Jun 09, 2004 11:57 pm
Location: Indiana

Post by hoz »

I agree w/mt. It is too hard to try and get the glass to bend around the stems. Simply let i trun long and as the poxy starts to kick cu tit off at the edge of the stems with a razorblade. Then after al lis said and done add a bias strip to the stems.
someday I'll fly, someday I'll soar
User avatar
Erik, Belgium
Posts: 344
Joined: Fri May 14, 2004 5:31 am
Location: Gierle, Belgium
Contact:

Post by Erik, Belgium »

I know a flapover at the outer stems isn't favoured, but I have done it on 2 canoes now and it turned out fine. I keep about 5 cm flapover, and lay it down over each other on both sides of the stem. Idon't care too much about air traps between overlap and the glass cloth.
I return about 2 hours after wetting out the spot, when the epoxy is less soft but still very plyable, and press the glass to a smooth surface with my fingers (use gloves!).
After that I lay a number of bias strips over the stems, overlapping each other.

Maybe not the preferred method but it is effective.

my 0.02 euro
Erik, Belgium
User avatar
Glen Smith
Posts: 3719
Joined: Sat May 08, 2004 9:08 am
Location: Baie-St-Paul, Quebec, Canada

Post by Glen Smith »

With those shop temps it will probably be about six hours from the beginning of the first application to the beginning of the second application. My shop is a little warmer and it needs about 5 hours between coats using West 105/207.

The first coats requires a lot of baby-sitting. You have to check it about every twenty minutes for the first two or three hours. Keep looking for dry areas, lifting cloth along the egdes, floating cloth, bubbles, runs and/or excess epoxy.

After the second coat, if it is quite late, I would get a few hours sleep and do the third coat early in the morning.

As for the stem treatment, since you seem to want to use brass stem bands, I would just let the cloth run a bit past the stems and trim it off after the first coat has set. Adding bias cut strips would be an added protection but not really necessary with brass stem bands IMHO.

Good luck.
User avatar
Chris
Posts: 105
Joined: Sat Nov 06, 2004 4:32 pm
Location: NorthWest Germany
Contact:

Bias strips

Post by Chris »

Thanks to all for the quick response! Only to get you right: If you use bias strips of glas, to you put them ON the cloth after a while or maybe better an the stem, before laying the cloth on, and so install it this way UNDER the glas?

Best regards
Chris
---------------------------------------
www.natur-im-sucher.com
User avatar
Chris
Posts: 105
Joined: Sat Nov 06, 2004 4:32 pm
Location: NorthWest Germany
Contact:

Sanding after the 1th coat

Post by Chris »

An additional question: In Ted Moors book i read that it is maybe a good idea to make a quick hand sanding after the 1th coat. I´m wondering if it`s not dangerous for the cloth to sand it if it`s not totally filled. And. How big is the danger when sanding this very fresh & uncured epoxy? If I need so much time as Glen pointed out, would it be a alternative to spot the fiberglassing after the first coat and make the rest the next day, or would it be better to make the break after the second coat?

Thanks a lot

Chris
---------------------------------------
www.natur-im-sucher.com
User avatar
Glen Smith
Posts: 3719
Joined: Sat May 08, 2004 9:08 am
Location: Baie-St-Paul, Quebec, Canada

Post by Glen Smith »

With West Sytems epoxy I believe that if you wait more than 12 hours to add another coat, you have to sand first to obtain a mechanical bonding. I would not sand the hull before a 12 hour period because the epoxy isn't hard enough and this could cause "gumming" and cloudiness. The only place I woud sand is where you trim the cloth at the stems after it has set for about four hours.

When I use bias cut strips on the stems, I put them on after the hull cloth has its first coat but before the second coat. It is easier to feather in the cloth if the strips are on top. This method takes longer to do however.
User avatar
Chris
Posts: 105
Joined: Sat Nov 06, 2004 4:32 pm
Location: NorthWest Germany
Contact:

Bias Strips

Post by Chris »

I´m sorry, but I have to ask again - after reading a while in the net, I´m unsure about the bias strips - I had haerd of them this day first ....

If I got right, bias strips means, that I have to cut them from the cloth in an angle of 45 degrees, right? I´m not sure how to install them. Do I have to make a pretty large piece of cloth for the whole area of the hull in the stem area or do you mean a really "strip" which is only a few inches wide and lay it directly on the stem before doing the 2th coat? If so, do you use one strip in the whole lengh of the outer stem or it is easier to use a ferw shorter part which have a particular overlay.? I looked around with Google but I only found pictures of the readiliy installed strips - so I´m not sure how to do.

Sorry for the much questions - I´m just a little bit uncertain befor doing the wet out

Regards!

Chris :thinking
---------------------------------------
www.natur-im-sucher.com
User avatar
Glen Smith
Posts: 3719
Joined: Sat May 08, 2004 9:08 am
Location: Baie-St-Paul, Quebec, Canada

Post by Glen Smith »

The picture below shows extra fiberglass added to a kayak hull and stem. The part on the stem is what you want to do. If you are not putting on the brass stem bands, you should use several thicknesses of extra glass on the stems. If you are using the brass stem bands, you can use only one layer of glass on the stems or none at all.

If you want to use just one strip, cut it about 4 to 6 inches wide at a 45 angle. You can use more than one piece and overlap them by one inch. Be careful with these bias cut pieces because they will stretch out of shape very easily.

There are many ways to apply these strips. I will explain one way. After the hull has been glassed and the epoxy has set long enough so that it is no longer sticky you should cut the cloth that sticks out at the ends even with the outer stem. Use 120 grit sandpaper and lightly go over the cut edge to make it smooth then vacuum off the dust. Place a bias cut strip along the stem and fold it over on each side so that it is against the hull and smooth it out so there are no wrinkles or bumps.

I use a brush to apply the epoxy to the strips. Saturate the strips and when they will not take any more epoxy, use the squeegee to remove the excess but be careful not to move the strips.

Let the epoxy harden overnight. Sand the edges of the bias cut strips to feather them into the hull glass so there are no bumps or lumps. Now you are ready to apply the second coat of epoxy to the entire hull. This will add an extra day to the work schedule.
Image
Rod Tait

Here's how I do it

Post by Rod Tait »

Since this is your first time and it seems like you are leaning towards extra cloth over the stems, I would put the full layer of glass with ends overhanging and apply your epoxy. At the temps you have you will probably be able to apply the second in 4-5 hours as Glen stated. I then let everything harden for at least 12 hours or more and then sand the whole hull to get rid of small bumps, runs and sags. It is at this time that I trim the hardened cloth at the ends and sand to blend in with the hull. Cut a few pieces of cloth on the bias, (45 degrees to the weave of the cloth), long enough to cover your stem area. Apply a third coat of epoxy to the whole boat and then place the extra pieces of cloth over the ends and then apply a little more epoxy to this area to wet out the extra pieces. Apply your fourth coat over whole boat in 4-5 hours.

The stem areas will only have two layers of epoxy over them, but you will have ample time during the building process to go back and clean up this area, sand smooth and feather in a few more coats of epoxy to bury the weave.

More tips and info on glassing on my web site.
User avatar
Juneaudave
Posts: 522
Joined: Sat May 08, 2004 12:42 pm
Location: Juneau, Alaska
Contact:

Post by Juneaudave »

Don't fret so much!!!! Make sure your workspace is heated beforehand, mix each batch two minutes, get a helper for the first coat (you won't need him for the second), use the "time tape trick" to make sure you squeege at the appropriate time, trim the cloth at the stems after you get it wetted out to about two inches from the cut. You'll be fine. If you have made it this far, wetting out is worrysome, but also a bunch of fun!!! I predict that you won't have any problems...Juneaudave
User avatar
Chris
Posts: 105
Joined: Sat Nov 06, 2004 4:32 pm
Location: NorthWest Germany
Contact:

You`re unbelievable

Post by Chris »

Wow - that`s really great stuff. I´m very impressed again about your friendly and professional help. It´s really a pleasure to communicate with you all. Tahnks a lot. So, the shop is heated, I´m just waiting for the helping hans of my frein - goin´to start in about one hour. I´ll tell you tomorrow what happend.

Best regards

Chris
---------------------------------------
www.natur-im-sucher.com
User avatar
Chris
Posts: 105
Joined: Sat Nov 06, 2004 4:32 pm
Location: NorthWest Germany
Contact:

Fiberglassing in progress

Post by Chris »

Hallo
I give you a short info about my fiberglassing results: I just have finished the first coat - uff. IAll in all it not worked bad, in der middle of the hull I had problems to squeeze enough resin from the hull. I used the squee very flat as shown in canoecraft, but everytime the tool left a matte looking surface it began to shine later on. So I wirked at these places differnt times, some areas look nice and matte like in the book, some others remain shining. I hope it will not be a problem, the coating looks quite clear, so I hope it should work. After there have been no bubbles for the last 2 hours I´m making a one hour break now.

I made some digi shots after the first coat, see what it looks like:


www.natur-im-sucher.com/canoe/index.html

All the best

Chris


UPDATE:

Now, 4or 5 hours after starting the first coat I saw, that the most areas of the hull "keep on shining".... I use the squeeze much, but I think I had to use a less sharper angle with the tool when I´m wetting out.

There are some tears and some very little bubbles near the top of the coat I do not mentioned an hour ago.

All in all in looks not so bad, but it lookes like the second coat in some areas, not like the first coat. :thinking

My thought was NOT to bring on the second coat now, wait another 2 hours and give the coat a hand sanding to open the small bubbles and then add the new epoxy layer. If you have a better idea, please let me know!

Best wishes

Chris
Last edited by Chris on Tue Feb 01, 2005 1:26 pm, edited 2 times in total.
---------------------------------------
www.natur-im-sucher.com
User avatar
Patricks Dad
Posts: 1476
Joined: Wed Oct 13, 2004 1:11 pm
Location: Warrenville, Illinois

Post by Patricks Dad »

Chris,

It looks great. It must have been quite exciting to see the rich colors come out!

We're looking forward to glassing this weekend. We don't have a temp problem any more (since punching a hole in the heating duct for upstairs) but I do have a question for the experts:

The humidity in the garage is somewhat below 35%. The weather reports predict a rising temp and possible rain this weekend. How high can the humidity go and still be OK to glass (using West 105/207)? Should we wait for colder/drier weather?

Advice/guidance would be much appreciated.
Randy Pfeifer
(847) 341-0618
Randy.Pfeifer1@gmail.com
Post Reply